background image


13


1.

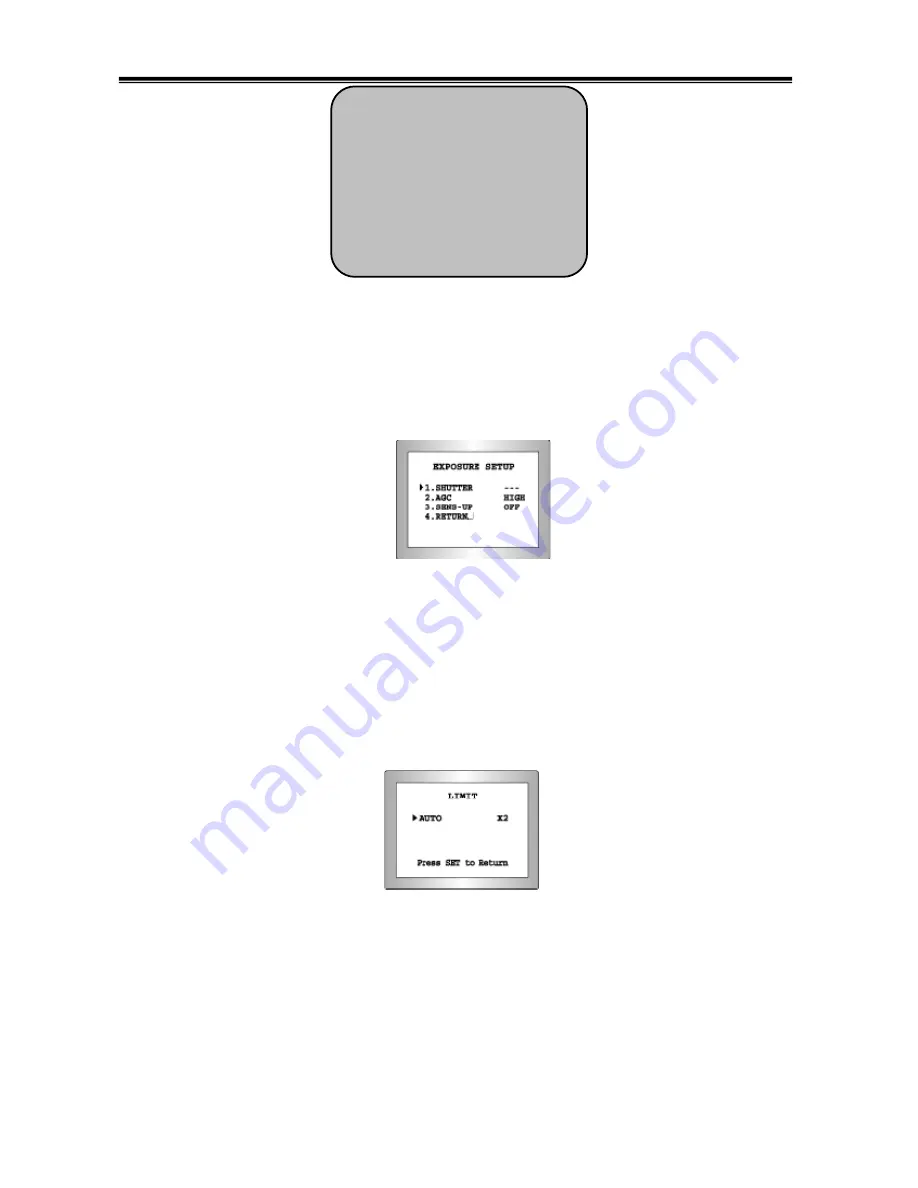
 SHUTTER

: You can select either auto or manual shutter. 

- A.FLK

: Select this when you experience picture flicker, which can happen when there 

is a clash with the frequency of the installed lighting. 

- ESC:

 Auto control of the shutter speed can be achieved. When ESC mode is on, the 

speed is controlled automatically according to the brightness of the screen. 

- MANUAL:

 The shutter speed can be controlled manually. 


2.

  AGC(Auto Gain Control) 

OFF

: Deactivates the AGC function. 

LOW

: Allows automatic gain control from 5.3dB to 32 dB 

HIGH

: Allows automatic gain control from 5.3dB to 37dB 


3.

 SENS-UP


OFF:

 Deactivates the SENS-UP function


AUTO:

 Activates the SENS-UP function


4.

 RETURN 

Select this to save the changes in the EXPOSURE menu and return to the SETUP 

menu


4) WHITE BALANCE     

The screen colour can be adjusted by using the WHITE BALANCE function. 

SETUP 

LENS                          DC 

EXPOSURE                   

WHITE BAL                  ATW 

BACKLIGHT                OFF 
SSNR                          ON 

DAY/NIGHT         COLOUR 

IMAGE ADJ 

SPECIAL                     
EXIT 

Summary of Contents for VSXR-581DV

Page 1: ...580TVL High Resolution Day Night Vandal Proof Dome Camera 사용 설명 서 용 서 MANUAL VSXR 581DV ...

Page 2: ...ules These limits are designed to provide reasonable protection against harmful interference when the equipment is operated in a commercial environment This equipment generates uses and can radiate radio frequency energy and if not installed and used in accordance with the instruction manual may cause harmful interference to radio communications Operation of this equipment in a residential area is...

Page 3: ...ur camera around smoke or unusual heat for a long time fire may be caused Do not install the camera on a surface that cannot support it Unless the surface is suitable it could cause falling or other hazards Do not hold plug with wet hands It could cause an electric shock Do not disassemble the camera It may result in fire electric shock or other hazards Do not use the camera close to a gas or oil ...

Page 4: ...4 Precautions ...

Page 5: ...5 ...

Page 6: ...6 1 Features 7 2 Components Cable Connection 8 3 Names and functions of parts 9 4 Installation Dimension 10 5 Camera Operation 11 6 Troubleshooting 23 7 Specifications 24 Contents ...

Page 7: ...en 1 60 1 120 000 seconds PRIVACY Function The PRIVACY function conceals the areas you do not wish to appear on the screen 3Axis built in Vandal Resistant Dome Housing High Sensitivity The built in high sensitivity SONY COLOUR CCD enables a clear image even in 0 05Lux or as low as 0 0002Lux with SENS UP sDNR Digital Noise Reduction The amount of low illuminance noise has been significantly reduced...

Page 8: ...8 1 Components 2 Cable Connection 2 Components Cable Connection ...

Page 9: ...nu display This button can be used to confirm settings after changing the value of the selected function or current conditions UP DOWN buttons Used for selecting items by moving the cursor up or down on the menu screen LEFT RIGHT buttons Used when changing item values by moving the cursor to the left or right on the menu screen 3 Names and Functions of Parts ...

Page 10: ...10 1 Installation 2 Dimension 4 Installation Dimension ...

Page 11: ...ton is pressed available values and modes are displayed in order Please keep pressing the button until you get to the mode you wish to operate Please select EXIT and then press the SETUP button to finish the setting Note If appears at the mode you wish to operate it means that there is a sub menu which can be selected by pressing the SETUP button If appears at the mode item it means that there is ...

Page 12: ... DC Auto iris lens selection Note The brightness of the screen can be adjusted in DC mode The brightness can be adjusted within the range of 1 70 The optimum level of brightness for the user can be achieved by adjustment If you select the MANUAL mode it can be adjusted in ESC mode 3 EXPOSURE When the SETUP menu is on the screen please position the arrow to point to EXPOSURE by using the UP and DOW...

Page 13: ...hutter speed can be controlled manually 2 AGC Auto Gain Control OFF Deactivates the AGC function LOW Allows automatic gain control from 5 3dB to 32 dB HIGH Allows automatic gain control from 5 3dB to 37dB 3 SENS UP OFF Deactivates the SENS UP function AUTO Activates the SENS UP function 4 RETURN Select this to save the changes in the EXPOSURE menu and return to the SETUP menu 4 WHITE BALANCE The s...

Page 14: ...nged you have to adjust the white balance again MANUAL The manual adjustment mode enables finer adjustment Please select ATW or AWC first Please change to manual adjustment mode and press the SETUP button Please set the appropriate colour temperature and then increase or decrease the red and blue colour values while monitoring the colour changes on the object Note Under the following conditions th...

Page 15: ... picture and to view the area more clearly BLC ON BLC OFF HLC if there is a high light installed in a limited environment such as an apartment parking garage or gas station entrance removing the high light makes it possible to view car license plates efficiently HLC MASKING AREA HLC ON HLC OFF DAY In normal daylight conditions the HLC is not activated NIGHT If a high light that is larger than a ce...

Page 16: ... so that noise is reduced OFF Deactivates SSNR Noise is not reduced Set the SSNR mode to ON and press the SET button Then you can adjust the noise reduction level 7 DAY NIGHT You can display pictures in colour or black and white When the SETUP menu screen is displayed select DAY NIGHT by using the UP and DOWN buttons so that the arrow indicates DAY NIGHT SETUP LENS DC EXPOSURE SHUTTER WHITE BAL AT...

Page 17: ...GE ADJ by using the Up and Down buttons so that the arrow indicates IMAGE ADJ Select a desired mode using the Up and Down buttons FREEZE You can view still or moving pictures V_REV You can flip the picture vertically on the screen H REV You can flip the picture horizontally on the screen D ZOOM You can use a digital zoom of x1 x10 SHARPNESS As you increase this value the picture outline becomes st...

Page 18: ... the mode you wish to operate by pressing the UP or DOWN button 2 CAMERA TITLE If the TITLE is input the camera TITLE appears on the monitor Please position the arrow to point to CAMERA TITLE by using the UP or DOWN button Please select ON by pressing the LEFT or RIGHT button SETUP LENS DC EXPOSURE SHUTTER WHITE BAL ATW BACKLIGHT OFF SSNR ON DAY NIGHT COLOUR IMAGE ADJ SPECIAL EXIT SPECIAL 1 CAMERA...

Page 19: ...e repeat the above to input the ID Note If the wrong name has been input If you press the SETUP button after moving the cursor to CLR all the letters will be erased If you want to correct a letter please move the cursor to the arrow at the bottom left of the screen and press SET Please position the cursor above the letter you wish to correct and then move the cursor onto the letter you wish to cho...

Page 20: ... SETUP button Please select END and then press the SETUP button to complete ID input 3 SYNC In areas where the supply is at 60Hz you can synchronize the output phase of multiple cameras using power synchronization function Line Lock without using a synchronization signal generator INT Internal Synchronization Type L L Power Synchronization Type Line Lock ...

Page 21: ... vertical axis for SEL POS XPOS Determines the coordinate of the horizontal axis for SEL POS Fill SET Fills in a selected MD area The colour of filling is sequentially selected as brown orange blue cyan yellowish green yellow and red RETURN Select this to save the MOTION DET menu settings and return to the SPECIAL menu 5 PRIVACY This mode conceals the areas you do not wish to appear on the screen ...

Page 22: ...s wind Notes The chance of resolution is existed because DIS function uses the digital zoom 7 LANGUAGE You can select the menu language according to your requirements 8 RESET Defaults the camera to the manufacturer programmed settings 9 RETURN Saves the SPECIAL menu and returns to the SETUP menu 10 EXIT Press the SET button in the EXIT menu to save the current settings and return to the special me...

Page 23: ...check if an auto iris lens is being used and adjust the brightness level There is a problem with the camera operation Please check if an appropriate power source to the camera complies with the manufacturer s standard requirement or if the voltage keeps changing The MOTION DETECTION function is not working Please check if MOTION DETECTION mode is turned on Please check if the MD LEVEL is too low P...

Page 24: ...ON LEVEL adjustable SENS UP OFF AUTO selectable x2 x256 MOTION DETECTION ON OFF 8zone S N Y Signal 52dB AGC Off Weight ON SYNC SYSTEM Internal Line Lock WHITE BALANCE ATW AWC Manual Outdoor Indoor 1 800 10 500K DIS OFF ON VIDEO OUTPUT Composite output 75ohm terminated 1 0 Vpp Y C separate output SHUTTER SPEED Auto Manual 1 60 1 120 000 Auto Manual 1 50 1 100 000 PRIVACY MASKING ZONE OFF ON 8 ZONES...

Page 25: ...25 DISTRIBUTED BY ...

Reviews: