Quick Start Guide
Support Windows 2000, XP, Vista, 7 (32-bit/64-bit) OS
Windows Vista/7 Driver Software Installation
Plug in iCamDVR hardware to the computer via USB2.0
port. Insert the auto run CD into the CD/DVD ROM tray to
automatically install the driver software and the following
windows will appear:
Select and click on “
Install or run program
” to continue
installation.
Note: If the CD is inserted and the auto run does not
execute please go into the CD directory into a folder called
”DVR” and simply click on “SETUP.EXE” and the installation
process will begin.
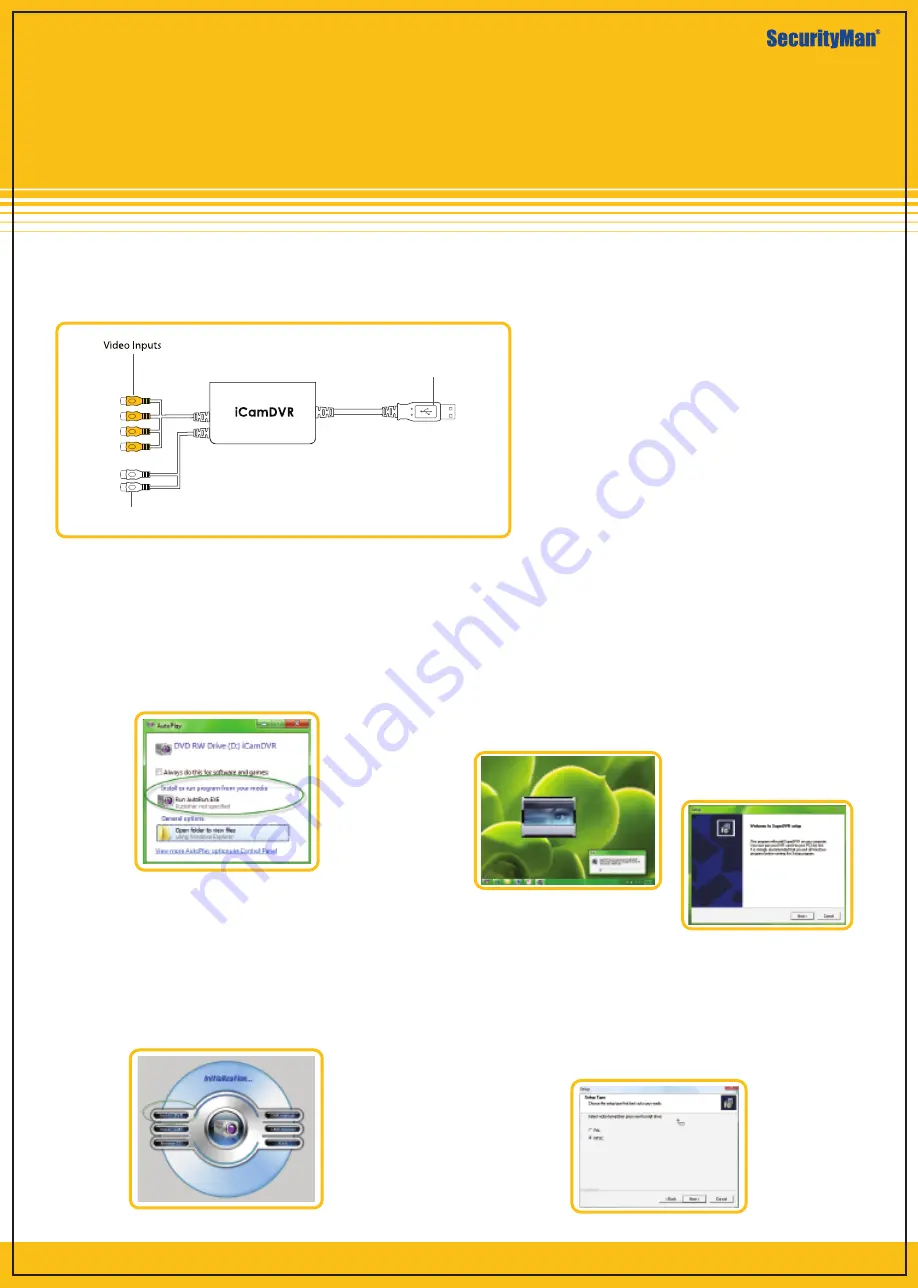
USB Connection
to Computer
Audio Inputs
Figure 4 - Installation Selection
Figure 2 - iCamDVR
Figure 5- Automatic
Next click on “
Install DVR
” and the installation process
start with User Account Control windows, please select
“
Cancel
” to quite installation or select “
SuperDVR.EXE
Unkown Publisher
" (windows 7) or select “
Allow I trust
this program. I know where it’s from or I’ve used it
before
” to continue installation as illustrated below.
Click”
Next
” to proceed.
Setup Type windows Select to setup”
NTSC or PAL
”
video standard, for U.S customers and other NTSC
countries select NTSC and the click”
Next
” to continue
setup. All other than NTSC countries select PAL and then
click “
Next
” to continue setup.
Figure 3 - iCamDRV Installation
Figure 6 -Welcome Page
iCamDVR1W
1 wireless camera system for video recording and
remote monitoring from PC
Figure 7 - Select Video Format


