56
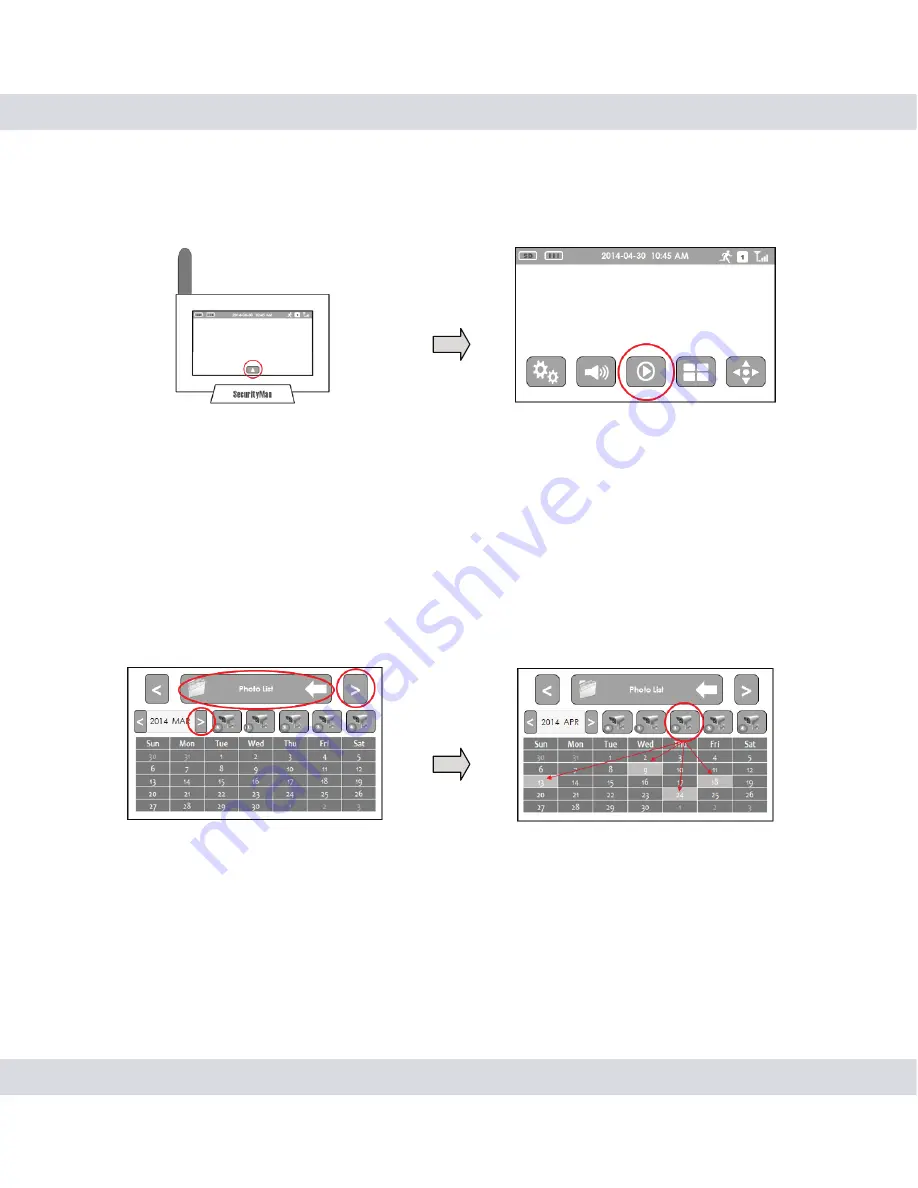
1. Tap the Menu icon on the receiver and then tap on the Playback icon.
2. Change the playback mode from “Video” to “
Photo
” by tapping on
the “<” & “>” icons located to the right and left of the main banner. Set
the
month
that you want to view recorded events on by tapping on the
“<” & “>” located to the side of the date banner and tap on any of the 5
camera
icons. The days that contain events will be highlighted.
NOTE:
You can choose to display each cameras event individually by
tapping on a specific camera or you can view all events at once by tap-
ping on the camera icon that contains the letter “A”.
3. Tap on any of the highlighted dates to view all recorded
events
for
that day. The event list screen will display each event in ascending order
and also provides you with the option to delete any event by pressing
the “X. The file naming convention for each event is as follows: An event
labeled “
A081356-4
.jpg” would mean that the event was created at
08:13:56 am; on camera #4 (.jpg is the file format).
Playing Back Photos (Snapshots)


