background image

15

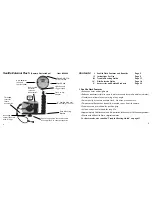
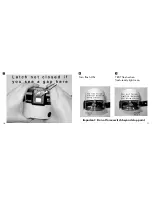
Inserting a Moisture Muncher

desiccant packet helps

extend the life of batteries 

and electronics.

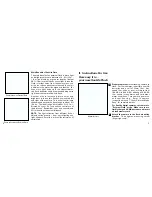
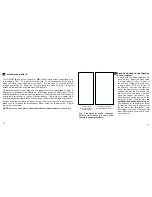
A removable flash deflector

covers the built-in flash

15

The 

built-in

flash of the camera

is covered by a

removable flash deflector.  Keep the deflector in
place to  prevent unwanted backscatter of light from
small particles floating in front of the camera lens.
In very clear water, the flash cover may be removed
by pulling it out of the bottom bracket.  This will
intensify the light and avoid shadows.

16

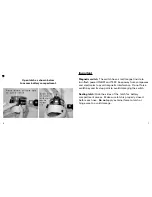
After use, flash and camera (the closed camera
housing), must be 

soaked in fresh water

immediately. 

Never use detergents or cleaners to

clean the flash.

Let the water drain out of the flash

arm (which has small drainage holes) and let it dry
thoroughly before storage.  Flash arm links can be
separated to remove excess water (see page 14).  It
is best to hang it up in a well-ventilated place,
similar to drying your wet suit. For long-term
storage, remove the batteries.  Extend the life of
batteries and electronics by inserting a small 
1.5-gram Moisture Muncher desiccant capsule (item 
# SL911) in the battery compartment of the flash
head (same as used in camera).

Tip:  Also use Moisture Muncher (1-oz/28g bag)
when storing your spare batteries in a closed
container.  (see page 23)

The flexible arm

consists of eight 1-inch (2.5 cm) links covered by a foam

rubber sleeve.  You can bend the flexible arm in any direction, but do not force
it beyond the point of resistance (or the links will separate).  If you want to take
the arm off or apart, you can bend it beyond the point of resistance, until the
links separate.  The links can easily be re-connected by pushing them together
until they snap in.  In the same way, you can connect the optional 3” (8cm)
FLASH EXTENSION ARM (item #SL965) available from your local dive shop.

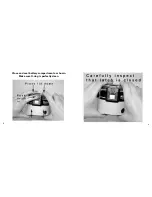
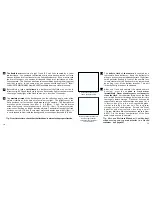
Before diving, take a 

test picture

in a darker area (the flash may not fire in

direct sunlight). Check that both the green flash-ready light of the camera and
the orange-ready light of the flash comes on in less than 15 seconds.

7

The 

maximum reach

of the flash depends on the reflection, angle, color of the

object, visibility, and the amount of ambient sunlight.  The brightness of the
flash has been set for the shooting distance of the camera.  The best pictures
are taken with a close-up lens from 2 - 4 ft (60cm - 1.2m).  Good pictures
without a close-up lens are taken from 4 - 6 ft (1.2 - 1.8m).  The most common
error is over-flashing on bright, close-by objects.  The optimal reach of the flash
has been set to 6 ft (1.8m) in very clear water and depths below 40 ft (12m).  It
is not intended to illuminate the background, or seascapes, beyond 8 ft (2.4m).

Tip:  From time to time, check that the flash head is aimed in the proper direction.

14

12

13

14

Summary of Contents for ReefMaster

Page 1: ...Fits all SeaLife Film and Digital Camera Models EXTERNAL FLASH 200 feet 60 meters ...

Page 2: ...era Foam covered arm allows for positive grip All non corrosive materials for long life Approximately 100 flashes with 4 AA batteries Alkaline or Ni MH rechargeables Works with all SeaLife film or digital cameras For best results also read the Trouble Shooting Guide on page 17 2 Sealife External Flash Camera Not Included Item SL960 4 AA batteries required not included Flash ON OFF TEST switch Thre...

Page 3: ...istance Remember your eye sees objects 33 closer than the actual distance NOTE The light reflection from different fish or objects varies greatly from not reflecting any light like dark coral to a mirror like reflection of certain fish Photo taken without External Flash Photo taken with External Flash II Instructions For Use How easy it is your new SeaLife Flash 1 Prepare camera before attaching c...

Page 4: ...N OFF and TEST Keep away from compasses and electronics to avoid magnetic interference Do not force switch beyond its stop point to avoid damaging the switch Sealing latch Grab the sides of the latch for battery compartment access Make sure latch is properly closed before each use Do not apply external force to latch or hinge area to avoid damage ...

Page 5: ...8 Close and seal battery compartment as shown Make sure O ring is perfectly clean 9 ...

Page 6: ...10 7 Turn flash ON TEST flash when flash ready light is on Important Do not force switch beyond stop point 11 8 9 ...

Page 7: ... or above camera flash 11 Test and prepare flash 3 Turn ON OFF switch on top of flash to ON When orange flash ready light is on turn switch to TEST This will test fire the flash Count the seconds from firing to when the flash ready light comes on again If more than 15 seconds passes replace the batteries Keep the O rings absolutely clean and dry Regular Alkaline 4 AA batteries will yield about 100...

Page 8: ...page 23 The flexible arm consists of eight 1 inch 2 5 cm links covered by a foam rubber sleeve You can bend the flexible arm in any direction but do not force it beyond the point of resistance or the links will separate If you want to take the arm off or apart you can bend it beyond the point of resistance until the links separate The links can easily be re connected by pushing them together until...

Page 9: ...ose up Lens Attaching two external flash units is easy and pictures will be even more colorful 17 III Trouble Shooting Guide 1 Flash does not fire when switch is turned from ON to TEST a Wait until the orange flash ready light is on If it does not turn on check that batteries are inserted correctly b Test or replace batteries c If a and b above do not correct the problem send to SeaLife Service Ce...

Page 10: ...ect very little light d4 19 d The further the flash head is away from the camera lens the bigger will be the shadows The closer it is the more backscatter you may have from small particles in the water If you have absolutely clean water without plankton or sand you should move the flash head closer to the camera lens If you want to eliminate shadows you may remove the flash deflector or even use a...

Page 11: ...th the flash mounting base using the 1 mounting knob SL96022 Weight also attaches directly under ReefMaster camera using the 3 4 mounting knob SL96025 20 CLOSE UP LENS U W FILTER For incredible underwater shots at a comfortable range of 2 4 ft snap on the MACRO 3X Close Up Lens This color corrected lens is designed for magazine quality pictures in diving and snorkeling adventures Fits ALL SeaLife ...

Page 12: ...olds sideways when not in use Adjustable from 8 to 16 inches Neoprene Lens covers Fits all ReefMaster Cameras Item SL959 23 Don t Forget Me Anti Fog Silica Gel Make sure you bring along plenty of Moisture Muncher Moisture Muncher will prevent fogging of the lens and protect the electronics from humidity The small 1 5 gram capsules fit inside the flash battery compartment see page 15 Moisture Munch...

Page 13: ... from the purchase date in the case of a manufacturing defect if the complete defective product is sent freight prepaid at the sender s risk with prepayment for handling and shipping of U S 10 00 to Pioneer Research 97 Foster Road Suite 5 Moorestown NJ 08057 or to the importer in a different country The shipment must include an original purchase receipt or proof of purchase with the purchase date ...

Reviews: