6.3.
CONNECTING THE WELDING CURRENT RETURN CABLE
6.3.1.
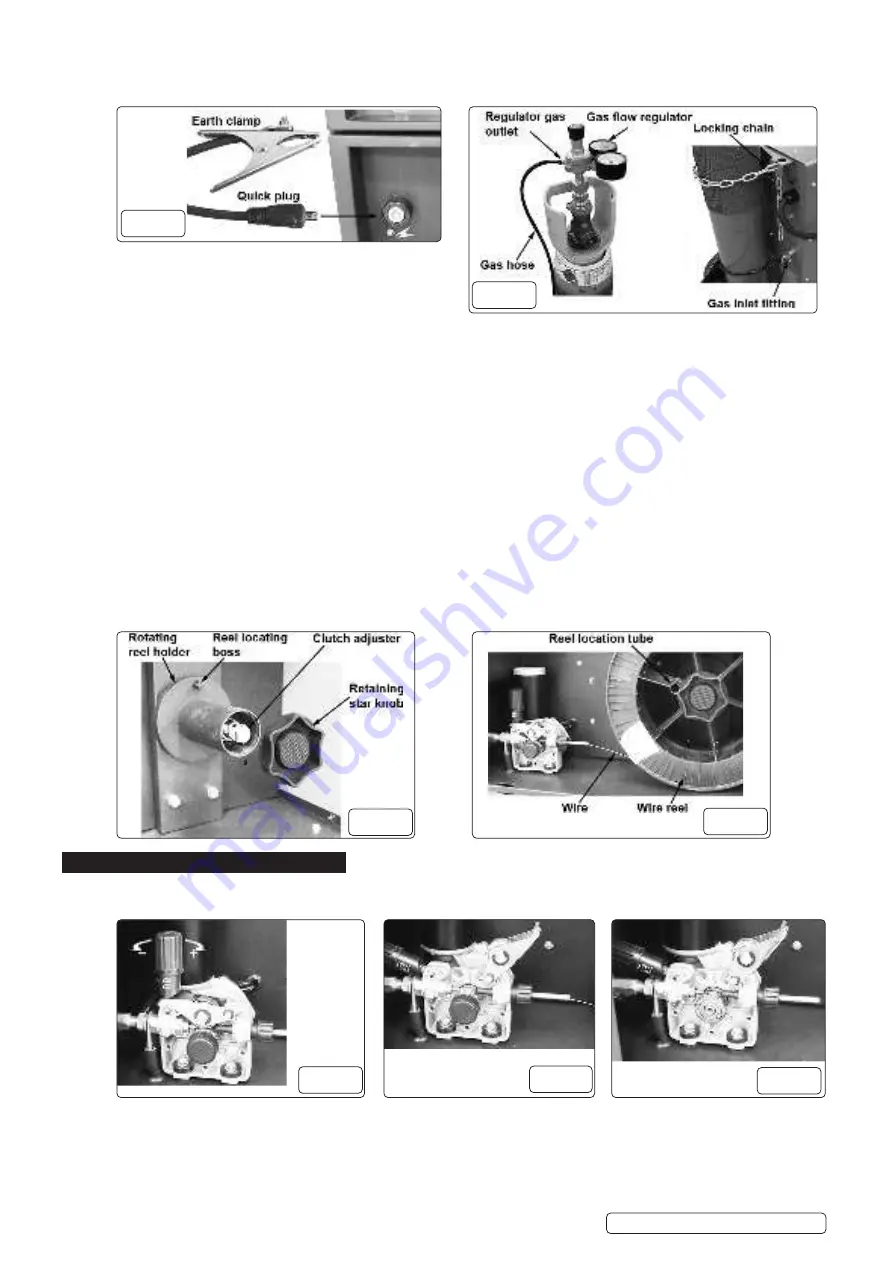
Firmly attach the earthing clamp
(fig.4)
to the workpiece, or to a metal support structure, as close as possible to the joint being made.
6.3.2.
Insert the quick connector
(fig.4)
into the earth clamp socket located on the lower front panel.
6.4.
MOUNT THE GAS CYLINDER
6.4.1.
Stand the gas cylinder on the platform at the rear of the welding set and secure with locking chain (fig.5).
WARNING!
The platform is designed to support bottles up to a maximum weight of 20kg.
6.5.
FITTING THE FLOW REGULATOR
6.5.1.
If using CO2 gas, screw the flow regulator directly into the cylinder, and tighten with correct size spanner (fig.5).
6.5.2.
If using argon or argon mixture gas, the supplied “bull nose adaptor” should be fitted to the cylinder and be tighten with correct size
spanner, then screw the flow regulator into the “bull nose adaptor”, and tighten with correct size spanner (fig.5).
6.5.3.
Remove the flow regulator and store in a dry childproof location if the welding set is to be stored for any length of time.
NOTE:
The supplied flow regulator may differ from that illustrated.
6.6.
ATTACH THE GAS HOSE
6.6.1.
Push the free end of the gas hose fully onto the flow regulator gas outlet connection (fig.5).
6.6.2.
Screw the brass fitting onto the gas inlet fitting on the rear of the welding set and tighten with correct size spanner (fig.5).
6.7.
FITTING A REEL OF WIRE
WARNING!
Ensure the welding set is unplugged from the mains power.
NOTE:
The wire feed reel holder will accept reels of up to 15kg.
6.7.1.
Open the wire feed compartment and unscrew and remove the retaining star knob (fig.6) and place to one side.
6.7.2.
Slide the wire reel onto the reel holder (fig.6) and locate the reel location tube on the wire reel with the reel location boss (fig.7) on the
reel holder.
6.7.3.
Reattach the retaining star knob and fully tighten (fig.7).
6.7.4.
Ensure that the wire is spooling off from the bottom of the wire reel in the direction of the wire drive unit (fig.7).
7. FEED WIRE THROUGH TORCH
WARNING!
Ensure that the wire feed roller, the wire guide hose and the contact tip of the torch correspond to the diameter and
type of wire to be used and are fitted correctly.
7.1.
To access the drive mechanism pull the pressure adjustment knob to the left and allow it to rotate downwards (fig.8). The pressure
roller housing will then spring open, rotating to the right (fig.9).
7.1.1.
Ensure that the required feed groove (Ø0.8mm and Ø1.0mm wire) is in line with the wire path. See section 7.4 on how to reverse or
change the roller.
7.1.2.
Release the wire from the reel and trim off any bent portion and remove any burrs.
Supermig275.V2 Issue 1 10/01/22
Original Language Version
© Jack Sealey Limited
fig.4
fig.5
fig.6
fig.7
fig.8
fig.9
fig.10


