


PROGRAMMING THE TORQUE AND ANGLE.
The wrench has the ability to hold 5 torque and
angle settings in its memory
4.8
Target Torque Setting
4.8.1 Press button to turn the wrench on.
4.8.2 Press and hold the button for 5
seconds (more if required) to select the
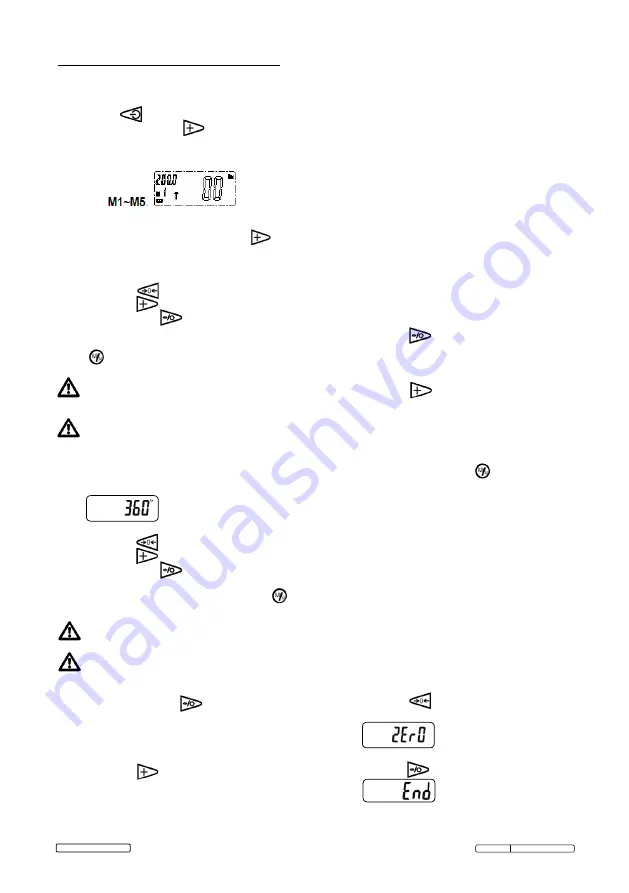
memory storage number between
M1 - M5
4.8.3 Once the memory number is chosen, access
the Target Torque by pressing the
button.
4.8.4 ‘ SET’ is shown on the screen.
4.8.5 The last saved torque will be shown.
4.8.6 Press the button to ZERO the figures.
4.8.7 Press the button to change each digit in
turn, press the button to move between
digits.
4.8.8 To confirm the torque figure is set, press the
button. Setting the angle will proceed.
If no buttons are pressed within 6 seconds
the display will continue to the angle
setting.
‘Erro’ will be shown on the screen if the
torque set does not fall between 10% and
100% of the range of the wrench.
4.9
Target Angle Setting.
4.9.1 When the torque setting has been confirmed
the wrench will go to angle setting.
4.9.2 The last saved angle will be shown.
4.9.3 Press the button to ZERO the figures.
4.9.4 Press the button to change each digit in
turn, press the button to move between
digits.
4.9.5 When the angle figure is set, press the
button to confirm.
If no buttons are pressed within 6 seconds
the display will return to the main screen.
‘Erro’ will be shown on the screen if the
angle set does not fall between 1° and
360°.
4.10 Display Back-light.
4.10.1 Press and hold the button for 5
seconds.
4.11 Torque Measurement.
4.11.1 Select the correct size socket and snap it onto
the wrench.
4.11.2 Press the button to scroll through the
pre-set torque figures (M1-M5).
4.11.3 Place the wrench onto a nut/bolt and begin to
tighten, use a smooth motion and avoid jerky
movements.
4.12 LED/Buzzer/Vibration Indicators-Torque.
4.12.1 When under 50% of the set torque, the LED
will flash GREEN.
4.12.2 After 50% of the torque figure has passed
the LED will change to a solid YELLOW.
4.12.3 When +/-5Nm from the set torque the buzzer
will sound.
4.12.4 The LED will change to RED when you are
within 2% of the set torque and handle
vibration will be felt.
4.12.5 When the set torque is reached the buzzer
will become quicker.
4.12.6 If you go over the set torque the wrench will
emit a continuous tone and the LED will turn
back to GREEN and handle vibration will be
felt.
4.13 Angle Measurement.
4.13.1 Press the button to switch to angle
measurement.
4.13.2 Select the correct size socket and snap it
onto the wrench.
4.13.3 Press the button to scroll through the
pre-set angle figures (M1-M5).
4.13.4 Place the wrench onto a nut/bolt and begin
to tighten, use a smooth motion and avoid
jerky movements.
4.13.5 To change the direction from clockwise to
anti-clockwise press the button. A minus
symbol will appear on the display.
4.14 LED/Buzzer/Vibration indicators - Angle.
4.14.1 When under 50% of the set angle, the LED
will flash GREEN.
4.14.2 After 50% of the angle figure has passed
the LED will change to a solid YELLOW.
4.14.3 The LED will change to RED when you are
within 2% of the set angle.
4.14.4 When the set angle is reached the buzzer
will emit a continuous tone and handle
vibration will be felt.
4.14.5 If you go over the set angle by 2% the LED
will turn back to GREEN and handle
vibration will be felt.
4.14.6 Press the button to ZERO the angle
for another reading. The below will display.
4.14.7 When all angle measurements are done,
press the button, the display will show
and switch to torque measurement mode.
Original Language Version
STW306B Issue:2(I) - 20/06/17
© Jack Sealey Limited


