


XFp Extracellular Flux Analyzer User Manual
_____________________________________________________________________________________________________________________
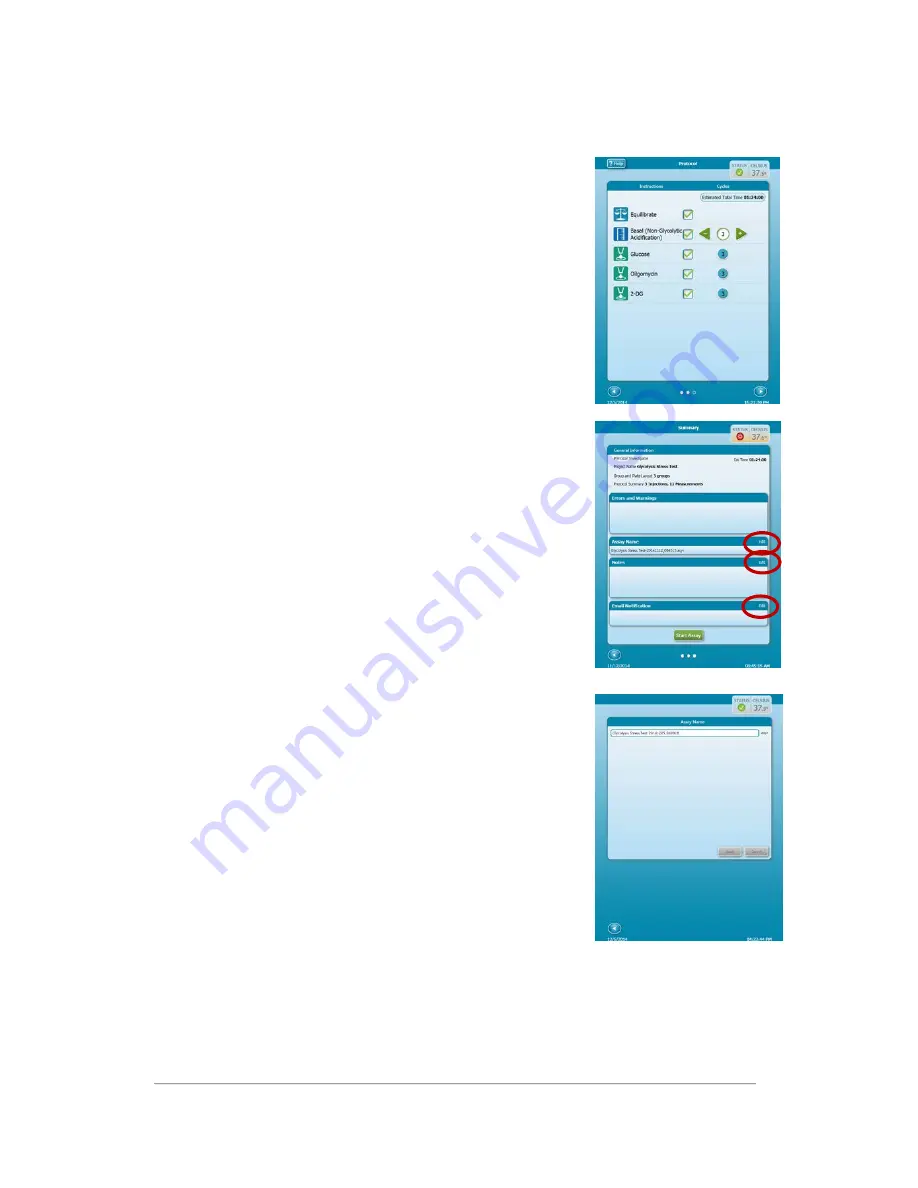
3.
Review/Edit Instrument Protocol
Check that all desired steps are selected (check boxes checked).
Seahorse Bioscience strongly recommends performing
equilibration for all cell-based XF assays. If needed, increase or
decrease the number of measurements that will be performed
during the assay on the Instrument Protocol page by touching
the circled number corresponding to the step to be modified,
then adjusting the number of cycles up or down. (Refer to
Define the Instrument Protocol
section of the Wave User Guide
for XFp Analyzer for more information about measurement
cycles).
4.
Review Summary and Start Assay
a.
Review the General Information, and Errors and Warnings
sections to verify that the settings are as desired.
b.
Before beginning an assay, the following optional steps may
be taken:
i.
Click
Edit
next to
Assay Name
to customize the
name of the Assay Result file.
ii.
Click
Edit
next to
Notes
to add any notes related to
the assay or protocol being performed.
iii.
Click
Edit
next to
Email Notification
to add email
addresses for recipients to be notified when the
assay is complete.
c.
Click
Start Assay
then follow the on-screen instructions.
NOTE:
The XFp Analyzer will save assay results to a USB flash drive, if available. Seahorse
Bioscience recommends inserting a USB flash drive into the instrument at the time of assay
setup so that results will automatically be saved.
10


