YAK 54.
Instruction Manual.
12
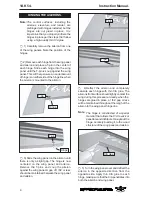
Repeat the procedure for the other
wing.
!
2) Thread the screw (insert the aluminium
washer) into the hole from the top of surface.
Wipe away any excess epoxy on the wing and
screw with rubbing alcohol and a paper towel.
Screw the M3 nut (insert the aluminium
washer) in place as shown. Alllow the epoxy
to fully cure.
Aluminium washer.
M3 nut.
M3 lock nut.
Wing bottom.
M3 control horn.
Wing bottom.
Aileron control horn.
Right side.
Elevator control horn.
ELEVATOR CONTROL HORN INSTALLATION.
!
1) Elevator control horn:
Mix a small amount of 30 minute epoxy and
lightly coat the inside of the hole in the elevator
and the 3x40mm control horn screw.
!
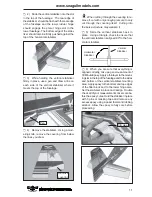
2) Thread the screw (insert the aluminium
washer) into the hole from the top of surface.
Wipe away any excess epoxy on the fin and
screw with rubbing alcohol and a paper towel.
Screw the M3 nut (insert the aluminium
washer) in place as shown. Alllow the epoxy
to fully cure.
Repeat the procedure for orther
elevator.
Horizontal fin.
Elevator
.
75mm.
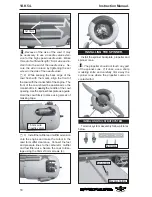
ELEVATOR PUSHROD INSTALLATION.
C/A glue.
Elevator pushrods assembly follow pictures
below.
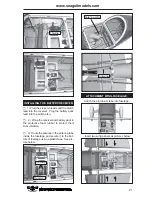
AILERON CONTROL HORN INSTALLATION
2 sets.
3x45mm.
!
1) Aileron control horn:
Mix a small amount of 30 minute epoxy and
lightly coat the inside of the hole in the aileron
and the control horn screw.
Wing.
Aileron.


