


www.seagullmodels.com
11
!
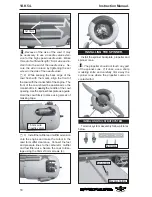
2) Slide the vertical stabilizer into the slot
in the top of the fuselage. The rear edge of
the stabilizer should be flush with the rear edge
of the fuselage and the lower rudder hinge
should engage the precut hinge slot in the
lower fuselage. The bottom edge of the stabi-
lizer should also be firmly pushed against the
top of the horizontal stabilizer.
!
3)
While holding the vertical stabilizer
firmly in place, use a pen and draw a line on
each side of the vertical stabilizer where it
meets the top of the fuselage.
Pen.
!
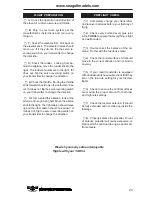
6) When you are sure that everything is
aligned correctly, mix up a generous amount of
30 Minute Epoxy. Apply a thin layer to the mount-
ing slot in the top of the fuselage and to the sides
and bottom of the vertical stabilizer mounting
area. Apply epoxy to the bottom and top edges
!
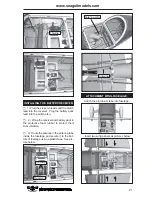
4)
Remove the stabilizer. Using a mod-
eling knife, remove the covering from below
the lines you drew.
When cutting through the covering to re-
move it, cut with only enough pressure to only
cut through the covering itself. Cutting into
the balsa structure may weaken it.
!
5) Slide the vertical stabilizer back in
place. Using a triangle, check to ensure that
the vertical stabilizer is aligned 90º to the hori-
zontal stabilizer.
90º
Vertical
Stabilizer.
Horizontal
Stabilizer.
Remove
covering.
of the filler block and to the lower hinge also.
Set the stabilizer in place and realign. Double
check all of your measurements once more be-
fore the epoxy cures. Hold the stabilizer in place
with T-pins or masking tape and remove any
excess epoxy using a paper towel and rubbing
alcohol. Allow the epoxy to fully cure before
proceeding.
C/A glue.


