Jumper 25
Instruction Man u al
4
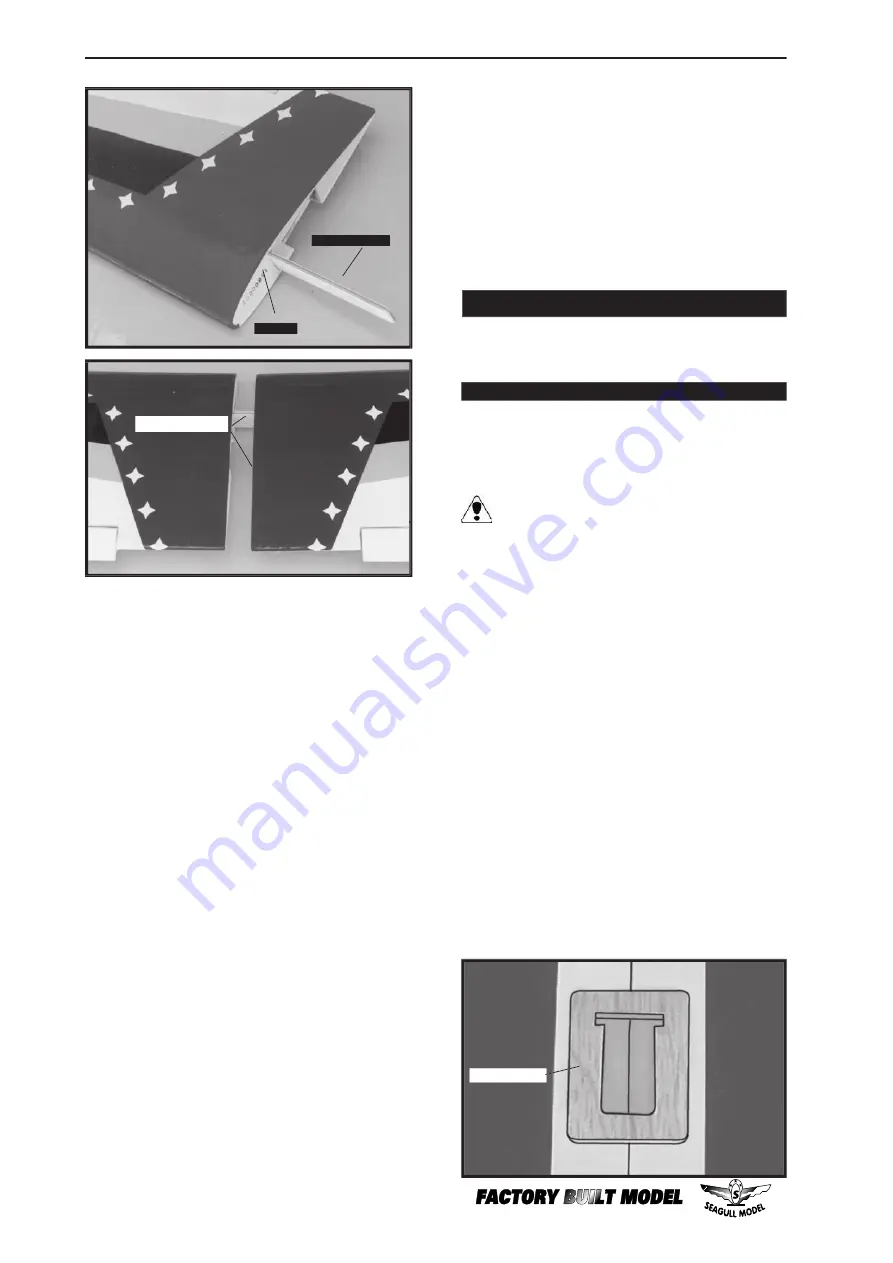
5.
Once the epoxy has cured, trial fi t
both wing halves together. The cen tre
ribs should fi t together fl ush with no
gaps. If gaps do exist, use 220 grit
sandpaper and sand down the high
spots on the root ribs and the wing
joiner until a proper fi t is achieved. The
correct amount of dihedral is ready-
built into the wings. With one wing half
laid fl at on the table, the other wing
tip should be ap prox i mate ly 8cm off
the table surface. If this needs to be
adjusted, you may do so by sanding
small amounts from the cen tre ribs
or dihedral brace.
6.
Carefully apply masking tape around
the top and bottom edge of the root
rib of each wing half to protect them
from damage caused by epoxy.
7.
Mix a generous amount of 30 minute
epoxy. Coat the exposed half of the
dihedral brace, and the remaining
wing joiner box and both root ribs
with epoxy. Slide the two wing halves
to geth er and carefully align them at
the leading and trailing edges. Wipe
away any excess epoxy using paper
tow els. Use mask ing tape wrapped
around the centre section to hold
the halves in place until the epoxy
cures.
PARTS REQUIRED
SERVO INSTALLATION
INSTALLING THE AILERON SERVO MOUNT
{1} Plywood Aileron Servo Mount
1) Install the rubber grommets and brass
collets onto the aileron servo. Test fi t the ser vo
into the ai le ron servo mount.
Because the size of servos differ, you
may need to adjust the size of the precut
opening in the mount. The notch in the
sides of the mount allow the servo lead to
pass through.
2) Remove the aileron servo. Place the
mount onto the wing, aligning the cutout in the
mount with the cutout in the wing. The two
notches in the mount should face the leading
edge of the wing.
3)
While holding the servo mount fi rmly
in place, trace around it using a pen.
4) Remove the mount, and using a
mod el ing knife, carefully remove the covering
from inside the outline you drew.
5) Using Kwik Bond 5 Minute Epoxy,
glue the servo mount into place. Remove
any ex cess epoxy using a paper towel and
rubbing alcohol. Use pieces of masking tape
to hold the tray in place until the ep oxy fully
cures.
8.
When the epoxy has cured, care ful ly
remove the masking tape from the
wing.
9.
Peel off the backing from the self ad-
he sive covering strip. Apply the strip to
the centre section of the wing starting
from the bottom trailing edge. Wrap
the strip all the way around the wing
until it meets the trailing edge again.
Trim off any excess strip.


