GB-9
INSTALLING THE UNIT:
1. Place your unit on a flat surface or mount it in a secure rack mount case.
2. Be sure the player is mounted in a well-ventilated area where it will not be exposed to direct
sunlight, high temperatures, or high humidity
3. Try to place the unit as far as possible from TVs and tuners, as the unit may cause undesirable
interference
CAUTION
The player will work normally when the main unit is mounted with the front panel at within 15° of the
vertical plane. If the unit is tilted excessively, discs may not be loaded or unloaded properly.
The control panel's LCDs are designed to be clearly visible within the angles shown in Figure 2. Mount
the control unit so that the visual angle is within this range.
Figure 1
Figure 2
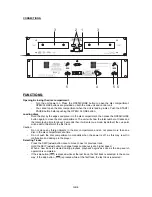
Connections:
1. Turn off unit using the POWER switch
2. Connect the RCA cable to the input on your mixing console
3. Connect the control cords to the “CONNECT TO REMOTE CONTROL” connector on the main unit
and to the “CONNECT TO MAIN UNIT” connector on the controller.
CAUTION:
•
Be sure to use the supplied mono 1/8” control cables. Using other types of cable may result in unit
damage.
•
To avoid severe damage to the unit, be sure the power is off before making the connections.
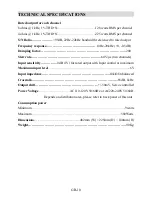
SPECIFICATIONS:
Pitch bend
+/-16%
Pitch Range
/-8%,+/-12%,+/-16%
Power supply
AC115/230V, 60/50Hz
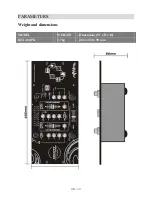
Dimensions
Controller: 482 x 88.8 x 97mm
Main unit: 482 x 88.8 x 262.5mm
Weight
Controller: 1.74Kg
Main unit: 5.09Kg
Should you have any questions/doubts on operating the unit, please send an e-mail to
djtech@first-
audio.com.
45
Main unit
Control
Panel button
Summary of Contents for DJX 480 PK
Page 2: ...DJX 480 PK Professional DJ Mixer USER MANUAL ...
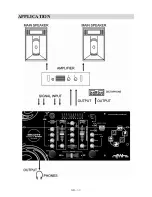
Page 13: ...APPLICATION GB 11 ...
Page 15: ...DJX 480 PK CDX 310 PROFESSIONAL DUAL CD PLAYER USER MANUAL www my scott com ...
Page 25: ...DJX 480 PK AX 121 PROFESSIONAL AMPLIFIER USER MANUAL ...
Page 32: ...SYSTEM CONNECTION GB 7 ...
Page 37: ...USER MANUAL DJX 480 PK S 12 PROFESSIONAL SPEAKER ...


