


setting menu.
In the “ADVANCE” menu, Move to “SYSTEM” or “SYSTEM INFO”. Select “PASSWORD” and press “ENTER” to
enter the submenu to set the password (four digits). The default admin password is 0000.
3.7. Record Setting
By defaults, the record function is activated when the DVR is powered on and a camera is connected.
To change the record settings, Press “MENU” and enter the password to go to the menu list. Then, Move to
“RECORD” to enter the advanced setting menu. You can set the image size, image quality and the image per
second for recording.
For details, please refer to “5.2. RECORD” in the user manual..
4. BASIC OPERATION
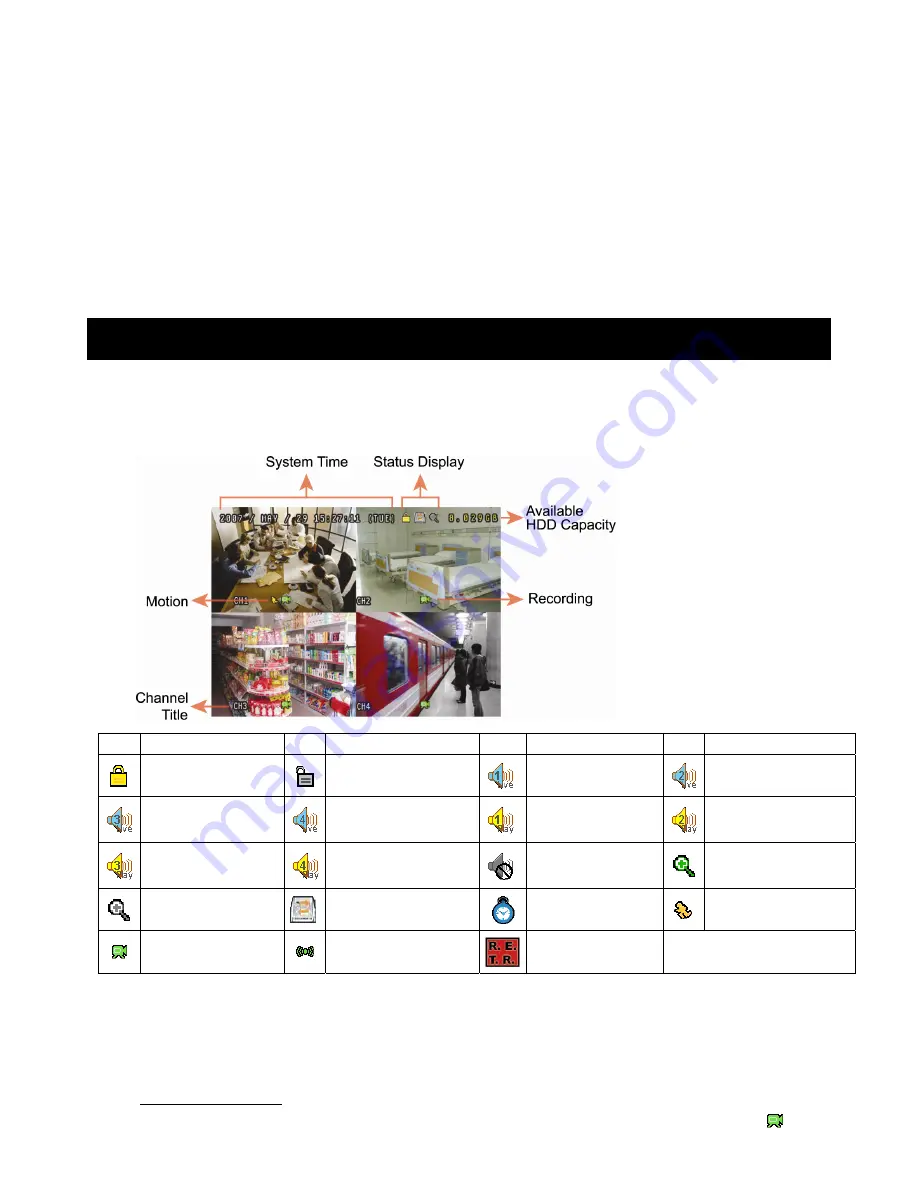
4.1 Live Page
Depending on the DVR you have, you may see the following live view screen with status icons.
Icon Function
Icon Function
Icon Function
Icon Function
Key lock
Key unlock
1
st
live audio
channel
2
nd
live audio channel
3
rd
live audio channel
4
th
live audio channel
1
st
playback audio
channel
2
nd
playback audio
channel
3
rd
playback audio
channel
4
th
playback audio
channel
Audio channel
unselected
Digital zoom mode
Digital zoom
unselected
HDD overwrite
Timer recording
Motion
Recording
Alarm
R.E.T.R.
4.2. Recording
When the recording and the pre-alarm function are activated, this device will overwrite 8GB data from the oldest
for continuous recording without notice.
1) Manual Recording Icon
By defaults, when the DVR is properly connected with cameras and the HDD is installed, you can see “ ”


