8
STEP 3: VALIDATION
Check your signal.
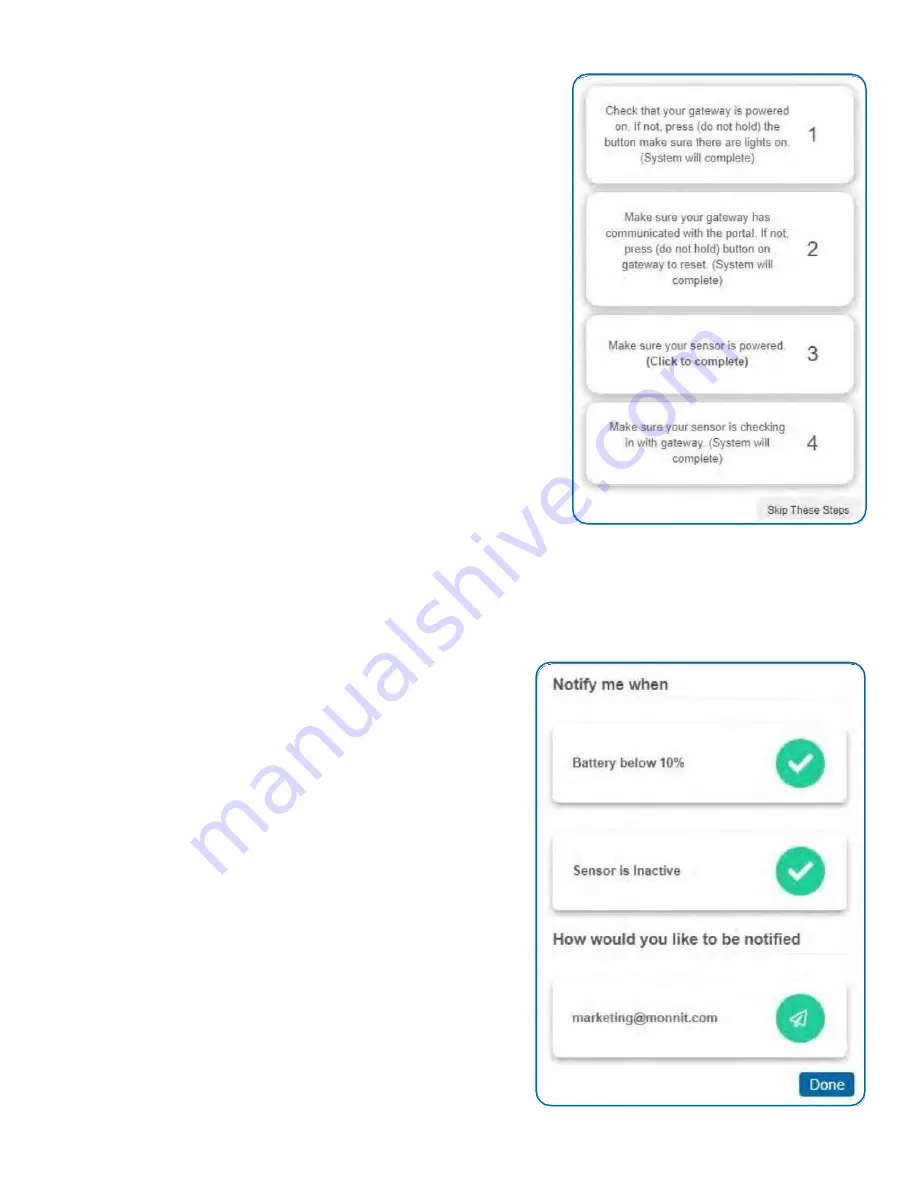
The validation checklist will help you ensure the Local Alert is
communicating with the gateway properly and has a strong signal.
1. Check that your gateway is powered on. If not, press (do not hold)
the button. Make sure there are lights on (System will complete):
Ensure that the gateway is registered to Scigiene Premier and is connected
to power with antenna(s) or an Ethernet cable allowing it to communicate
with the Internet.
2. Make sure your gateway has communicated with the Scigiene
Premier portal. If not, press (do not hold) the button on the gateway to
reset. (System will complete):
This step will autocomplete if the gateway
is communicating with Scigiene Premier. Press the gateway utility button to
ensure the gateway has an updated sensor list and to speed up this
process.
3. Make sure Local Alert is powered:
Attach the included antenna and
switch on the Local Alert (see the Powering Sensor On and Attach Antenna
sections for help in this area). Once you power the Local Alert on by flipping
the switch, the device will communicate with the gateway every 30 seconds
for the first few minutes.
4. Make sure your Local Alert is checking in with the gateway:
Checkpoint 4 will only complete when the Local Alert achieves a solid connection to the gateway. Press the action button
on your cellular gateway or Ethernet gateway to force communication.
Select the
Save
button when completed.
STEP 4: ACTIONS
Choose your actions.
Actions are the alerts that will be sent to your phone or email in the
event of an emergency. Low battery life and device inactivity are two
of the most common actions to have enabled on your device. See the
Actions Overview section for how to set actions for your Local Alert.
Select the
Done
button when completed.


