


12
B
A
B
Note:
Your machine may not match the image. For reference only.
Tools required:
pedal wrench, 4mm hex key, #2 Phillips screwdriver,
13mm socket and wrench
1.
Remove the Pedals. Refer to the “Replacing the Pedals”
procedure in this manual.
2.
Carefully remove the Shrouds. Refer to the “Replacing the
Shrouds” procedure in this manual. Set the hardware safely aside
for reassembly.
3.
Remove the Handlebar and Footpeg. Refer to the “Replacing
the Handlebars and Footpegs” procedure in this manual. Set the
hardware safely aside for reassembly.
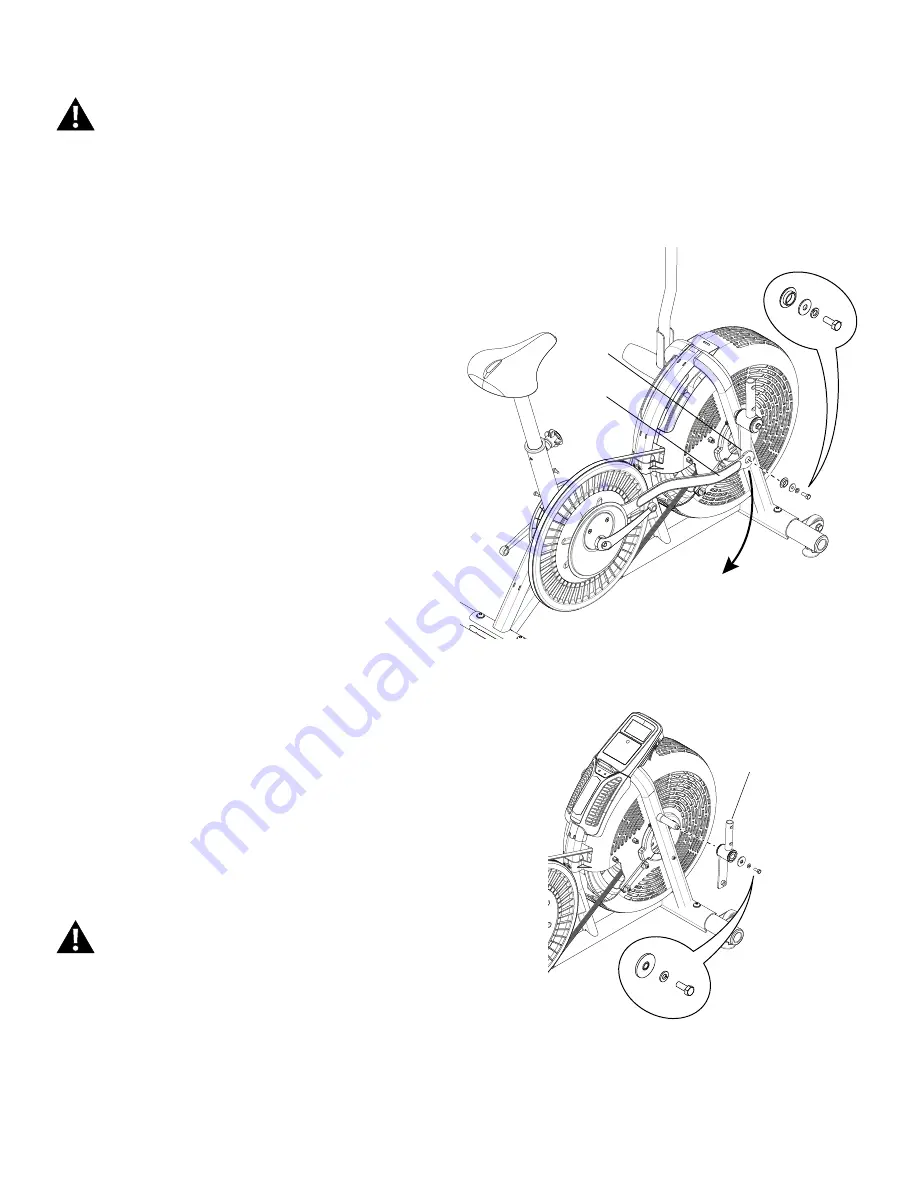
4.
Loosen and remove the hardware that attaches the
Connector Arm (A) to the Arm Pivot (B). Set the free end of the
Connector Arm on the floor. Set the hardware safely aside for
reassembly.
5.
Loosen and remove the hardware that attaches the Arm
Pivot (B). Remove the Arm Pivot. Set the hardware safely aside for
reassembly.
6.
Installation is the reverse procedure.
7. Final Inspection
Inspect your machine to ensure that all hardware is tight and
components are properly assembled.
Do not use until the machine has been fully assembled and
inspected for correct performance in accordance with the
Owner’s Manual.
Disconnect the data cable from the console before you service this machine.
Replacing the Arm Pivots


