background image

15

Montage- und Betriebsanleitung für
3-Finger-Zentrischgreifer Type PZH

Operating manual for
3-Finger-Centric-Gripper Type PZH

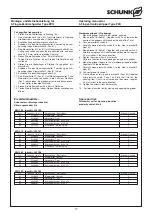
10.   Fixieren Sie den Magnetschalter 

2 in dieser Stellung ,indem 

Sie  ihn  durch  Anziehen  des  Gewindestiftes  in  der  T-Nut 
verklemmen.

11.   Testen Sie die Funktion, indem Sie den Greifer öffnen und 

schließen,


Teil »gegriffen«(Innengreifen)
1.    Stellen Sie den Greifer in Stellung „Zu“
2.     Schieben Sie den Magnetschalter 

2 in Richtung Greifermitte 

bis zum Ende der T- Nut.

3.    Schließen Sie den Magnetschalter 

2 an.

4.     Den  Magnetschalter 

2  langsam  zurückschieben,  bis  dieser 

schaltet.

5.     Fixieren sie den Magnetschalter 

2 in dieser Stellung, indem 

Sie  ihn  durch  Anziehen  des  Gewindestiftes  in  der  T-Nut 
verklemmen.

6.     Testen  Sie  die  Funktion,  indem  Sie  den  Greifer  öffnen  und 

schließen.

7.     Stellen  Sie  die  Greiferfinger  in  die  Stellung  „Teil  gegriffen“ 

(mit Werkstück)

8.     Schließen Sie den Magnetschalter 

1 an

9.     Schieben  Sie  den  Magnetschalter 

1  langsam  von  außen  in 

die T-Nut, bis dieser schaltet.

10.   Fixieren  Sie  den  Magnetschalter  in  dieser  Stellung,  indem 

Sie ihn durch Anziehen der T-Nut verklemmen

11.   Testen  Sie  die  Funktion,  indem  Sie  den  Greifer  schließen 

und öffnen.

Montage  und  Einstellung  des  Anbausatzes  zur 
Hubüberwachung mit induktiven Näherungs schaltern
HINWEIS:
Die  induktiven  Näherungsschalter  und  der  Anbausatz  zur 
Hubüberwachung sind Zubehör und müssen gesondert bestellt 
werden.

Assembly 

and 

adjustment 

of 

the 

attachment 

set for stroke control with inductive proximity switches 
NOTE:
The  inductive  proximity  switches  and  the  attachment  set  for 
stroke   control  are  accessories  and  have  to  be  ordered  sepa-
rately.

Schaltfunktion: in unbedämpftem Zustand gezeichnet
Output: drawn in non-actuated condition


Type 

Schaltfunktion / Output 

Ident-Nr. / Id.-No.

  INW 80/S 

Schließer / Closer 

301 508

Schaltabstand / Sensing distance:  1,5 mm

2 Stück / pieces

Anbausatz für induktive Näherungsschalter Ø 8
HINWEIS:
Die  induktiven  Näherungsschalter  und  der  Anbausatz  zur 
Hubüberwachung  sind  Zubehör  und  müssen  gesondert 
bestellt werden.

81

85

84

81

83

82

81

83

82

81

84

Klemmhalter 2

Klemmhalter 1

N herungsschalter 2

N herungsschalter 1

N herungsschalter 2

N herungsschalter 1

Klemmhalter 2

Klemmhalter 1

10.   Clamp solenoid switch 

in this position in the T-slot by 

tightening the set screw.

11.  Perform a function test by opening and closing the gripper.
Workpiece „gripped“ (I.D. gripping)
1.    Move the gripper to the „closed“ position.
2.     Move solenoid switch 2 towards the centre of the gripper 

until it reaches the end of the T-slot.

3.     Connect solenoid switch 2.
4.     Move solenoid switch 2 back slowly until it switches.
5.     Clamp solenoid switch 2 in this position by tightening the set 

screw in the T-slot.

6.     Perform a function test by opening and closing the gripper.
7.     Move the gripper fingers to the „workpiece gripped“ position 

(together with the workpiece).

8.     Connect solenoid switch 1.
9.     From outside, slowly insert solenoid switch 1 into the T-slot  

until it switches.

10.   Clamp the solenoid switch in this position by tightening the 

set screw in the T-slot.

11.  Perform a function test by closing and opening the gripper.

Summary of Contents for PZH 140

Page 1: ... com USA SCHUNK Intec Inc Tel 1 919 572 2705 Fax 1 919 572 2818 info us schunk com www us schunk com HUNGARY SCHUNK Intec Kft Tel 36 46 50900 7 Fax 36 46 50900 6 info hu schunk com www hu schunk com INDIA SCHUNK India Branch Office Tel 91 80 40538999 Fax 91 80 41277363 info in schunk com www in schunk com ITALY SCHUNK Intec S r l Tel 39 031 4951311 Fax 39 031 4951301 info it schunk com www it schu...

Page 2: ...mbly 5 5 1 Befestigung des Greifers Fastening of the gripper 5 6 Luftanschluss Air connection 5 7 Problemanalyse Trouble shooting 6 8 Wartung und Pflege Maintenance and care 6 8 1 Wartungs und Pflegeintervalle Maintenance intervals 6 8 2 Zerlegen des Greifers ohne Greifkraftsicherung Disassembly of the gripper without Gripping force safety device with springs 7 9 Zusammenbauzeichnung Assembly draw...

Page 3: ...he function and or the operational safety of the gripper are to be refrained from 5 Never move any parts by hand as long as the power supply is connected 6 Never grasp into uncovered mechanisms and never grasp between the gripper fingers 1 Sicherheit 1 1 Symbolerklärung Dieses Symbol ist überall dort zu finden wo besondere Gefahren für Personen oder Beschädi gungen des Greifers möglich sind 1 2 Be...

Page 4: ...ingungen AG B Diese finden Sie auf unserer Webseite www de schunk com unter Service bei den Verkaufs und Lieferbedingungen Die Einheit gilt dann als defekt wenn deren Grundfunktion Greifen oder Schwenken nicht mehr gegeben ist 7 Always disconnect the power supply lines during assembly conversion maintenance and setting work 8 Always carry out maintenance work conversions and attachments outside of...

Page 5: ...ir borne noise emitted by the gripper is 70 dB A 5 Assembly CAUTION Before starting assembly of the gripper the power supply must be switched off Please also consider the safety hints on page 3 and 4 5 1 Fastening of the gripper 1 Fix the gripper with both fixing bores Two cylinder pins are enclosed to every shipment 2 Fasten the gripper in the 3 provided fastening bores 6 Luftanschluss ACHTUNG Be...

Page 6: ...nspection Gripper is not efficient Loss of pressure Check the sealings Check the pressure of the air feedings The gripper does not move the full stroke Dirt between the cover plate piston and base jaw 8 Maintenance and care CAUTION Please consider the safetey notes on pages 3 and 4 8 1 Maintenance intervals Greifer AUF Greifer ZU Schlauchloser Direktanschluss AUF Schlauchloser Direktanschluss ZU P...

Page 7: ...os 1 geschoben werden ACHTUNG Finger sind in das Gehäuse eingepasst und müssen beim Zusammenbau des Greifers in die jeweilige ursprüngliche Nut zurückgeschoben werden 13 Das Fixierstück Pos 2 aus dem Gehäuse Pos 1 ziehen 14 Die Gewindestifte Pos 36 vollständig herausdrehen 15 Die Zylinderstifte Pos 61 aus dem Fixierstück Pos 2 schieben 16 Kolbenstangen Pos 4 vorsichtig aus dem Fixierstück Pos 2 he...

Page 8: ...chgreifer Type PZH Operating manual for 3 Finger Centric Gripper Type PZH 41 9 43 12 8 15 10 32 11 60 44 31 62 1 33 2 24 3 30 70 4 39 25 5 7 34 36 35 40 6 61 71 20 26 23 9 Zusammenbauzeichnungen 9 1 PZH 140 PZH 210 9 Assembly drawings 9 1 PZH 140 PZH 210 ...

Page 9: ...g für 3 Finger Zentrischgreifer Type PZH Operating manual for 3 Finger Centric Gripper Type PZH 41 8 12 32 62 1 31 38 24 9 43 15 10 60 11 7 34 5 3 2 23 26 4 71 17 16 40 6 33 42 30 20 25 39 70 9 2 PZH 280 PZH 350 9 2 PZH 280 PZH 350 ...

Page 10: ...cription Menge Quantity 20 9610016 Quad Ring Square ring 13 95 x 2 62 3 23 9610037 Quad Ring Square ring 28 17 x 3 53 3 24 9936333 O Ring O ring Ø 7 0 x 2 0 2 25 9936334 O Ring O ring Ø 14 0 x 1 5 6 26 9936336 O Ring O ring Ø 36 0 x 2 0 3 Dichtsatzliste PZH 350 Ident Nr 370 863 Seal kit list PZH 350 Id No 370 863 Pos Ident Nr Id No Bezeichnung Description Menge Quantity 20 9935427 Stangendichtung ...

Page 11: ... Screws M 4 0 x 12 6 70 9907570 Rundmagnet 6 0 x 5 0 Round magnet 6 0 x 5 0 2 71 9621028 Sicherungsring Safety ring 23 x 1 20 3 72 9936169 Luftanschluss Air connection 2 10 3 Spare parts lists PZH 140 PZH 140 Pos Ident Nr Id No Bezeichnung Description Menge Quantity 1 5510724 Gehäuse Housing 1 2 5510728 Fixierstück Positioning component 1 3 5510732 Finger Finger 3 4 5510736 Kolben Piston 3 5 55107...

Page 12: ...2 9682102 Schrauben Screws M 5 x 20 6 70 9660013 Rundmagnet 4 0 x 5 0 Round magnet 6 0 x 5 0 2 71 9907569 Sicherungsring Safety ring 40 x 1 75 3 72 9936169 Luftanschluss Air connection 4 PZH 350 PZH 350 Pos Ident Nr Id No Bezeichnung Description Menge Quantity 1 5510727 Gehäuse Housing 1 2 5510731 Fixierstück Pistioning component 1 3 5510735 Finger Finger 3 4 5510739 Kolben Piston 3 5 5510743 Deck...

Page 13: ...n on the operation of sensors please contact your SCHUNK representative Information is also available for download at www schunk com Products Automation Accessories 11 1 Proximity switches Technical data Supply voltage 10 30 V DC Operation voltage 15 10 Max load current 200 mA short circuit proof Hysterisis 15 of nom sensing dist 2 mm Range of operat temp 25 C to 70 C Max operat frequency 1000 Hz ...

Page 14: ...ng Teil gegriffen mit Werkstück 7 Schieben Sie den Magnetschalter 2 in Richtung Greifermitte bis zum Ende der T Nut 8 Schließen Sie den Magnetschalter 2 an 9 Den Magnetschalter 2 langsam zurückschieben bis dieser schaltet CAUTION The max tightening torque for set screws is 30 Ncm Gripper open 1 Put the gripper onto closed position 2 Move the magnetic switch 2 see illustration NOTE Thereby the magn...

Page 15: ...roke control with inductive proximity switches NOTE The inductive proximity switches and the attachment set for stroke control are accessories and have to be ordered sepa rately Schaltfunktion in unbedämpftem Zustand gezeichnet Output drawn in non actuated condition Type Schaltfunktion Output Ident Nr Id No INW 80 S Schließer Closer 301 508 Schaltabstand Sensing distance 1 5 mm 2 Stück pieces Anba...

Page 16: ...r2 Pos 81 mitNäherungsschalter2 vorsich tig nach außen schieben bis er bedämpft wird und dann noch ca 0 5 mm weiter in dieselbe Richtung 12 Ziehen Sie die Schrauben Pos 83 mit Gefühl an 13 Testen Sie die Funktion indem Sie den Greifer öffnen und schließen Assembling the mounting kit PZH 140 210 1 Screw the brackets item 81 and the T nuts item 82 together loosely with the screws item 83 2 Fasten th...

Page 17: ...lly outwards until it is actuated and then move it approx 0 5 mm further in the same direction 6 Tighten the screws item 83 carefully 7 Perform a function test by opening and closing the gripper 8 Move the gripper fingers to the workpiece gripped position together with the workpiece 9 Carefully move proximity switch 1 to the stop in bracket 1 item 81 10 Connect proximity switch 1 11 From outside c...

Page 18: ...e Maschine eingebaut werden soll den Bestimmungen der Richtlinie Maschinen 2006 42 EG entspricht Angewandte harmonisierte Normen insbesondere EN ISO 12100 1 Sicherheit von Maschinen Grundbegriffe allgemeine Gestaltungsleitsätze Teil 1 Grundsätzliche Terminologie Methodik EN ISO 12100 2 Sicherheit von Maschinen Grundbegriffe allgemeine Gestaltungsleitsätze Teil 2 Technische Leitsätze und Spezifikat...

Page 19: ... machine into which the incomplete machine is to be installed with the provisions of the Machinery Directive 2006 42 EC is confirmed Applied harmonized standards especially EN ISO 12100 1 Safety of machines Basic concepts general principles for design Part 1 Basic terminology methodology EN ISO 12100 2 Safety of machines Basic concepts general principles for design Part 2 Technical principles The ...

Reviews: