•
4
•
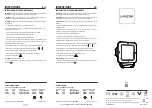
4. FEATURES
1
2
3
4
5
1.
Hooks for mounting
2.
(3) COB LEDs
3.
Battery status LEDs
4.
Charging port
5.
Power level button
Not shown:
• 100-240V AC wall charger with USB port
• Micro USB to USB charging cable
5. CHARGING
IMPORTANT! CHARGE THE WORK
LIGHT IMMEDIATELY AFTER
PURCHASE, AFTER EACH USE, AND
AT LEAST EVERY 3-6 MONTHS.
Failure to do this will reduce the battery’s
capacity and may void the warranty.
5.1
Before charging, make sure the work light
is turned off.
5.2
Connect the micro USB end of the charging
cable to the micro USB port on the work
light. Insert the USB end of the cable into
the USB port on the wall charger.
5.3
Plug the AC charger into a live AC outlet.
The green LEDs will light, to indicate
battery status.
5.4
Charging will take 7-8 hours.When the
battery is fully charged, all four LEDs
will be lit.
5.5
When fully charged, unplug the charger
from the AC outlet, and then from the work
light. The work light is now ready for use.
5.6
Recharge the work light after use, and at
least every 3-6 months.
6. OPERATING INSTRUCTIONS
6.1 IMPORTANT:
Charge the internal battery before use.
6.2
Press the Power Level button on the front
of the unit:
1x –
turns on one (center) light
2x –
turns on two lights
3x –
turns on all three lights
4x –
turns all lights off
The position of each individual light may be
rotated, for more precise positioning.
7. MAINTENANCE INSTRUCTIONS
7.1
After use and before performing
maintenance, unplug and disconnect
the work light.
7.2
Ensure the work light is unplugged and
allowed to cool before attempting any
cleaning.
7.3
Any servicing should be performed by
qualified service personnel.


