14
The following are general rules:
High air pressure:
Low rolling resistance / less suspension comfort
Lower air pressure:
Higher rolling resistance / more suspension comfort
See
point 9
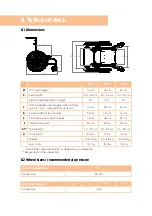
for sizes and air pressure for the guide and rear wheels (techni-
cal data).
4.1 Rear wheels with drum brake
The drum brake allows safe braking, which is independent of the tyre pres-
sure. It is activated with the brake lever on the right and left push handle
with four engagement options. A safety catch engages with an audible
"click" by pulling the lever. The brake is applied in the fourth click position.
Release the brake by pulling the lever again and pressing the red safety
catch at the same time. By braking lightly on one side it is possible to
achieve a steering movement when pushing.
Setting the drum brakes
The drum brakes are set by turning the
setting screws (
A
) in or out. They are
located at the lower end of the bra-
ke cable in the brake saddle. Unscrew
the screw a little for precise adjust-
ment until you hear a grinding noise
with turning the rear wheel. The bra-
ke jaws are placed lightly against the
hub housing in this state. Then turn the
setting screw 1 turn back and clamp it
in place with the nut. Check the function of the drum brake and readjust
the setting screw if necessary.
Leave this work to your specialist dealer in case of any uncertainty.
The drum brake may only be used on the level with maximum load as a
parking brake due to safety reasons. The knee lever brake must always be
used on a slope and tilt up to a maximum of 8%.
4. Handling of wheels.
A


