2060534 V2.0
4
Operator menu
ENGLISH
3. Contrast adjustment
Press contrast once to enter contrast adjustment mode.
Now use the plus and minus buttons to select the image
contrast.
4. Brightness adjustment
Press brightness once to enter brightness adjustment
mode. Now use the plus and minus buttons to select the
image brightness.
3. and 4. Saturation adjustment
Press contrast(3) and brightness(4) at the same time to
enter saturation adjustment mode. Now use the plus and
minus buttons to select the image saturation.
Blocking of 2.3.4.
The operation of these buttons can be disabled in the
service settings menu.
5. Single sequence scan
When pushed button 5 ‘option’ the Display 7" LEDD
generates a single sequence scan (not continuous) of
the attached cameras (using whatever dwell time was
programmed), see page 9 chapter Scanning.
TIC camera short-cuts
When in normal viewing mode, the following direct
access short-cuts are possible:
Pressing option key (button 5) will activate zoom mode
(indicated by lit key indicator) and + and – keys will
change the zoom factor, possible zoom factors for TIC
are: 1x (normal view), 2x and 4x.
When zooming back to 1x the pan/tilt function will be
set to center.
When pan/tilt is activated additional presses on option
key (button 5) will cycle through ZOOM, PAN, TILT
mode, where + and – key will activate the ZOOM, PAN
or TILT action (PAN and TILT will only work when the
digital zoom is 2x or 4x).
The TIC camera video standard and spot meter setting
are only accessible via the camera menu’s, there are no
direct keys to access these settings.
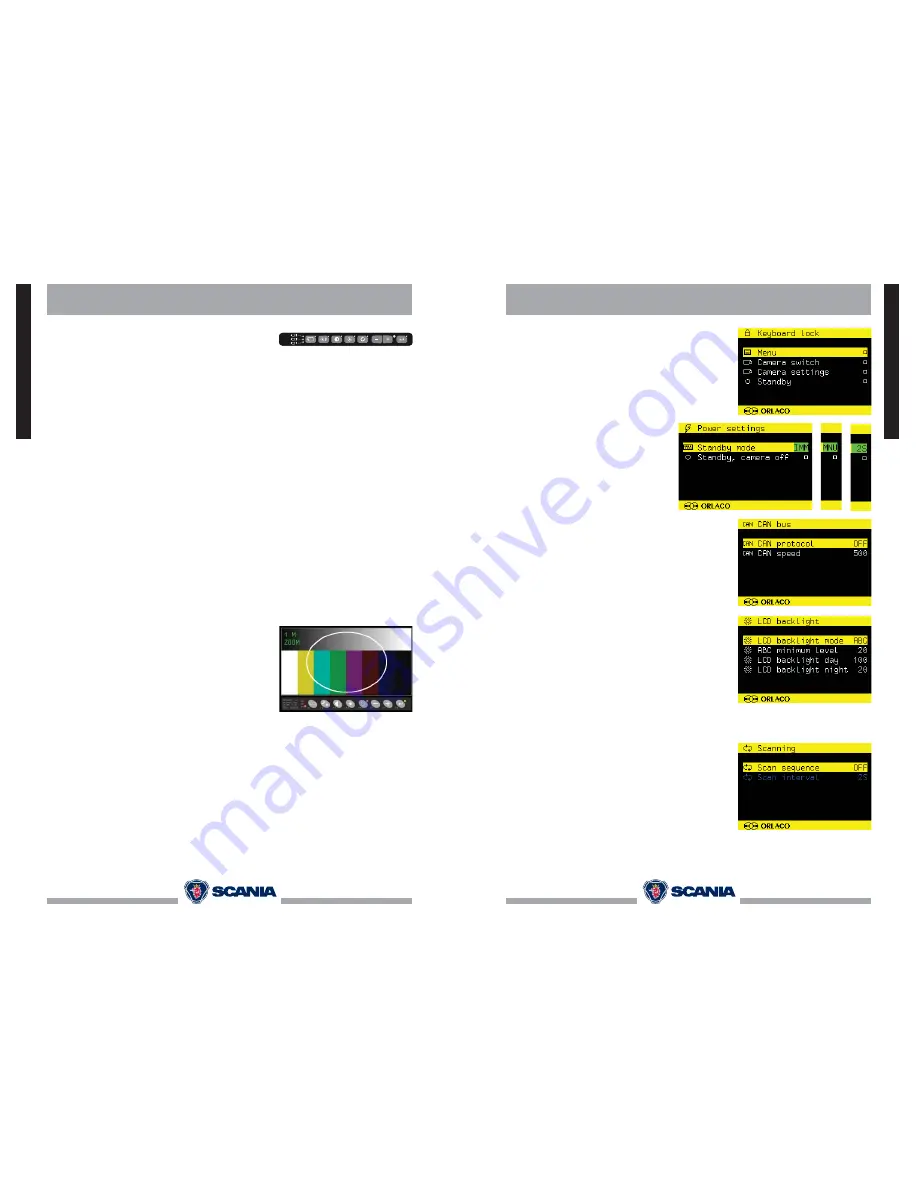
Buttons
1 2 3 4 5 6 7 8
Button No. 1 = Camera selection
Button No. 2 = Auto LCD Backlight
Control/Day/Night
settings
Button No. 3 = Contrast
Button No. 4 = Brightness
Button No. 5 = Option
Button No. 6 = Selection/setting -
Button No. 7 = Selection/s
Button No. 8 = Enter
2060534 V2.0
9
Power settings
This menu has the following 2 options:
Standby mode
This option has three possible choices:
MNU
= Choose standby mode by pushing the button 8.
IMM
= Direct in Standby.
2S
= Standby after 2 seconds delay.
Standby, camera off
When set, camera power is off during
standby otherwise camera stays powered.
CAN bus
This option selects the CAN bus submenu.
This menu has the following options:
CAN protocol
This option selects the CAN protocol to
use on the CAN bus. The CAN speed will
be automatically adjusted, but can also be
manually adjusted by selecting the protocol.
CAN
speed
This option selects the bit rate of the CAN bus. Valid
options are 100, 125, 200, 250, 500 and 1000 kbit.
LCD Back light
This option opens the back light submenu. The back
light menu has the following four options:
LCD back light mode
This option enables the automatic back light control
(ABC). The display will adapt its brightness to the
amount of light in the environment Alternatively, a
manual day or night brightness adjustment can be
chosen.
ABC minimum level
These settings defi ne the minimal brightness levels to
the point where the ABC adjustment can adjust down
the levels when there is little ambient light available.
LCD-Backlight day
This option can manually adjust the brightness set-
tings for the day settings (50 – 100%).
LCD-backlight night
This option can manually adjust the brightness set-
tings for the night settings (0 –50%).
Scanning
This option opens the camera scanning submenu. This
menu has the following options:
Scan sequence
This option selects the cameras which will be enabled
in the scanning sequence.
Scan interval
This option sets the interval between camera scans.
System settings
ENGLISH


