14
Do not splash the water on the top or back of the refrigerator,
otherwise it would reduce insulation effect.
Attention:
The product is a household refrigerator. According to the national
standards, household refrigerator is only applicable to store food
and cannot be used for other purpose such as storing blood,
drugs, biological products, etc.
Refrigerator maintenance
Cleaning
Fingerprints are easily left on its exterior. Use a dry towel to wipe
up.
Periodically clean the dust both at the back of and under the
refrigerator.
Refrigerator interior should be cleaned frequently so as to avoid
foreign odor. After the power is cut off, use soft towel and neutral
detergent to clean and wipe with the clean water.
Do not use the following products to clean refrigerator interior:
• Alkaline or alkalescent detergents; (may cause the inner
liner and plastic components to crack)
• Soap powder, benzine, amyl acetate, alcohol, etc.; (may
destroy the plastic components)
• If cooking oil or seasonings blot on the refrigerator’s external
surface, please clean it immediately. (may cause the plastic
components to crack)
Lamps and replacement
If the illuminating lamp occur failure, please contact professional
personnel for home service.
Halt
Non-use within a long time. Please plug off the power to avoid
electric shock or fire due to power line aging; clean up refrigera-
tor interior; open the door for a time and close it after the interior
become completely dry.
Power failure: Reduce opening times as many as possible; you’d
better not to put fresh food in it.
Discard: When discard unused refrigerator, door seal must be
dismantled off, so that the children would not be closed in it by
accident.
Door Right-Left Change
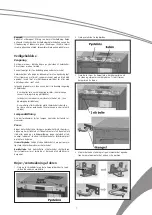
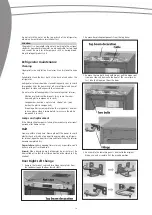
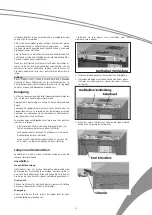
1 Remove the two nut caps and two hinge cover plates from
the top beam(open the door toward right)
2 Remove decorating components from the top beam
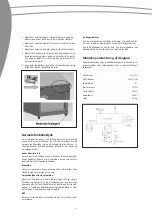
3 Remove the two bolts fixed with hinges, pull the hinges out
from one side and dismantle the door at the same time. As
last, take the hinges out from the door.
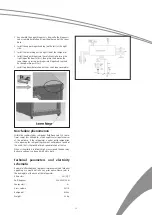
4 Reassemble the lower hinge axis: dismantle the original
hinge axis and assemble it at the graphic position.


