15
RT-FS/RT-PHFS OWNER’S MANUAL
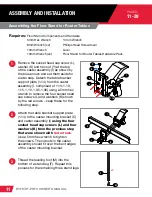
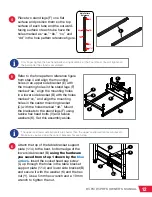
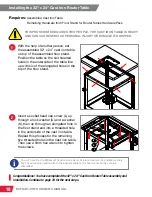
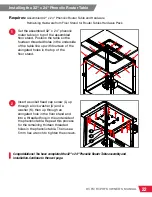
The switchbox assembly (G) can be installed on
either the front left or right stand leg (F). The handle
mounting bracket (T) can also be installed on
either stand leg (F).
13
14
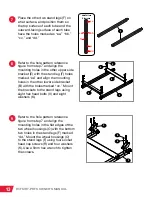
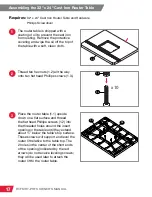
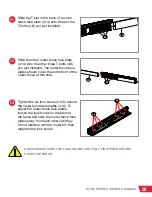
Place a level on one of the upper
brackets and adjust the leveling feet (M)
to make sure the bracket is level. Check
the corners between the brackets and
the remaining three brackets, as shown
by the red arrows. Recheck all four
brackets, then use a 14 mm wrench to
tighten the hex nut (N) on each leveling
foot (M) up against the bottoms of the
stand legs (F). Make sure the feet are
adjusted so the wheels (P) just contact
the ground, but can still spin relatively
freely. If the wheels (P) are not close
enough to the ground, the stand will not
roll properly.
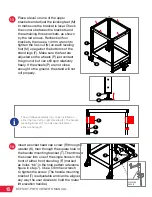
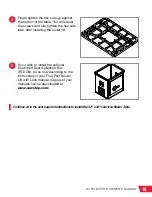
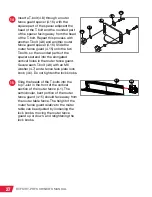
Insert a socket head cap screw (R) through a
washer (K), then through the square hole in
the handle mounting bracket (T). Then thread
the screw into one of the single holes in the
front of either front stand leg (F) (marked
as holes “bb” in the hole pattern reference
figure in step 7). Use a 5mm hex wrench
to tighten the screw. (The handle mounting
bracket (T) is adjustable and can be aligned
any way the user desires to hold the router
lift elevation handle.)
i
ROUTER LIFT
ELEVATION
HANDLE
N
R
T
F
K
P
F
M
M
T
G
F


