


SawStop
®
10” Industrial Cabinet Saw 19
Setting Up
Your Saw
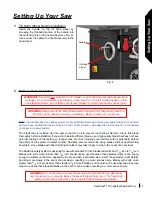
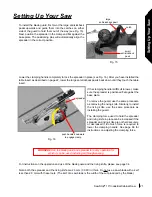
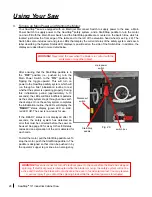
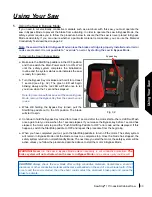
Using the 8 mm hex L-wrench included with the saw, turn the spacing adjustment bolt clockwise to decrease
the spacing between the brake cartridge and the edge of the blade, and counter-clockwise to increase the
spacing. Adjust the brake position as needed to set the spacing between the teeth of the blade and the closest
point on the brake cartridge to between
1
/
16
inch and
1
/
8
inch (see Figs. 11 and 12).
One simple method to adjust the spacing is to place a U.S. nickel between the closest points on the blade and
brake cartridge to give a spacing of about 0.070 inch. Then adjust the spacing adjustment bolt until the teeth
of the blade just skim the nickel when the blade is rotated by hand.
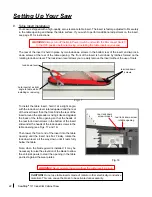
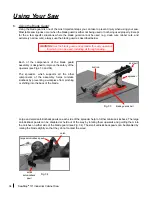
Note that the point on the brake pawl that is closest to the blade may be at the end of the brake pawl rather
than the middle if the diameter of the blade is slightly less than 10 inches.
The exact distance is not critical, but it
is
important to make sure the blade teeth do not touch the brake pawl.
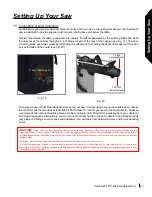
Since blades are often slightly eccentric, the spacing between the blade and brake pawl may change slightly
as the blade rotates. Therefore, you should rotate the blade by hand at least one full revolution
with the nickel
in place
after setting the spacing. This will verify that no part of the blade will hit the brake when the motor is
started.
Setting Up Your Saw
CAUTION!
Always spin the blade by hand with the nickel in place after changing the
blade or the brake cartridge, or after adjusting the spacing between the brake cartridge
and the blade! This ensures that no part of the blade will touch the brake cartridge once
the motor is started.
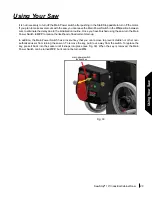
Fig. 11
Fig. 12
spacing


