


-7-
Maintenance
1
2
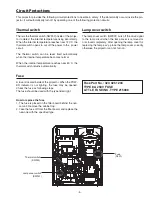
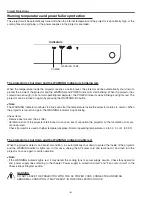
Filter prevents dust from accumulating on the optical elements inside the projector. Should the filter become
clogged with dust particles, it will reduce cooling fans’ effectiveness and may result in internal heat buildup and
adversely affect the life of the projector. If a “Filter warning” icon appears on the screen, replace the filter immedi-
ately by following the steps below.
3
5
CAutION
- Do not operate the projector with the filter re-
moved. Dust may accumulate on the optical ele-
ments degrading picture quality.
- Do not put anything into the air vents. Doing so
may result in malfunction of the projector.
- Do not wash the filter with water or any other liq-
uid matter. Otherwise the filter may be damaged.
rECOMMENDAtION
We recommend avoiding dusty/smoky environments when
you operate the projector. Usage in these environments may
cause poor image quality.
When using the projector under dusty or smoky conditions,
dust may accumulate on a lens, or optical elements inside
the projector degrading the quality of a projected image.
When the symptoms above are noticed, clean up the lens
or other optical parts by referring to the chapter "Cleaning
the projector".
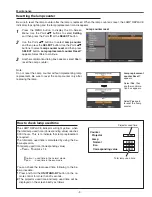
Be sure to reset the Filter counter after replacing the filter.
Press the
MENu
button to display the On-Screen
Menu. Use the Point
ed
buttons to select
Setting
and
then press the Point
8
or
SELECt
button.
Use the Point
ed
buttons to select
Filter counter
and
then press the Point
8
or the
SELECt
button. Use the
Point
ed
buttons to select
Filter counter reset
and
then press the
SELECt
button.
Filter counter reset?
appears. Select
Yes
to continue.
1
2
Resetting the filter counter
Filter counter
Filter counter
reset?
appears.
Select
Yes
, then
another confirmation
box appears.
Select
Yes
again to
reset the Filter coun-
ter.
Another confirmation dialog box appears, select
Yes
to
reset the Filter counter.
3
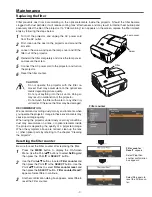
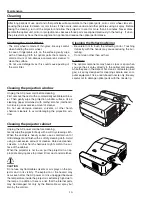
Replacing the filter
Turn off the projector, and unplug the AC power cord
from the AC outlet.
First, clean up the dust on the projector and around the
air vents.
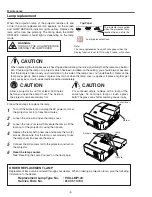
Loosen the screw and open the lamp cover and lift the
filter out of the projector.
Reinstall the filter completely and close the lamp cover
and secure the screw.
Connect the AC power cord to the projector and turn on
the projector.
Reset the filter counter.
4
6
Lamp cover
Screw
Filter
Summary of Contents for PDG-DXL2000E
Page 47: ... 47 IC Block Diagrams LV49152V Audio output IC001 LC87F2G08A Sub micom IC4501 ...
Page 48: ... 48 IC Block Diagrams M62393 DAC IC7881 MR4010 Power switching IC631 ...
Page 49: ... 49 IC Block Diagrams PIC18F67J60 Network IC8301 NJW1156 Audio selector IC5101 ...
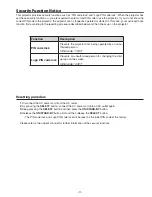
Page 82: ...Key No Part No Description Key No Part No Description Electrical Parts List 82 KV2 DXL2000E00 ...
Page 83: ...Key No Part No Description Key No Part No Description 83 Electrical Parts List KV2 DXL2000E00 ...
Page 84: ... KV2AC Apr 2011 DC 50 Printed in Japan SANYO Electric Co Ltd ...