GENERAL SETTING
3
Turn the shuttle dial clockwise.
A WARNING screen appears and then “NO” flashes.
4
Use the jog dial to select YES, and then turn the shuttle dial.
The “HDD INITIALIZING!” screen appear and the hard disk is
initialized. Then the display is returned to the HDD SET screen.
5
Press the EXIT/OSD button.
The display returns to the normal screen.
Adding a hard disk
Consult the place of purchase if you would like to add a hard disk. If
adding a hard disk, use an additional hard disk unit (sold separately).
Note: If adding another hard disk, be sure to initialize the hard disks.
When this is done, both hard disks will be initialized, so that
any existing data on the original hard disk will be cleared.
Reference: HDD SET screen
•
MIRRORING: When a hard disk is added, or if a 160 GB hard disk
is installed, it is possible to record the same images on two hard
disks. This means that even if an image write error occurs you will
be able to read from an area where there is no write error.
•
PLAYBACK DRIVE: After MIRRORING has been set, you will be
able to specify which of the two hard disks is to be used for
reading the recorded image.
With mirroring setting, if an error has occurred in the playback
image, switch from the hard disk in current use (DISK1) to (DISK2).
F
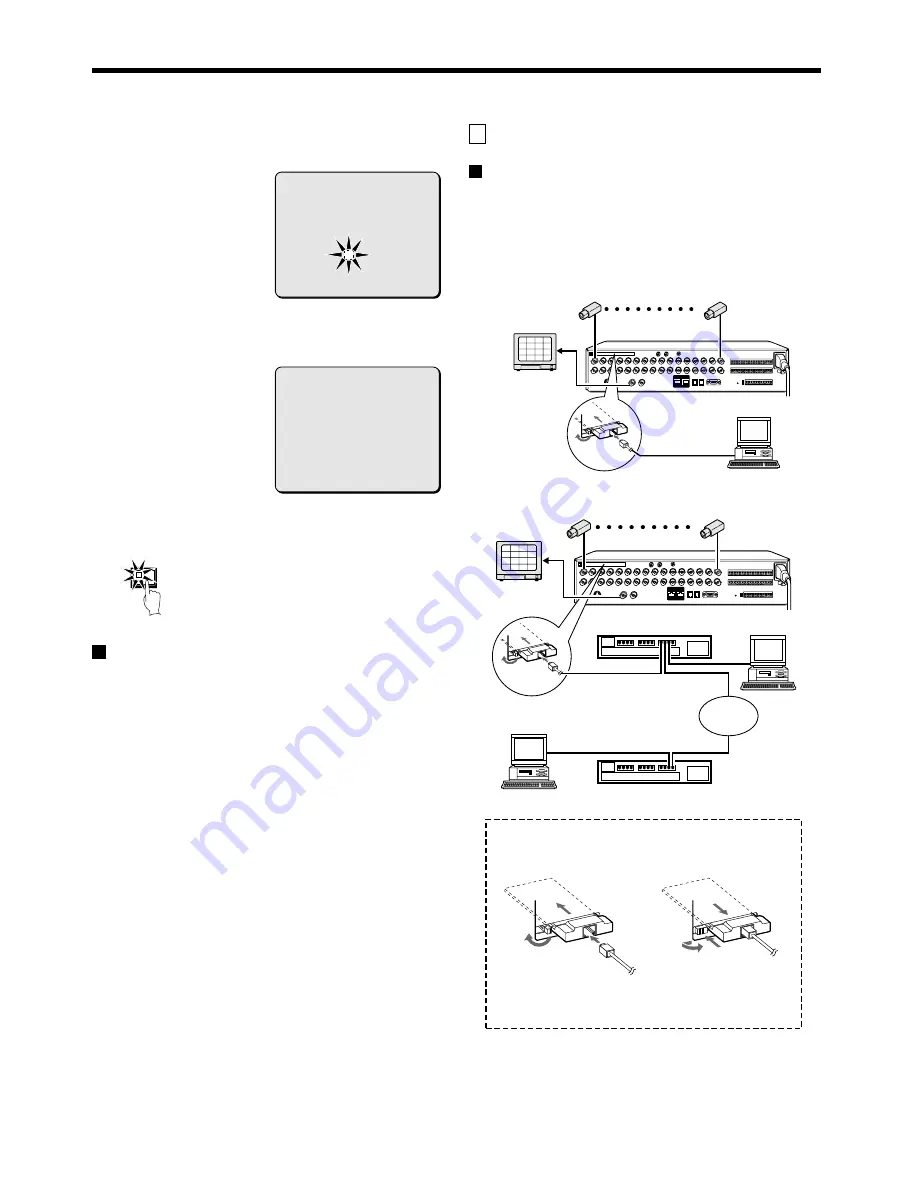
NETWORK SET SETTING
Network connection
Insert a recommended commercially-available LAN card or PC
card (Ethernet card) into the PC card slot at the rear of the digital
video recorder. This will enable you to view images on this unit
and make menu settings through the network (LAN) from a
personal computer.
•
When connecting directly to the computer (without using an
Ethernet hub)
•
When connecting via an intranet (using an Ethernet hub)
Note: The PC card slot is for 16-bit 5 V cards only.
Do not use 32-bit card bus types of card, as they may damage
the PC card slot of the digital video recorder.
<WARNING>
THIS CHANGE WILL INITIALIZE THE DISK.
ALL RECORDING WILL BE ERASED.
ARE YOU SURE ?
NO
CHANGE LINES WITH JOG. SELECT WITH SHUTTLE
HDD INITIALIZING !
EXIT/OSD
6
2
10
14
5
1
9
13
7
3
11
15
8
4
12
16
1
2
3
1 – 16
Main monitor
TV monitor
(sold separately)
Computer
Always use a
cross-type
Ethernet cable.
1 – 16
Main monitor
TV monitor
(sold separately)
Computer
6
2
10
14
5
1
9
13
7
3
11
15
8
4
12
16
2
2
3
Ethernet switching hub
Computer
Ethernet switching hub
Intranet
Always use a straight-
type Ethernet cable.
2
3
1
1
3
2
(Installed)
(Removed)
Locking can be carried out
easily by sliding the knob.
Return the knob after
unlocking.
Inserting the recommended LAN card
English
77


