-12-
Transferring data using the Media Player
If you have the Microsoft Windows Media Player installed,
you can transfer WMA files to the player and listen to them.
See the Windows Media Player on-line help for details on
how to do this.
Note:
-
Never disconnect the player from your PC during
transfer.
-
Files in subfolders up to two levels below the MUSIC
folder can be transferred.
Precaution when copying WMA files to the player:
Transfer from your PC to the player and/or playback are
impossible in the following cases.
-
Music files which are copyright protected
-
Music files purchased over the Internet may not transfer
and/or play back.
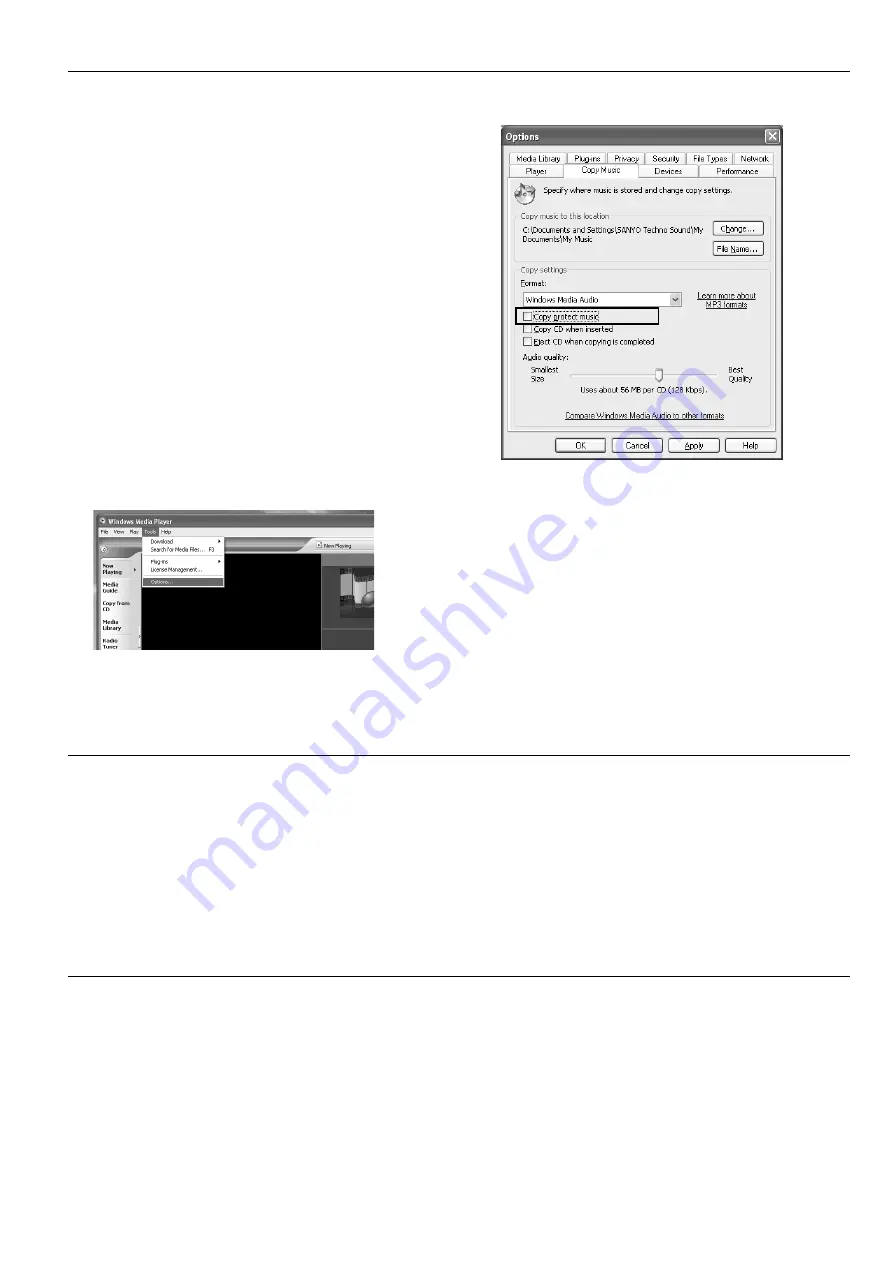
Note when ripping a CD (transferring CD music files to
your PC as WMA files)
Be sure to remove the copyright protection as described
below before ripping a CD using Windows Media Player.
1. Start up Windows Media Player.
2. Select [Tools] > [Options].
Formatting the player’s data
Designating the playback order (Playlist)
It is possible to designate the playback order of music.
Create a playlist on your PC and transfer it to the player to
play your music in that order.
It is also possible to transfer two or more playlists to the
player.
1. Start up the MusicFileMaster (refer to page 10).
2. After selecting [Table of Contents] in [Help] menu,
click [Basic operations] > [Creating / deleting portable
device playlists] of [Portable device]. Then, store the
data according to the instruction displayed on the
screen.
Always format data using the player itself (refer to page
19).
Note:
-
If you select the format function from the menu, the
memory will be initialised and all files will be erased.
Use only when you need it. Save a backup copy of your
data on a PC, etc.
-
The player might not operate normally if formatting the
player with your PC.
-
If you accidentally formatted using your PC, reformat
it using the player.
3. Open [Copy Music] or [Rip Music] in tab.
Make sure that [Copy protect music] is not checked.
4. Click [Apply] then [OK].


