background image

19

ENGLISH

Clear All

All channels are deleted from the channel memory.

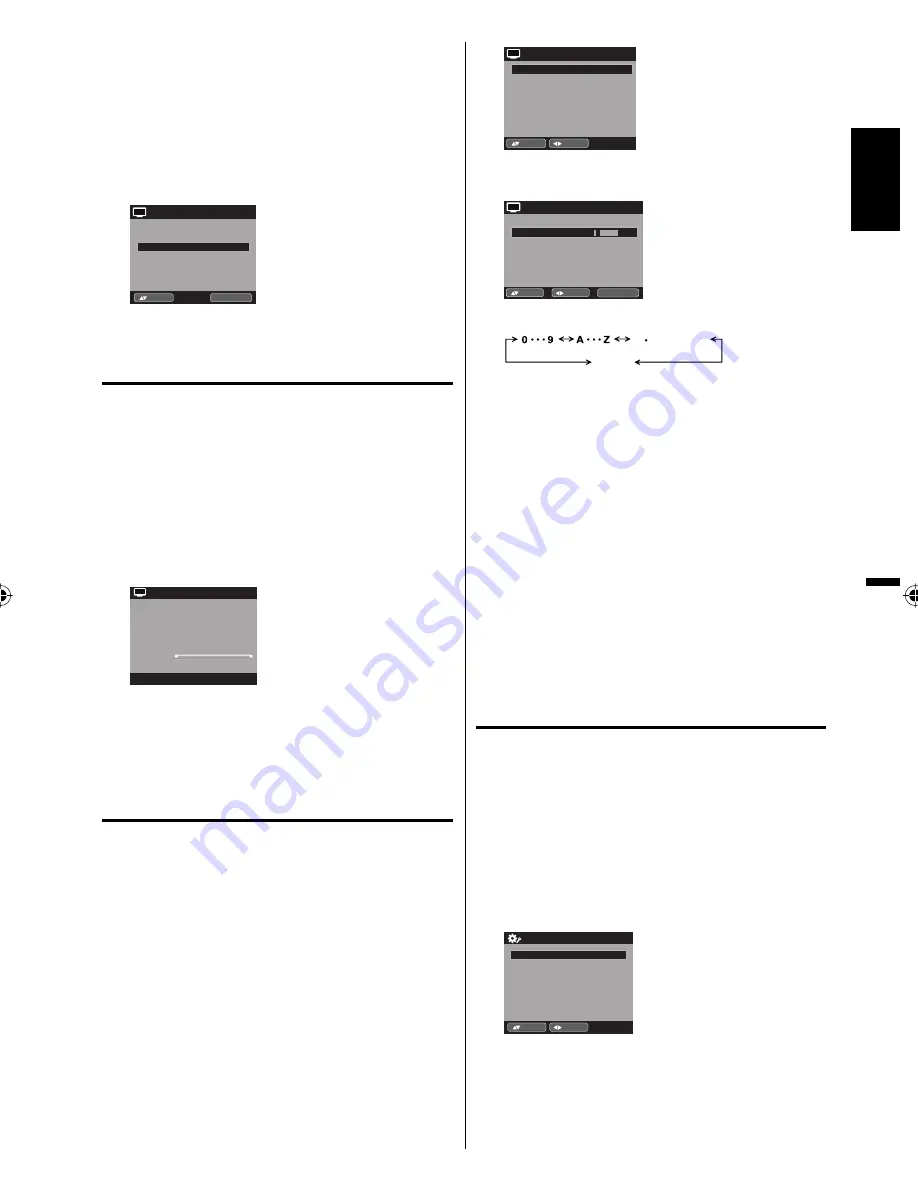
1

Select “Channel”, then press 

 or 

ENTER

.

2

Press 

 or 

 to select “Add/Delete”, then press 


or 

ENTER

.

3

Press 

 or 

 to select “Clear All”, then press 

 or 

ENTER

.

Add/Delete

Adding Channel

>>

Clear All

>>

Add/Delete

>>

ENTER :Set

:Select

CH

Checking the digital 

signal strength

This TV will allow you to view the digital signal 

meter for digital channels. 

1

Select “Channel”, then press 

 or 

ENTER

.

2

Press 

 or 

 to select “DTV Signal”.

3

Press 

 or 

ENTER 

to


check the digital signal 

strength.

The digital signal strength screen will appear.

If necessary, adjust the direction of the antenna to 

obtain the maximum signal strength.

Signal Level

0 50 

100

DTV Signal

CH

NOTE:

Signal meter feature is not available for analog 

channels.

After 240 seconds, DTV Signal screen will return to 

normal TV operation automatically.

Labeling channels

Channel label appear with the channel number 

display each time you turn on the TV, select a 

channel, or press DISPLAY.

You can choose any four characters to identify a 

channel.

To create channel labels

1

Select “Channel”, then press 

 or 

ENTER

.

2

Press 

 or 

 to select “Ch Label”, then press 


or 

ENTER

.

The Ch Label menu will appear.

3

Press 

 or 

 to select a channel you want to 

label, then press 

.

Ch Label

Label Clear

>>

Ch Label

Channel Number

15-1

CH-1

:Adjust

:Select

CH

4

Press 

 or 

 repeatedly until the character you 

want appears in the first space.

Label Clear

>>

Ch Label

Channel Number

15-1

Ch Label

CH-1

:Adjust

:Select

ENTER :Set

CH

The characters rotation as follows:

SPACE

-

      , () @ / + = 

-

If the character which you desire appears, press 

ENTER

.

Repeat this step to enter the rest of the characters.

If you would like a blank space in the label name, 

you must choose the empty space from the list of 

characters.

5

Repeat steps 3-4 for other channel. You can 

assign a label to each channel.

6

When you finish inputting the label name, press 

EXIT 

to return to the normal screen. 

To clear a Ch Label

After step 3 above, press 

 or 

 to select “Label 

Clear”, then press 

 or 

ENTER

.

NOTE:

The channel labels will be reset after “Automatic 

Search” on page 18.

Labeling video inputs

The Video Label feature allows you to label each 

input source for your TV.

1

Select “Setup”, then press 

 or 

ENTER

.

2

Press 

 or 

 to select “Video Label”, then press 

 or 

ENTER

.

3

Press 

 or 

 to select an input which you want to 

label.

4

Press 

 or 

 to select the desired label for that 

input source.

Component

-

HDMI

-

PC

-

Video Label

Video

-

:Adjust

:Select

 / VCR / DVD / STB / Cable / Satellite / Receiver / 

Game / Camcorder / PC / DVI PC / Blu-ray

57B0721A_eng.indd   19

57B0721A_eng.indd   19

4/2/11   10:43:06 AM

4/2/11   10:43:06 AM

Summary of Contents for SLEDVD196

Page 1: ...n mode If not using Cable TV set this menu option to the Air position Lorsque l appareil sort de l usine l option Signal Type est en mode Cable c blodistribution Si vous n utilisez pas la c blodistrib...

Page 2: ...SHOCK HAZARD DO NOT EXPOSE THIS APPLIANCE TO RAIN OR MOISTURE TO PREVENT THE SPREAD OF FIRE KEEP CANDLES OR OPEN FLAMES AWAY FROM THIS PRODUCT AT TIMES CAUTION TO PREVENT ELECTRIC SHOCK DO NOT USE THI...

Page 3: ...harges Section 810 of the National Electrical Code ANSI NFPA 70 provides information with respect to proper grounding of the mast and supporting structure grounding of the lead in wire to an antenna d...

Page 4: ...is may cause skin inflammation If the liquid gets in your mouth immediately gargle and consult with your doctor Also if the liquid gets in your eyes or touches your skin consult with your doctor after...

Page 5: ...mages This type of damage is NOT COVERED BY YOUR WARRANTY Never leave your LCD Panel on for long periods of time while it is displaying the following formats or images Fixed Images such as stock ticke...

Page 6: ...s shown in figure 1 Finally secure the bottom plate with 2 screws supplied as indicated by the arrows in figure 2 Be sure to follow the instructions Insufficient tightening or incorrect installation o...

Page 7: ...Zoom You can zoom in the selected subject on the screen during playback Note Make sure that discs are suitable for the following functions Multi Language Maximum 32 language subtitles and maximum 8 l...

Page 8: ...o inputs 19 Setting the V Chip 20 Closed Caption 21 CC advanced 21 Setting the picture size 22 DVD operation Preparation 23 Status display of disc 23 Playback procedure 23 Special playback 24 Zooming...

Page 9: ...gion number 1 or ALL of DVD video discs can be used on this unit Title When two or more movies are recorded on a disc the disc is divided into two or more sections Each section is called a TITLE Chapt...

Page 10: ...as Files with extensions jpg or JPG can be played Progressive JPEG formatted files do not work It may take some more time to start to play larger files than usual JPEG files with different aspect rati...

Page 11: ...buttons VOL VOLUME buttons and INPUT ENTER button can be used to select the desired setting during the menu screen operations AC INPUT jack PC DVI AUDIO IN jack VIDEO IN jacks VIDEO AUDIO L MONO R COM...

Page 12: ...the menu EXIT CANCEL Exit from On Screen menu Reset information in the menu TOP MENU Select title SEARCH Fast Forward Review playback PLAY Playback SKIP Skip chapter to forward or reverse direction SU...

Page 13: ...le Ni Cd Ni MH etc batteries Remove batteries if the remote control will not be operated for an extended period of time Power source TO USE AC POWER Connect the AC cord plug into this unit s AC INPUT...

Page 14: ...subscribers to unscrambled Cable TV service with scrambled premium channels If you subscribe to a Cable TV service in which basic channels are unscrambled and premium channels require the use of a Co...

Page 15: ...on will be delayed for a few seconds TO SELECT ANALOG CHANNELS 1 9 Press 1 9 as needed Example to select channel 2 press 2 then press ENTER 10 99 Press the 2 digits in order Example to select channel...

Page 16: ...ound will be silenced and Mute will appear on the screen The sound can be switched back on by pressing this button again or the VOL or SLEEP To set the TV to turn off after a preset amount of time pre...

Page 17: ...P containing a second language or other audio information When the TV receives a stereo or SAP broadcast the word Stereo or SAP displays on screen every time you press DISPLAY Surround On Off The dyna...

Page 18: ...vance for several minutes please be patient NOTE Memorizing channels is best accomplished during evening PRIMETIME hours as more stations are broadcasting digital signals Memorizing channels can only...

Page 19: ...ENTER The Ch Label menu will appear 3 Press or to select a channel you want to label then press Ch Label Label Clear Ch Label Channel Number 15 1 CH 1 Adjust Select CH 4 Press or repeatedly until the...

Page 20: ...ou select TV Y7 TV PG TV 14 or TV MA press DISPLAY to explain the rating Genre D Dialogue L Language S Sex V Violence FV Fantasy Violence Movie Rating G PG PG 13 R NC 17 X Movie Rating ENTER Set Selec...

Page 21: ...ENTER The Closed Caption menu will appear 3 Press or to set CC Setting to On On Captions will be displayed on the screen Off Captions will not be displayed on the screen 4 Press or to select Analog C...

Page 22: ...ll 3 Cinema Wide3 NOTE Selectable picture sizes may vary depending on the input source or broadcast signal Picture Size menu also can be displayed by pressing SCREEN SIZE on the remote control Natural...

Page 23: ...a single faced disc label downwards i e the wrong way up Loading will appear on the display and then Can t play disc will be displayed Some playback operations of DVDs may be intentionally fixed by s...

Page 24: ...of the frame 1 Press ZOOM during playback The center part of the image will be zoomed in Each press of ZOOM will change the ZOOM magnification Zoom 2 and Zoom 4 2 Press to view a different part of the...

Page 25: ...DVD Changing soundtrack language You can select the language when you play a multilingual disc 1 Press AUDIO during playback The current soundtrack language will appear Current Total Audio 1 2 English...

Page 26: ...e screen will appear A Start Point B End Point Off A B Repeat Repeat Random Program Search Mode Play Mode 2 Press to select A B Repeat then press or ENTER 3 Press to select A Start Point then press EN...

Page 27: ...ode in HOME MENU Locating desired scene 1 Press PLAY MODE during playback or stop mode Play Mode screen will appear 2 Press to select Search Mode then press or ENTER 3 Press to select desired search m...

Page 28: ...est part and the darkest part Gamma Emphasize dark part of images Hue Adjust a balance between green and red Chroma Level Adjust color density It is effective with animation or something with high col...

Page 29: ...the image fills the screen 16 9 Wide Set if you have a widescreen TV Language settings Audio Language English French Spanish If there is an English French or Spanish soundtrack on the disc then it wi...

Page 30: ...Password Change Level Change Country Code 2 Press Number buttons 0 9 to input the current password then press ENTER Digital Audio Out Video Output Language Display Options 1 2 3 4 5 6 7 8 Off Initial...

Page 31: ...Moldavian mo 1315 Marathi mr 1318 Malay ms 1319 Maltese mt 1320 Burmese my 1325 Nauru na 1401 Nepali ne 1405 Norwegian no 1415 Occitan oc 1503 Oromo om 1513 Oriya or 1518 Panjabi pa 1601 Polish pl 161...

Page 32: ...gnals and 480p 720p progressive signals To connect the TV to a camcorder or a game console To playback from a camcorder connect the camcorder to the unit as shown This unit can also be used as a displ...

Page 33: ...ut of your Multimedia computer and to the AUDIO IN connector of the PC DVI AUDIO IN jack of the TV You can also connect the PC with HDMI cable If you use HDMI cable you don t have to connect the audio...

Page 34: ...een see page 17 Otherwise you will only see the image with no sound If you connect an external component cable box satellite receiver etc to this TV using an HDMI cable or a DVI to HDMI cable the imag...

Page 35: ...ARIATION A slight picture size variation is normal when you adjust the CONTRAST or BRIGHTNESS settings Most types of television interference can be remedied by adjusting the height and position of the...

Page 36: ...icture wobbles or drifts Station or Cable TV experiencing problems tune to another station Make sure channels are set into memory Cable TV company is scrambling signal Check antenna orientation 15 18...

Page 37: ...ram play etc cannot be performed Some discs may not allow some functions No surround sound The setup does not match your stereo system 33 The unit or remote operation key is not functioning Turn off t...

Page 38: ...1080i 1080p HDMI Audio 2 channel PCM 32 44 1 48 kHz sampling frequency 16 20 24 bits per sample PC Monitor Mini Dsub 15pin Antenna VHF UHF In 75 ohms coaxial Output Digital audio out 0 5 V p p 75 ohm...

Page 39: ...ufacturers This warranty does not cover a Damage to video disc b Damage to equipment not properly connected to the product c Costs incurred in the shipping of the product to an ORION authorized Indepe...

Reviews: