background image

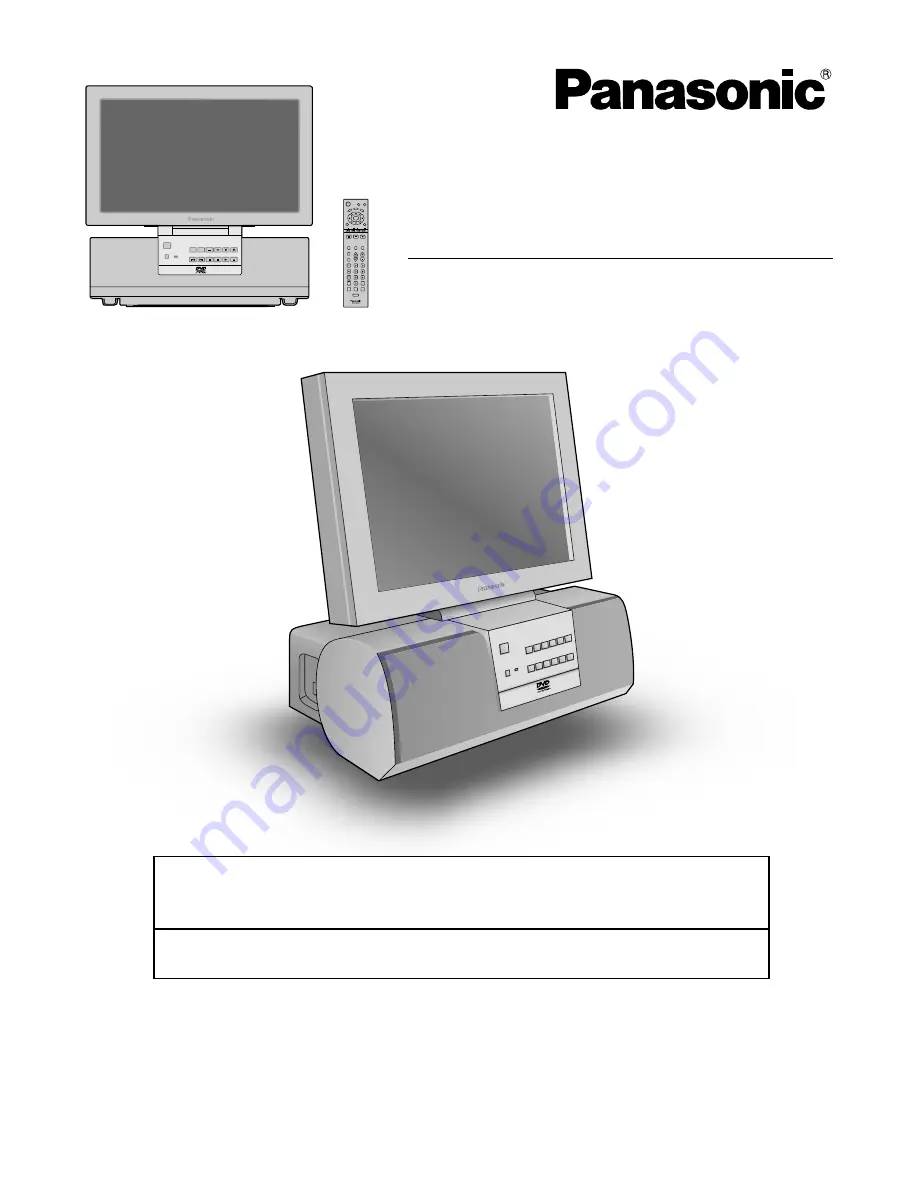
Combination 15.2˝ LCD

 TV/DVD  Player

Operating Instructions

TC-15DT2

Model No.

TQBC0256

Before connecting, operating or adjusting this product, please read these instructions completely. Please keep this

manual for future reference.

G-PO

WER 

ASPE

CT

R-STA

NDBY

ON

POW

ER

INPU

T

VOLU

ME

CHAN

NEL

TC-1

5DT2

G-POWER 

POWER

OPEN

/CLOSE DISPALY

TO

ME

NU

ANGLE

DV

D

ME

NU

ENTER

TV      
MENU

RETURN

SKIP

SLOW

/SEARCH

STOP

PAUSE

PLAY

ASPECT TV/VIDEO

MUTE

SLEEP

CH

VOL

SURROUND

CANCEL

REPEAT MODE A-B REPEAT PLAY MODE

R-TUNE

ASPECT

R-STANDBY

ON

POWER

INPUT

VOLUME

CHANNEL

TH-15DT1

This manual is divided into two parts, the “Install and TV Adjusts” and “DVD Operation Guide” :

Install and TV Adjusts: Details on installation of the unit and adjustments to achieve optimum quality of the TV.

DVD Operation Guide: Details on operating instructions for playing disks such as DVDs and CDs.

For assistance, please call : 1-800-211-PANA (7262)

or send e-mail to : [email protected]

or visit us at www.panasonic.com                                (U.S.A)

For assistance, please call : 787-750-4300

            (Puerto Rico)

Summary of Contents for TC15DT2 - 15"WIDE LCD TV

Page 1: ... VIDEO MUTE SLEEP CH VOL SURROUND CANCEL REPEAT MODE A B REPEAT PLAY MODE R TUNE ASPECT R STANDBY ON POWER INPUT VOLUME CHANNEL TH 15DT1 This manual is divided into two parts the Install and TV Adjusts and DVD Operation Guide Install and TV Adjusts Details on installation of the unit and adjustments to achieve optimum quality of the TV DVD Operation Guide Details on operating instructions for play...

Page 2: ...s apparatus during lightning storms or when unused for long periods of time This will prevent damage to the receiver due to lightning and power line surges 13 Refer all servicing to qualified service personnel Servicing is required when the apparatus has been damaged in any way such as power supply cord or plug is damaged liquid has been spilled or objects have fallen into the apparatus the appara...

Page 3: ...eplacement parts specified by the manufacture that have the same characteristics as the original part Unauthorized substitutions may result in fire electric shock or other hazards 21 WARNING TO REDUCE THE RISK OF FIRE OR ELECTRIC SHOCK DO NOT EXPOSE THIS APPARATUS TO RAIN OR MOISTURE 22 CAUTION TO PREVENT ELECTRIC SHOCK DO NOT USE THIS PLUG WITH A RECEPTACLE OR OTHER OUTLET UNLESS THE BLADES CAN B...

Page 4: ... OF THIS PLAYER USE OF CONTROLS OR ADJUSTMENTS OR PERFORMANCE OF PROCEDURES OTHER THAN THOSE SPECIFIED HEREIN MAY RESULT IN HAZARDOUS RADIATION EXPOSURE DO NOT OPEN COVERS AND DO NOT REPAIRYOURSELF REFER SERVICING TO QUALIFIED PERSONNEL CLASS 1 LASER PRODUCT Federal Communication Commission Information This equipment has been tested and found to comply with the limits for a TV Broadcast Receiver p...

Page 5: ...D on this Product 38 Enjoying digital audio output from the digital audio output connector 39 Location of Controls for DVD Operation 40 Basic play 42 Recalling clearing a marker 42 Stopping play 43 Skipping chapters or tracks 44 Still picture Pause 44 Rapid advance Rapid reverse 44 Frame advance Frame reverse DVD Video CD 45 Slow motion play DVD Video CD 45 Cancelling playback control Video CD 45 ...

Page 6: ...ht Handling precautions Hold the disc by the edges so the surface will not be soiled with fingerprints Fingerprints dirt and scratches can cause skipping and distortion Do not write on the label side Do not use record cleaning sprays benzine thinner static electricity prevention liquids or any other solvent Be careful not to drop or bend the disc Do not install more than 1 disc on the disc tray Do...

Page 7: ...s be replaced as a pair Always use new batteries when replacing the old set 2 Do not combine a used battery with a new one 3 Do not mix battery types example Zinc Carbon with Alkaline 4 Do not attempt to charge short circuit disassemble heat or burn used batteries 5 Battery replacement is necessary when remote control acts sporadically or stops operating this unit Helpful Hint For frequent remote ...

Page 8: ...mbled channels A cable converter box is required for proper reception Check with your local Cable company for its compatibility requirements Connecting the Antenna Cable to the RF In Terminal DC IN 15V ANT UHF Antenna RF In Terminal VHF Antenna Mixer 75 Ohm Coaxial Cable Coaxial Antenna Plug DVD DIGITAL AUDIO OUT PCM BITSTREAM OPTICAL Antenna Connection For proper reception of VHF UHF channels an ...

Page 9: ...ofthe VCR to the Antenna input terminal on the left side of theTV Connect the cable from the Output terminal on the back of the Cable Box to the Antenna input terminal on the back of the VCR ANTENNA TERMINALS ON THE LEFT SIDE OF THE TV VCR CABLE BOX TERMINAL ON THE BACK OF THE CABLE BOX Incoming Cable from Antenna or Cable TV System OUTPUT INPUT ANT ANT OUTPUT INPUT TO VCR Connect the cable from t...

Page 10: ...udio OUT Video OUT S Video OUT R L Super VHS VCR L R AUDIO S VIDEO VIDEO FRONT L R SURROUND L R CENTER SUBWOOFER 5 1 ch SURROUND AUDIO OUT VIDEO IN MONITOR OUT S VIDEO cable VIDEO AUDIO Connects VCRs and other peripheral equipment Connect the S VIDEO or VIDEO Terminal Audio INPUT Video IN S Video IN R L Recording Equipment VCR L R AUDIO S VIDEO VIDEO FRONT L R SURROUND L R CENTER SUBWOOFER 5 1 ch ...

Page 11: ...V amplifier with 5 1ch AUDIO OUT connectors you can enjoy multi channel audio of CDs recorded in dts as well as DVDs L R AUDIO S VIDEO VIDEO FRONT L R SURROUND L R CENTER SUBWOOFER 5 1 ch SURROUND AUDIO OUT VIDEO IN MONITOR OUT FRONT L R SURROUND L R CENTER SUBWOOFER Direction of signal flow To audio input connectors SUBWOOFER To audio input connectors CENTER To audio input connectors FRONT L R To...

Page 12: ...cable Remove the dust protection cap from the digital audio output connector and connect the cable firmly so that the configurations of both the cable and the connector match Keep the dust protection cap and reattach when not using the connector DC IN 15V ANT Dust protection cap MD player recorder Audio system equipped with optical audio connector DVD DIGITAL AUDIO OUT PCM BITSTREAM OPTICAL DVD DI...

Page 13: ...on Green Turn the power to the TV set off by pressing the POWER switch on the TV when the TV is on or in standby mode How to Turn the Power On ASPECT R STANDBY G POWER ON POWER TV VIDEO VOLUME CHANNEL TC 15DT2 R STANDBY G POWER ON POWER TC 15DT2 DISPLAY TOP MENU ANGLE DVD MENU RETURN SKIP STOP PAUSE PLAY TV MENU ENTER SLOW SEARCH OPEN CLOSE POWER POWER CH 6 STEREO SAP MONO NORMAL DC IN 15V ANT 2 2...

Page 14: ...on OPEN CLOSE button POWER switch Remote control sensor SLEEP timer button The LCD TV may be preset to switch to stand by after a fixed period The setting changes to 30 minutes 60 minutes 90 minutes and 0 minutes off timer cancelled each time the button is pressed When three minutes remain 3 will flash The off timer is cancelled if the main power turn off Starting three minutes before the power is...

Page 15: ...und Press again to reactivate sound Sound is also reactivated when power is turned off or volume level is changed TV VIDEO button This input mode changes each time this button is pressed see page 20 ASPECT button Change of screen size see page 23 NORMAL JUST FULL ZOOM Stand by ON OFF button The television receiver must first be plugged into the wall outlet and turn on at the power switch see page ...

Page 16: ...ENU screen will be displayed If the MENU button is pressed once more while the menu screen is displayed the MENU screen will be cleared MENU ADJUST PICTURE AUDIO PICTURE ADJUST POSITION SIZE AUDIO ADJUST SET UP MENU ADJUST PICTURE AUDIO PICTURE ADJUST POSITION SIZE AUDIO ADJUST SET UP Select MENU desired by pushing Right button or Left button 1 2 ENTER ENTER MENU ADJUST SET UP PROGRAM CH DVD SET U...

Page 17: ...u Language English 4 On Screen Messages 5 TV Aspect 16 9 6 Digital Audio Output 7 Speaker Setting 9 Other Settings 0 Exit CHANGE SETTING LOCK MOTION PICT OFF ON CHANGE SETTING TV PARENTAL OFF ON ENTER CODE FIRST See page 30 TO VIDEO INPUT LABEL selection screen INPUT LABEL VIDEO VIDEO See page 33 TO OTHER ADJUST screen OTHER ADJUST NATURL CLR VIDEO NR 3D Y C ID 1 IMAGE ADJ CHILD LOCK 1 2 OFF ON OF...

Page 18: ...l 69 is displayed channel 125 for cable TV 3 Press to select AUTO PROGRAM Press to display the confirmation screen 4 Press to select YES Press to run AUTO PROGRAM Press the TV MENU button to display the MENU screen and select SETUP ENTER ENTER ENTER ENTER 5 Channels will automatically advance until all channels have been scanned Channel numbers with a video signal present will turn light blue Whic...

Page 19: ...channel or number keys 4 5 Press to add channels to memory blue Press to select channel Press to delete channels from memory yellow Press to select PROGRAM CH Press to display the PROGRAM CH Press the TV MENU button to display the MENU screen and select SETUP ENTER ENTER 3 ENTER 6 7 Repeat steps 4 and 5 to continue adding or deleting channels Press the TV MENU button to exit the set up menu ENTER ...

Page 20: ...ions for details Note When the remote control is unavailable input modes can also be switched on the TV set using the TV VIDEO button TV VIDEO DVD CD Video camera DISPLAY TOP MENU ANGLE DVD MENU RETURN SKIP STOP PAUSE PLAY ASPECT MUTE SLEEP CH VOL SURROUND CANCEL REPEAT MODE A B REPEAT PLAY MODE R TUNE TV MENU ENTER TV VIDEO SLOW SEARCH OPEN CLOSE POWER L R AUDIO S VIDEO VIDEO FRONT L R SURROUND L...

Page 21: ...SPLAY SLOW SEARCH OPEN CLOSE POWER DISPALY The GUI menu bar for DVD operation is displayed by pressing the DISPLAY button when the above screen is displayed 1 1 1ENG ENG ON ON 1 ENG ENG LPCM LPCM 48k 16b 48k 16b 1 56 37 1 56 37 1 2 dB dB 0 OFF OFF OFF OFF 100 100 100 100 DISPLAY DISPLAY DISPLAY DISPLAY Press to GUI screen The GUI screen changes everytime the DISPLAY button is pressed Refer to DVD ...

Page 22: ... display the MENU screen and select SETUP 2 ENTER Press to select OTHER ADJUST Press to display the OTHER ADJUST screen MENU ADJUST SET UP PROGRAM CH DVD SET UP LOCK CLOSED CAPTION INPUT LABEL OTHER ADJUST 3 Press to select CHILD LOCK Press to set ENTER OTHER ADJUST OFF ON OFF ON OFF ON OFF ON OFF ON NATURAL CLR VIDEO NR 3D Y C ID 1 IMAGE ADJ CHILD LOCK 1 2 To end adjustment TV MENU Note The setti...

Page 23: ...ifies the central section of the picture FULL will display the picture at its maximum size but with sight elongation JUST mode will display a 4 3 picture at maximum size but with aspect correction applied to the center of the screen so that elongation is only apparent at the left and right edges of the screen The size of the picture will depend on the original signal NORMAL 3 4 ZOOM 4 3 FULL 4 3 J...

Page 24: ...d by the producer The adjusted setting will be kept even when the TV is turned off The signals output from the monitor output terminal on the right of theTV are not affected when the screen size and position are adjusted 1 2 ASPECT TV MENU Press to display the MENU screen POSITION SIZE NORMAL SIZE RETURN NORMALIZE 1 STOP PAUSE PLAY TV VIDEO MUTE SLEEP CH VOL SURROUND ASPECT Press to select POSITIO...

Page 25: ...IO SET UP PICTURE ADJUST POSITION SIZE AUDIO ADJUST ENTER 5 0 0 0 0 0 PICTURE ADJUST NORMAL PIC MODE BACK LIGHT PICTURE BRIGHTNESS COLOR TINT SHARPNESS AI PICTURE OFF ON STANDARD 5 0 0 0 0 0 PICTURE ADJUST NORMAL PIC MODE BACK LIGHT PICTURE BRIGHTNESS COLOR TINT SHARPNESS AI PICTURE OFF ON STANDARD See next page Press the left or right button to switch between modes STANDARD Displays unaltered ima...

Page 26: ...te colors clearer when turned ON Note There is little change when PICTURE is increased with a bright picture or reduced with a dark picture Picture Adjustments 5 0 0 0 0 0 PICTURE ADJUST NORMAL PIC MODE BACK LIGHT PICTURE BRIGHTNESS COLOR TINT SHARPNESS AI PICTURE OFF ON STANDARD ENTER To adjust each item Press the up and down button and make adjustments using the left and right buttons Select NOR...

Page 27: ...m Select the desired level by listening to the sound ENTER ENTER MENU ADJUST PICTURE AUDIO SET UP PICTURE ADJUST POSITION SIZE AUDIO ADJUST AUTO STANDARD DYNAMIC MUSIC 1 MUSIC 2 BASS Adjusts low sounds TREBLE Adjusts high sounds BALANCE Adjust left and right volumes SURROUND To enjoy a concert hall effect turn SURROUND to ON During stereo sound or soft playing Note When VSS is enabled during DVD m...

Page 28: ...zed separately for each SOUND mode AUTO STANDARD Even from the MENU screen the surround setting is possible Helpful Hints STEREO Two channel Audio reception SAP Second Audio Programming typically used for bilingual audio MONO Use when stereo signal is weak TV VIDEO MUTE SLEEP CH VOL ASPECT SURROUND SURROUND SURROUND Button The benefits of surround are enormous You can be completely enveloped in so...

Page 29: ...play the CLOSED CAPTION screen ENTER Press to select CC MODE Press to select from the following ENTER CAPTION OFF CAPTION C1 CAPTION C2 Recommended mode when Closed Caption is not being used For video related information that can be displayed up to 4 lines of script strategically placed on the television screen so that it does not obstruct relevant parts of the picture Another mode used for video ...

Page 30: ...place Note The V CHIP used in this unit model is capable of selecting the U S ratings that are indicated in this manual 1 Input code Enter any 4 digit number as a password These numbers will be needed when deactivating the LOCK function Press to select LOCK Press to display the LOCK screen DISPLAY TOP MENU ANGLE DVD MENU SKIP STOP PAUSE PLAY ASPECT TV VIDEO MUTE SLEEP CH VOL SURROUND CANCEL REPEAT...

Page 31: ...e PG Parental guidance suggested PG 13 Parental guidance needed under 13 years old R Restricted NC17 No one under 17 is admitted X Pornography 2 Selecting broadcasts to lock Press to select CHANGE SETTING the menu following MOTION PICT STATUS Press to display the MOTION PICTURE RATING screen CHANGE SETTING LOCK MOTION PICT OFF ON CHANGE SETTING TV PARENTAL OFF ON ENTER CODE FIRST ENTER ENTER Press...

Page 32: ... ON or OFF Changing setting Press to select CHANGING SETTING the menu following TV PARENTAL Press to display the TV PARENTAL GUIDE screen Setting the TV PARENTAL PROGRAMS screen VIEW NR PROGRAMS NO Cannot view programs with NR signals YES Can view programs with NR signal SETTING BASIC The up and down buttons change the selected title DETAILED The cursor selecting the title can be moved to select o...

Page 33: ... to select INPUT LABEL Press to display the VIDEO INPUT LABEL screen By pressing this button display changes as follows Press to end VIDEO VCR LD BLANK DTV DVD GAME This button rotates in reverse Note When DVD or DTV is selected for the change images are adjusted to match each input signal MENU ADJUST SET UP PROGRAM CH DVD SET UP LOCK CLOSED CAPTION INPUT LABEL OTHER ADJUST ENTER INPUT LABEL VIDEO...

Page 34: ...FILTER Selecting the VIDEO menu Press the TV MENU button to display the MENU screen and select SETUP ENTER MENU ADJUST SET UP PROGRAM CH DVD SET UP LOCK CLOSED CAPTION INPUT LABEL OTHER ADJUST OTHER ADJUST OFF ON OFF ON OFF ON OFF ON OFF ON NATURL CLR VIDEO NR 3D Y C ID 1 IMAGE ADJ CHILD LOCK 1 2 ENTER ENTER TV MENU OTHER ADJUST OFF ON OFF ON OFF ON OFF ON OFF ON NATURL CLR VIDEO NR 3D Y C ID 1 IM...

Page 35: ... 1 Press the MENU button to display the MENU screen and select SETUP Press to select OTHER ADJUST Press to display the OTHER ADJUST screen ENTER Press to select IMAGE ADJ Press to select 2 ENTER Press to select OTHER ADJUST Press to display the OTHER ADJUST screen ENTER 2 Press to end TV MENU ON When screen size specification signals are detected screen size is automatically changed OFF Thescreens...

Page 36: ...OCK 1 2 TV MENU Press to exit menu MENU ADJUST SET UP PROGRAM CH DVD SET UP LOCK CLOSED CAPTION INPUT LABEL OTHER ADJUST MENU ADJUST SET UP PROGRAM CH DVD SET UP LOCK CLOSED CAPTION INPUT LABEL OTHER ADJUST OTHER ADJUST OFF ON OFF ON OFF ON OFF ON OFF ON NATURL CLR VIDEO NR 3D Y C ID 1 IMAGE ADJ CHILD LOCK 1 2 ENTER Press to select OTHER ADJUST Press to display the OTHER ADJUST screen 2 ENTER Pres...

Page 37: ...DVD Operation Guide ...

Page 38: ... dts DVDs 2 channel or over with the dialogue contained in the center channel this function will boost the sound level of the center channel so that it is easier to hear the dialogue on movie software Graphical User Interface GUl screen See page 46 By simply pressing the DISPLAY button on the remote control information on the DVD Video CD CD player and disc can be displayed on the TV screen for ea...

Page 39: ... of noise that it may be harmful to your ears and damage your speakers Video CDs and CDs can be played as they would normally be played Manufactured under license from Dolby Laboratories Dolby Pro Logic and the double D symbol are trademarks of Dolby Laboratories Confidential Unpublished Works 1992 1997 Dolby Laboratories Inc All rights reserved Manufactured under license from Digital Theater Syst...

Page 40: ...es Selects groups Opens and closes disk tray on the set Displays disk information and settings when pressed during playback Displays the menu for DVDs with several menus Used to make selections SELECT Key adjustments and settings For fast forwarding or slow playback Plays the disk or turns the vocals ON and OFF for Karaoke Used to select menus songs set time and input passwords Selects still pictu...

Page 41: ...tton VOLUME up down button Selects channels in sequenc Turns power ON and OFF The remote control can be operated when this is ON Remote control sensor Power OFF with remote control Red Power ON with remote control Green Rewinds DVD disks and skips scenes during playback Fast forwards DVD disks and skips scenes during playback Stops operation of disk Pauses or stops playback of DVD disks Opens and ...

Page 42: ... a d i n g C l o s e O p e n 1 2 3 Press POWER to switch on the power See page 20 Recalling clearing a marker Press OPEN CLOSE to open the disc tray The disc tray is automatically closed and play begins When the disc tray is closed by pressing OPEN CLOSE press PLAY to start play When a menu screen appears on the TV monitor In the case of many movie DVDs an interactive DVD or Video CD with playback...

Page 43: ...ontinues to rotate while the menu is displayed even after the player has finished playing a particular item When no further selections are to be played be sure to press STOP to clear the menu display For your reference When appears on the TV monitor when a button is pressed the operation is prohibited by the player or disc Stopping play Press STOP during play RESUME function The player records the...

Page 44: ...ormal play is resumed when PLAY is pressed Example For your reference When SLOW SEARCH is used during menu play of Video CDs with playback control a menu screen may sometimes be recalled For DVDs and Video CDs audio will be heard during scanning forward direction only at the initial scan speed See page 64 For CDs audio will be heard during scanning at every scan speed 1 to 5 For dts CDs audio will...

Page 45: ...top playback and press DVD MENU Perform step 5 on page 43 Some movie discs may have two or more titles If the disc has a title menu recorded on it the TITLE button can be used to select the movie title The details of operation depend on the disc used PressTOP MENU during play A list of the titles on the disc is now displayed Pressing TITLE again resumes play from the scene when TITLE was first pre...

Page 46: ... will be registered immediately for others ENTER or PLAY must be pressed When numbers are displayed e g title No the numeric buttons are also effective for setting instead of the SELECT button When numbers are entered with numeric buttons press ENTER to register the setting Press RETURN to clear the GUI screen General information about GUI screens ANGLE SKIP STOP PAUSE ASPECT TV VIDEO MUTE SLEEP C...

Page 47: ...KOR Korean NLD Dutch MAL Malay SVE Swedish VIE Vietnamese NOR Norwegian THA Thai DAN Danish Other 96k or 48k 1ch 3 2 1ch 1ch 3 2 1ch 1ch 3 2 1ch OFF ON OFF V1 V2 V1 V2 16b 20b 24b Linear PCM k stands for kHz and d stands of bit Dolby Digital dts MPEG audio DVD Karaoke Solo DVD Karaoke Duet Subtitle language No See page 55 56 Sub language Subtitle on off Change the No with the SELECT buttonorthenum...

Page 48: ...k No with the SELECT button or the numeric buttons and press ENTER Track No Display is changed with the SELECT button Elapsed playing time Remaining time of the track Remaining time of the disc This function works with the following discs CDs Video CDs with playback control when menu play is cancelled Press STOP while the menu screen is displayed Video CDs which do not support playback control Ver...

Page 49: ...n at the preferred point to store a marker Marker no replaces To recall a marker select the marker no with the SELECT button and enter the selection with the SELECT button To clear a marker select the marker no with the SELECT button and press CANCEL Marker See page 51 Adjust the master volume with the SELECT button 0 to 127 dB or Master volume Select the mode during play with the SELECT button Vi...

Page 50: ...o CD CD Normal play Repeat of track being played Repeat of entire disc contents Cancel repeat mode Normal play OFF OFF T A Note Repeat play may not work correctly with some DVDs Repeat play does not work with an interactive DVD or during menu play of a Video CD with playback control Press REPEAT MODE during play Each time this button is pressed the TV monitor changes as shown below and the disc wi...

Page 51: ...r may fail to appear DVD These operations do not work with an interactive DVD or during menu play of a Video CD with playback control For your reference All the markers are cleared when the player is set to the standby mode or turned off or OPEN CLOSE is pressed 4 Press SELECT button to recall a marker or Press CANCEL to clear a marker Play resumes from the point corresponding to the selected mark...

Page 52: ...k Numeric buttons STOP CANCEL PLAY MODE PLAY Choose a track then press ENTER Press PLAY to start Track Time 1 2 3 4 5 6 7 8 Clear Total time Clear all 5 55 5 55 1 Choose a track then press ENTER Press PLAY to start Track Time 1 2 3 4 5 6 7 8 Clear Total time Clear all The player plays the tracks on the disc in an order you specify Press PLAY MODE in the stop mode The program playback screen appear...

Page 53: ...ll and press SELECT The program is also cleared when the player is set to the standby mode or turned off or OPEN CLOSE is pressed Random play Video CD CD Press PLAY MODE twice in the stop mode The random playback screen appears on the TV monitor 1 To exit the screen Press PLAY MODE once The player plays the tracks on the disc in random order 2 Press PLAY Play now begins in random order After playb...

Page 54: ...Press DISPLAY during play to display the disk information The program playback screen appears on the TV monitor When no audio soundtrack is recorded will be displayed instead of the language number For your reference When the preferred language is not selected even after press the SELECT button several times it means that language is not available on the disc When the power is turned on or the dis...

Page 55: ...nguage item To clear display the subtitles Press the SELECT to select ON or OFF at step 2 For your reference When the preferred language is not selected even after press the SELECT several times it means that language is not available on the disc When the power is turned on or the disc is removed the language heard is the one selected at the initial settings If this language is not recorded on the...

Page 56: ...g stop mode Common procedures RETURN TV MENU 2 Press SELECT to select SETUP 3 Press SELECT to select DVD SETUP and press ENTER Initial Setting menu MENU ADJUST SET UP PROGRAM CH DVD SET UP LOCK CLOSED CAPTION INPUT LABEL OTHER ADJUST 4 Press SELECT to select the item and press ENTER Each screen for setting the value is displayed 1 Disc Languages 2 Ratings 3 Menu Language 4 On Screen Messages 5 TV ...

Page 57: ...mon procedures on page 56 Note If the language selected is not available on the disc the language designated by each disc will be selected Selecting disc language DVD At the initial settings screen on page 56 Press SELECT to select 1 Disc Languages and press ENTER 1 This is to select the audio soundtrack language subtitle language and the language used in title menus or the DVD menus which will al...

Page 58: ...s screen is displayed The rating is locked Any discs with a higher rating than the setting cannot be played back unless the password is entered When the player is locked The following screen appears when 2 Ratings is selected at the initial settings screen Ratings Enter your 4 digit password then press SELECT Press RETURN to cancel Press the SELECT button to select the level and press ENTER Level ...

Page 59: ...s will be displayed at a little lower position than the factory setting It is recommended to choose this setting if the screen is only partially displayed Initial settings Selecting On Screen Display Messages At the initial settings screen on page 56 Press SELECT to select 4 On Screen Messages and press ENTER 1 You can select whether Play Still and other displays will be displayed or not and the c...

Page 60: ... a conventional TV set is connected 2 16 9 Select when a wide screen TV set is connected Factory preset Setting is finished and the initial settings screen is displayed Initial settings DISPLAY ANGLE PAUSE ASPECT TV VIDEO MUTE SLEEP CH VOL SURROUND CANCEL REPEAT MODE A B REPEAT PLAY MODE R TUNE ENTER RETURN PLAY DVD MENU TOP MENU STOP SKIP TV MENU SLOW SEARCH OPEN CLOSE POWER SELECT For your refer...

Page 61: ...ing the original audio recording system if the DVD has not been copyright protected Factory preset 2 Yes During playback of DVDs recorded in 48 kHz or 96 kHz LinearPCM digitalaudioconvertedto48kHz 16bitisoutput Digital output of PCM audio is restricted to 48 kHz 16 bit or below for copyright protection When 2 Dolby Digital is selected 1 Bitstream 1 Dolby Digital bitstream 1ch 2 PCM 5 1ch is output...

Page 62: ...er Setting Exit Test 0 ms 0 dB 0 dB 0 dB 0 ms 0 dB Press RETURN to cancel Front L Large Small Center Large SmaIl No Center Delay time 0 ms Center Channel balance 0 dB Front R Large Small Exit Test signal Subwoofer Yes No Surround R Large Small No Subwoofer Channe balance 0 dB Surround L Large Small No Surround L Channel balance 0 dB Surround R Channel balance 0 dB Surround L R Delay time 0 ms 2 Pr...

Page 63: ...ROUND L FRONT L FRONT R SURROUND R CENTRE Centers approx 50 cm 1 3 ms speaker approx 100 cm 2 6 ms D2 approx 150 cm 3 9 ms approx 200 cm 5 3 ms Surround approx 200 cm 5 3 ms speakers approx 400 cm 10 6 ms D3 approx 600 cm 15 9 ms Speaker Difference between D1 and D2 D3 Delay time 4 Press SELECT to select Exit and press ENTER Setting is finished and the initial settings screen is displayed Playing ...

Page 64: ...e seen clearly when I Automatic is selected When 2 Audio during Search is selected 1 On Audio will be heard during search at the initial scan speed Factory preset 2 Off Select this setting when audio during search at the initial scan speed is not desired When 3 TV Mode 4 3 is selected 1 Pan Scan Wide screen video material will be played back in the pan and scan style on a conventional size TV Fact...

Page 65: ... type is computed by comparing the previous and subsequent I Picture or P Picture It has the lowest volume of information For your reference When the 2 On is selected at the 5 Still Picture Display the following screen is displayed in the still picture mode Field Half of the video information video signal in a frame is called a field With conventional TV systems a signal frame a single screen cons...

Page 66: ...Armenian Interlingua Indonesian lcelandic Italian Hebrew Japanese Yiddish Javanese Georgian Latin Ki rghiz Korean Kurdish Kashmiri Kannada Cambodian Greenlandic Kazakh Code 7678 7679 7684 7686 7771 7773 7775 7776 7778 7779 7782 7783 7784 7789 7865 7876 7869 7879 7982 8065 8076 8083 8084 8185 8277 8279 8285 8365 8368 8372 8373 Language Lingala Laotian Lithuanian Latvian Lettish Malagasy Maori Maced...

Page 67: ...of the screen is automatically eliminated so that the picture fills the whole screen Type of software TV set Screen mode 4 3 16 9 FULL mode 16 9 ZOOM mode 16 9 AUTO mode Wide screen pan and scan format Wide screen pan and scan format Software 4 3 Software 4 3 Letterbox Letterbox with black bands at top and bottom Screen horizontally enlarged with black bands at top and bottom Full screen Screen in...

Page 68: ... is turned on Are the batteries dead or inserted incorrectly Is the remote control sensor in direct light of florescent lamps or other strong sources of light Is the antenna cable connected properly When using a VCR and selecting channels on the TV is the TV VIDEO mode for the VCR set to TV Check cable signal connections or wire The image distorts when channels are changed When using 16 9 image so...

Page 69: ... French example No surround sound Checks Subtitles appear only with discs which contain them An alternative language is not selected with discs which do not contain more than one language In the case of some discs the alternative language cannot be selected Try selecting it from the DVD menu if one is available This function is dependent on software availability Even if a disc has a number of angl...

Page 70: ...d single layer 8 cm single sided single layer 8 cm single sided dual layer 8 cm double sided single layer Accessories Supplied Power Source AC 120 V 60 Hz Note Design and Specifications are subject to change without notice Weight and Dimensions shown are approximate Operating Conditions Temperature 42 F 95 F 5 35 C Humidity 20 80 non condensing Connection Terminals Dimensions W H D 15 24 387 mm 14...

Page 71: ......

Page 72: ... Secaucus New Jersey 07094 Panasonic Sales Company Division of Matsushita Electric of Puerto Rico Inc PSC Ave 65 de Infanteria Km 9 5 San Gabriel Industrial Park Carolina Puerto Rico 00985 Printed in Japan MBS0011S0 MS This product incorporates copyright protection technology that is protected by method claims of certain U S patents and other intellectual property rights owned by Macrovision Corpo...

Reviews: