


TowerSTOR TS4CT Introduction
Page 3
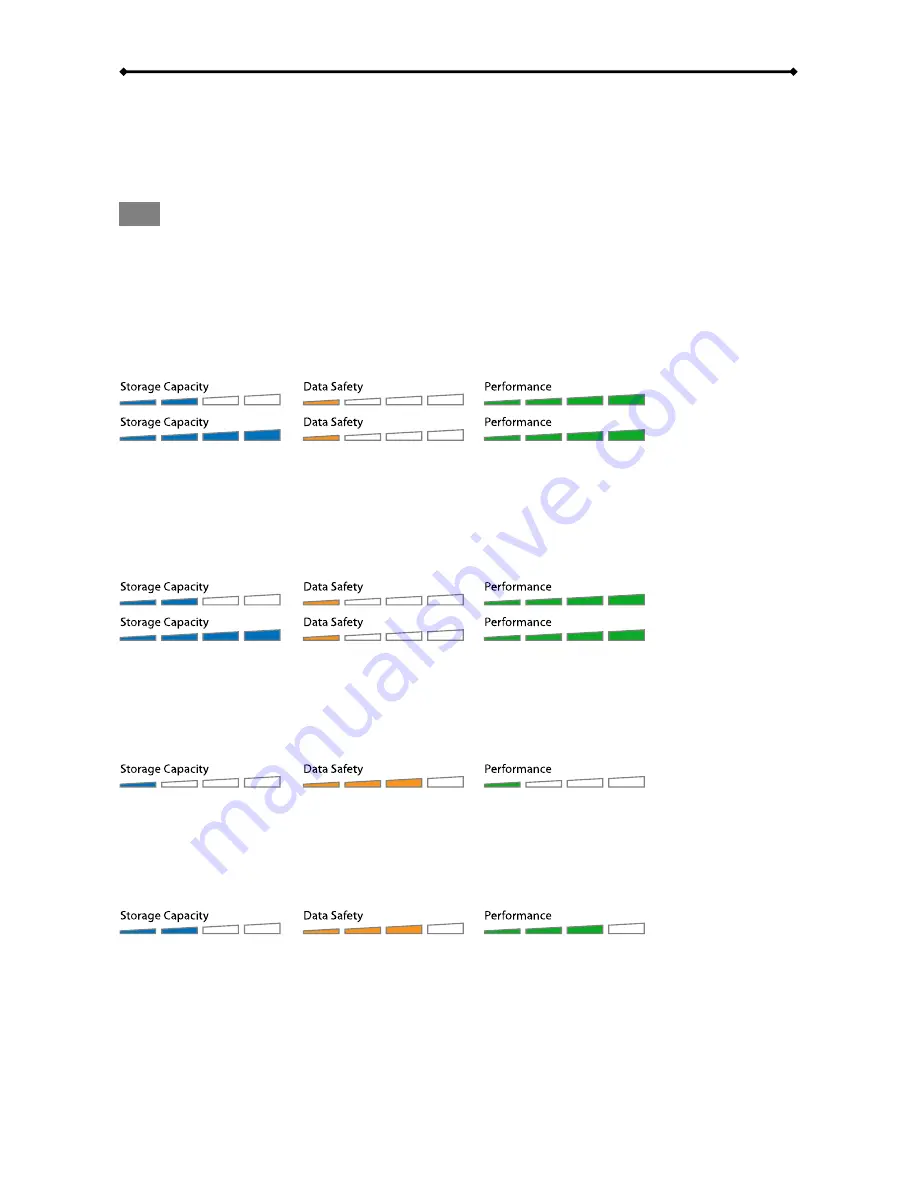
1.6 RAID Mode
Hard drives of identical capacities are recommended. If the capacities are different, the total
amount of the space that can be used will depend on the drive with the smallest capacity. The
difference in performance is only visible for fast interfaces like eSATA.
Note
Changing the RAID mode requires you to re-format the drives. This will erase all data on the hard
drives that are being formatted. Make sure to backup all existing data first!
1.6.1 Disk
Spanning
The drives show up as one large single volume but the total size will depend on the drive with the
smallest capacity. Spanning is an array (not RAID) that is written sequentially across the drives. By
itself, it does not provide any performance or redundancy benefits.
Æ
2 drives
Æ
4 drives
1.6.2 Disk Striping (RAID 0)
The drives show up as one large single volume but the total size will depend on the drive with the
smallest capacity. Used where speed is the primary objective but RAID Level 0 (also called striping)
is not redundant. This form of array splits each piece of data across the drives in segments. Since
data is written without parity data-checking, it allows for the fastest data transfer but if one drive
fails, the whole array can become corrupted.
Æ
2 drives
Æ
4 drives
1.6.3 Disk Mirroring (RAID 1)
The drives show up as one volume but only 50% of the total capacity, depending on the drive with
the smallest capacity, can be used. RAID 1 creates an exact copy (or mirror) of a set of data on the
second drive. This is useful when reliability and backup are more important than capacity. When
one drive fails, it can be replaced and the data rebuilt.
Æ
2 drives
1.6.4 Disk Mirroring with Striping (RAID 10)
The drives show up as one volume but only 50% of the total capacity, depending on the drive with
the smallest capacity, can be used. RAID 1 creates an exact copy (or mirror) of a set of data. This
is useful when reliability and backup are more important than data capacity. When one hard drive
fails, it can be replaced and the data rebuilt automatically.
Æ
4 drives


