23
the left heater bench .Continue to install right and left benches. Be careful not to scratch the
adjacent panels when sliding in the bench. Push the benches all the way in until they touch the
back panel and are securely in place.
6. Place the whole front panel onto the recessed area on the bottom panel. Align buckles both side
panels and secure in place by fastening them.
7. Put the top panel onto the assembled panels
。
(
1
)
.The top panel must be positioned so that cables on the top panel are in the front left corner
,
right above the CD Player.
(
2
)
.Gently place the top panel onto the rest of the assembled panels. When all corners are in
place, gently push down the top panel from the outside corners until it is snuggly fit over the rest
of the panels
(3).Make sure that the cables in the front left corners do not get pinched between the panels.
EXTERIOR LAMP SWITCH
To enjoy the deluxe exterior lamp, turn on the switch on the top left hand corner.
●●●
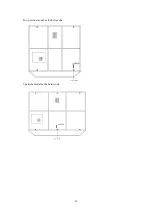
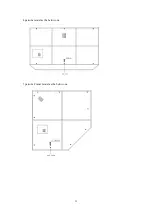
dust cover of roof
:
The pictures below are drawing of dust cover for sauna roof,
The solid cycles are the nail holes on the top panel of the sauna, need knocking in nails
(
Size:4-M4X30
)
. NOTE: one person models do not have nail holes on the saunas


