background image

8

※左 IH ヒーターでのみ使用できます。

● 加熱調理①~②同手順(P7)。

③ ブースターキー

を1秒以上押す。

(火力表示 LED が全点灯およびブースターランプ

が点灯する)

※ブースターによる連続加熱時間は、8 分間で、8 分以降は、自動的に火力「9」となり継続加熱されます。

④ 調理が終わったら、「0」キーを押して加熱を止める。

⑤ 使用後は、電源キー

を押し、電源を切る。

※本機器での炊飯調理は、「rC1(米:290g/水:350mℓ)」または「rC2(米:435g/水 530mℓ)」での調理設定となります。

(米や水の分量は目安です。なべの種類や米の品種などの条件により分量は変わる場合があります。)

● 加熱調理①~②同手順(P7)。

③ 炊飯キー

を 2 秒以上押す。

(表示 LED

が点灯します)

キー、

キーで炊飯プログラムを選択する。

⑤ プログラム選択後、約 5 秒後に火力表示 LED

が「5」まで、表示 LED

が点灯し炊飯を開

始します。

⑥ 炊飯調理終了後、ブザー音が鳴って自動的に通電が切れます。

※炊飯調理終了後、操作をしない場合、約 10 秒後自動的に電源が切れます。

● 加熱調理①~③同手順(P7)。

キーと

キーを同時に押す。

(表示 LED

が点灯します。)

例)右図は火力「7」の場合

キーと

キーで、時間を設定します。

最短 1 分から最長 9 時間 59 分まで設定できます。

キーと

キー同時押しで、設定時間をリセットできます。

⑥ 設定時間に達すると、ブザー音が鳴って自動的に通電が切れます。

高温注意表示(

)は、トッププレートが熱い間は表示します。

※タイマー調理終了後、操作をしない場合、約 10 秒後自動的に電源が切れます。

本機器でのタイマー調理は、加熱オフ調理の対応になります。

ブースター調理

炊 飯 調 理

タイマー調理

Summary of Contents for SIH-BH327BTW

Page 1: ...hat are Usable Pans Pots 7 How to Use Cooker 9 Troubleshooting 13 How to Take Care the Cooker 15 Installation Manual 16 Specifications 19 Thank you for purchasing the SANKAKOGYO Induction cooker Thoro...

Page 2: ...r treatment such as injury burn and electric shock Property damage refers to consequential damage concerning pet and the like WARNING Handling Do not put combustibles or flammables on to the cooker Do...

Page 3: ...pan pot at the center of the heating part CAUTION Handling As the top plate is hot during use or for a while after use do not touch it with your hand Do not use a pan pot in an unstable condition Do...

Page 4: ...Induction rice cooker on the top plate The magnetic field lines may cause such the cooker to fail After using clean the top plate after the top plate has cooled down Do not use the cooker with season...

Page 5: ...5 Names of Components Operation panel Body...

Page 6: ...rt is covered or for some other reason the heating power automatically decreases or the power supply stops If the temperature lowers to a normal temperature the heating power and the power supply will...

Page 7: ...to lower or disable heating depending on the pan pot type Multi layered pan pot and pan pot with attachment aluminum pans pots with stainless steel patch or the like attached on the bottom surface Dep...

Page 8: ...pans pots with enamel bottom surface in particular the enamel at the bottom may melt and bake causing the top plate to be damaged Shape Pans pots whose bottom diameter not pan pot nominal diameter is...

Page 9: ...shape and material of pan pot When the right and left Induction heaters are used at the same time there is a limit to the maximum heating power Refer to Heating power adjustment of Induction heater o...

Page 10: ...ding to the setting of rC1 rice 290 g water 350 ml or rC2 rice 435 g water 530 ml The amounts of rice and water are only guides They may vary depending on the pan pot type and rice variety Steps 1 to...

Page 11: ...timer if no operation has been made for about 10 seconds the power supply will be automatically turned off This function can be used even when the power is in OFF state Press the power consumption in...

Page 12: ...press the Operation lock key for two seconds or longer The key lock lamp goes off and all keys become operable Concerning the heating power adjustment of the right left Induction heaters the operation...

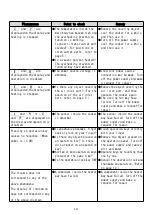
Page 13: ...eration has been made for a certain period the power supply stops Make an operation again The booster key does not operate Are you doing cooking by using the booster in succession Wait until the tempe...

Page 14: ...ain The cooling fan may have failed Turn off the power supply and make a request for repair and or and are displayed on the display and operation is disabled The sensor inside the cooker is abnormal T...

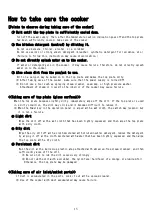
Page 15: ...interior of the cooker may cause failure Taking care of top plate glass surface When the top plate becomes slightly dirty immediately wipe off the dirt If the top plate is used in a dirty condition t...

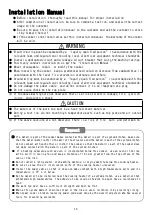
Page 16: ...the work top must be a heat resistant material During a test run do not touch high temperature parts such as top plate and air outlet port If the above cautions are not observed there is a risk of fi...

Page 17: ...circuit with breaker For safety please install an earth leakage breaker Use an appropriate electric wire for indoor wiring single wire with a diameter of 2 0 mm or more Wall outlet box type can use s...

Page 18: ...system kitchen Installation hole 20 or above flat part 100 or above 90 or above from device bottom face Side view simplified 20 or above flat part Distances from noncombustible wall and ceiling metal...

Page 19: ...stment range 90 to 2200 W adjustable in 9 steps Cooking timer Usable between the ranges of 1 minute to 9 hours 59 minutes Do not disassemble the top plate 1 Fit the main body unit in the installation...

Page 20: ......

Page 21: ...SIH BH327BTW 220V 2 4 5 6 7 10 12 13 16 SANKAKOGYO IH...

Page 22: ...2 1 2 3 1 2 3...

Page 23: ...3...

Page 24: ...4...

Page 25: ...5 LED 10 10 9 LED LED LED LED LED Hot 10 P 10 11...

Page 26: ...6 18 8 18 10 12 26 IH 12 2...

Page 27: ...7 IH IH IH 2 1 9 LED 10 7 1 2 3 4 5 6 7 8 9 Booster IH 85W 200W 360W 600W 860W 1170W 1510W 1910W 2200W 2870W IH IH P9 IH 0...

Page 28: ...8 IH P7 LED 8 8 9 0 C1 290 350 C2 435 530 P7 2 LED 5 LED 5 LED 10 P7 LED 7 1 9 59 10...

Page 29: ...9 OFF IH LED 1 kWh IH LED kWh IH 3520W IH 2 2 IH...

Page 30: ...10 2 2 2 LED P6 P6 LED 2 LED...

Page 31: ...11 LED P4 LED LED P4 LED ON 1 P9 LED...

Page 32: ...12...

Page 33: ...13 10 75...

Page 34: ...14 220V 20A 2 0 3 5mm2 250V 20A...

Page 35: ...15 100 70 0 0 100 5 5...

Page 36: ...16 SIH BH327BTW 220V 60Hz 3520 720 420 70 10kg 2 0mm2 3 EP 0 7 IH 2200 2870 90 2200 9 IH 2200 90 2200 9 1 9 59 220V 2 2 1...

Reviews: