background image

GB

80

Accessing your audio files via a UPnP server using 

Windows Vista and XP

If your computer is running Windows Vista or XP, then Windows Media 

Player version 11 includes a UPnP server which will make your files 

available to your radio. There are other UPnP server solutions available 

for non-Windows users and for Windows users who may wish to use 

an alternative (see the section of Use with Windows, Apple Mac and 

Linux).

It is beyond the scope of this instruction book to cover all possible 

options for UPnP. We explain the use of Microsoft's Windows Media 

Player here since that will be the first choice for the majority of users.

Set up UPnP access on a Windows PC

1.  If your PC is running Microsoft Windows Vista or Windows XP 

then you can use Microsoft's Windows Media Player version 11 

to act as your UPnP (Universal Plug and Play) media server. If not 

already installed on your PC, Windows Media Player 11 may be 

downloaded from Microsoft’s web site and installed by following the 

instructions detailed in its installation wizard, or by using Microsoft's 

Windows Update facility.

2.  Once installed, Windows Media Player 11 can create a library from 

all the media files available to it on your PC. To add new media 

files to the library, select the 'Library' tab, then 'Add to Library… > 

Advanced Options', click 'Add', choose the files you wish to add and 

click ‘OK’.

   The next step is to connect your radio to Windows Media Player 11 

and to configure the program to allow the radio to access your media 

library.

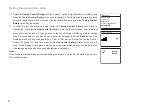
3.  Press the Standby button to switch the unit on. Then press the 

Mode

 button and rotate the 

Tuning Control Rotary

 as needed 

until the Music Player mode display is shown. Press the 

Tuning 

Control Rotary

 to select the option. The main 'Music Player' menu will 

then be displayed.

Set up UPnP access on a Windows PC - cont.

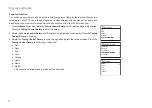
4.   Rotate  the 

Tuning Control Rotary

 until 'Shared media' is highlighted 

and press the 

Tuning Control Rotary

. The radio will scan for all 

available UPnP servers. It may take a few seconds for the radio 
to complete its scan. The radio will display '<Empty>' if no UPnP 
servers are found.

5.  After scanning, select your UPnP server using the 

Tuning Control 

Rotary

. If you are using WMP 11 as the server, your radio will then 

normally display 'Unauthorized - Select to retry' at this stage.

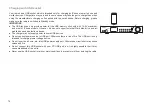
6.  Your PC may prompt you that there has been a connection to your 

UPnP server. Whether  prompted or not, in order that the radio may 

access the music files, you will need to click the 'Library' tab in WMP 

11 and select the 'Media Sharing…' item to open the 'Media Sharing' 
window. Make sure the box 'Share my media to:' is ticked.

7.  In the 'Media Sharing' window, the radio will be listed as an unknown 

device. Click on the unknown device shown to select it, then click the 
'Allow' button and then click 'OK'.

 Note:

   If you are using Microsoft Windows' firewall software, this should be 

correctly configured by WMP 11. If you are using third party firewall 
software you may need to manually configure it to allow your unit and 

WMP 11 to communicate.

8.  On the radio, select the named server again using the 

Tuning 

Control Rotary

. If WMP 11 is now able to communicate with your 

radio you will be presented with some media selection options on the 
display.

Summary of Contents for WFT-3

Page 1: ...WFT 3 Revision 4 GB ...

Page 2: ...he UNDOK App is available for Android and iOS You can easily control your device from your Smartphone or tablet with our full function UNDOK App to stream your favorite music or station Download and install free UNDOK App simply from the Apple iTunes App store or Android Google Play store to control your music now ...

Page 3: ...Windows 7 Play to function UPnP renderer 39 40 Using USB memory devices 41 42 DAB mode 43 49 Selecting a DAB radio station 44 Display modes 45 Finding new DAB radio stations 46 Manual Tuning 46 Dynamic Range Control Settings 47 Station order setup 48 Prune stations 49 FM mode 50 54 Manual tuning 50 Scan setting 52 Stereo Mono switching 53 Presetting stations in DAB and FM modes 54 Listening to Spo...

Page 4: ...long periods of time 14 Refer all servicing to qualified service personnel Servicing is required when the apparatus has been damaged in any way such as power supply cord or plug is damaged liquid has been spilled or objects have fallen into the apparatus the apparatus has been exposed to rain or moisture does not operate normally or has been dropped 15 To Reduce the Risk of Fire or Electric Shock ...

Page 5: ...2 data encryption then you either need to know the WEP WPA or WPA2 key used for encryption so you can get the internet radio to communicate with the network or your router needs to offer WiFi Protected Setup WPS If connecting using WiFi the internet radio will typically work within a 10 20 metre radio from your wireless access point The actual range achieved will depend upon the building type othe...

Page 6: ...wn button 11 Preset 5 Stop button 12 Preset 4 Play Pause button 13 Preset 3 14 Preset 2 Rewind button 15 Preset 1 Fast forward button 16 Remote control sensor 17 USB playback socket 18 Headphone socket 19 Telescopic aerial 20 Wi Fi antenna 21 Mains input socket 22 Coaxial output socket 23 Optical output socket 24 Ethernet socket 25 Line output socket 1 2 3 4 5 6 7 8 9 10 11 12 13 14 15 16 17 18 19...

Page 7: ...utton O Music player mode button P Internet radio mode button Q Spotify mode button R iPod mode button function not available S Aux in mode button function not available T Snooze button U DAB mode button V FM mode button W Repeat button X Sleep button Y Prev Next button Fast forward Rewind button Z Down arrow button Note Almost all functions that are available from the panel screen may also be per...

Page 8: ...ns require the user to make a selection from the menu Highlight the menu item using the Tuning Control Rotary on the rear of the radio Press the Tuning Control Rotary to select that item If there are more than five items in a menu then the display will automatically scroll up or down so that the additional items become visible If there are many items in a menu then the radio allows the menu to wra...

Page 9: ...te option for the clock will appear on the display The default of Update from Network will be the best option for most users 5 Rotate the Tuning Control Rotary to choose an auto update option for the clock This can be updated from DAB or FM radio from the Network or not updated The default is to auto update from the network If you choose any other option go to step 8 Otherwise you will first need ...

Page 10: ...o will attempt to connect If your network allows automatic configuration which is normal the radio will acquire a network address The screen should say Connecting and then Setup wizard completed Press the Select button to exit the setup wizard and show the main menu There are two indicator lights incorporated into the connector If you have problems with your wired connection they may help you to i...

Page 11: ...refer to your router s user documentation You should then press the Select button on the radio Skip WPS if you wish to enter the encryption key yourself or if it was previously Entered If you choose Push Button or PIN the screen will then show Connecting and then Setup wizard completed Press the Tuning Control Rotary to exit setup wizard 15 If your network is configured without an encryption key t...

Page 12: ...ey you must clear this by selecting the symbol This will remove the Set indication After the final character of the WEP or WPA key has been entered highlight the symbol and press the Tuning Control Rotary Then screen will show Connecting and then Setup wizard completed Press the Tuning Control Rotary to exit setup wizard The radio should now be able to connect to the network 18 Once you have conne...

Page 13: ...anual network configuration If you do not wish to use DHCP for automatic configuration or if your network is configured with a hidden SSID then you will need to enter some network settings manually Note a hidden SSID may prevent casual observers from detecting your network but is not recommended as a means of network security 1 From the radio Network settings menu select Manual settings You must t...

Page 14: ...lue and to move on to the next group Repeat this until all eight groups of digits have been entered 6 The next step is to set up the WiFi connection starting with the name of the wireless network SSID followed by the encryption options and password To enter the SSID characters are selected and entered using the Tuning Control Rotary The radio scrolls through the available characters as well as the...

Page 15: ...etween 8 and 63 characters and must be identical to the key which has been entered into your router Note the encryption key is sensitive to the use of upper and lower case letters and symbols Take care to enter the key exactly or the radio will not be able to connect to your router The three controls on the right hand side of the screen have special functions You can access these by rotating the T...

Page 16: ...them as presets within the radio or add them to a list of your favorite stations which your radio can access The number of presets is limited there are five presets in the radio but you can store as many favorites as you like You may search for an internet radio station by Location If you know the name of the station and the country from which a station is broadcast this may be the easiest method ...

Page 17: ...highlighted on the display and then press the Tuning Control Rotary Note that the menu may offer one or more local selections based upon the country in which the unit is being used according to your internet IP address United Kingdom and BBC stations for example 4 Rotate the Tuning Control Rotary until Location is highlighted on the display and then press the Tuning Control Rotary to select 5 Rota...

Page 18: ...annot connect to a radio station Note If your radio is unable to connect to an internet radio station it will generally either display Network Error or Stopped This can be for many reasons but typically will be due to one of the following The radio station may not be broadcasting at the present time The radio station may not be able to accommodate any more connections from internet listeners The b...

Page 19: ...d on the display and then press the Tuning Control Rotary 4 Rotate the Tuning Control Rotary to scroll through the list of content types This menu is normally cyclic you can scroll the list continually in either direction When the chosen genre is highlighted press the Tuning Control Rotary 5 You then have the choice of All Stations of the chosen genre or a list of countries Note if a country is no...

Page 20: ...he Info button to access the delete character on the screen and the character selection After the final character of the search has been entered use the Info button and then the Tuning Control Rotary to highlight the symbol on the screen and then press the Tuning Control Rotary to finish 5 The radio will search for radio stations that match your search data If you include a space between two searc...

Page 21: ...ed on the display and then press the Tuning Control Rotary 2 Rotate the Tuning Control Rotary until Stations is highlighted on the display and then press the Tuning Control Rotary 3 Rotate the Tuning Control Rotary until Popular stations or New stations is highlighted on the display Press the Tuning Control Rotary to enter your choice 4 Rotate the Tuning Control Rotary to highlight the station tha...

Page 22: ...rol Rotary 3 You may then search by location genre or using part of the name of the podcast The searches operate in exactly the same way as when searching for a conventional radio station Searching by location is done first by continent then by country You may then list All shows or search within a country by genre Searching by genre is more direct since once the genre is chosen the next menu disp...

Page 23: ...tion using one of the methods described on the preceding pages 2 To store the currently playing radio station as a preset press and hold the required Preset button 1 5 on the panel until the display shows Preset stored The station will be stored using the chosen preset button Repeat this procedure as needed for the remaining presets 3 Stations which are already stored in the presets may be over wr...

Page 24: ... radio mode press the Menu button The first item on the menu is Last listened With this item highlighted press the Tuning Control Rotary 2 The display will then show a list of the last ten Internet radio stations or podcasts Rotate the Tuning Control Rotary to highlight whichever you wish to listen to and then press the Tuning Control Rotary to cause your radio to reconnect to that radio station o...

Page 25: ...g line then the data stream reliability may be poor and you may find that there are many breaks in the audio this is not always the case for REAL audio streams f Date Displays the current date Additional or alternative information may be displayed when listening to Podcasts Categories displayable can include Episode name Show description Show genre Show language Episode URL Bit rate Codec Sampling...

Page 26: ...cess code This allows it to uniquely identify your internet radio from the many others that it also provides data for To obtain the access code please followthese steps 2 With your radio switched on and in Internet radio mode press the Menu button then select Station list using the Tuning Control Rotary 3 Scroll down the Station list menu to the item called Help Press the Tuning Control Rotary to ...

Page 27: ... account area To delete a favourite radio station click on the icon with a heart and minus symbol Configuring My Added Stations 1 If you wish to listen to a radio which is not a currently held in the database at http www wifiradio frontier com it is possible to add the details yourself You will need to obtain the internet address URL for the audio system for the station that you wish to add This m...

Page 28: ...ntil My Favourites is highlighted on the display Press the Tuning Control Rotary and your favorite stations list will appear on the display set up as described on the preceding page 4 Press the Tuning Control Rotary to highlight the required station and then press Tuning Control Rotary to confirm your selection The display will show Connecting while it finds the new station If the station has on d...

Page 29: ...tions do not broadcast 24 hours per day and some stations are not always on line In addition as mentioned in the previous section it is possible to specify audio streams for My added stations which are not compatible with your radio In this event the station will not be playable The Sangean WFT 3 can only play MP3 WMA AAC and Real Audio internet radio streams Note that the audio coding formats lis...

Page 30: ...efore streaming them to the radio Note that the playback of files encoded using WMA Voice WMA 10 Professional and for files which have DRM protection are not supported When using a UPnP server the search and selection criteria are determined by the server software but typically include Artist Album and Genre Many server applications also allow you to access your files according to the folders with...

Page 31: ...ia files available on your PC To add new media files to the library select Library then Music then All music or Artist Album etc This will show you the current library contents You may then simply drag and drop files from other locations into the library Alternatively with media files or folders on the screen you may right click on the file or folder and select Include in library and then select M...

Page 32: ...brary tab in WMP 12 and select the Stream item to open the Media Streaming window Select Automatically allow devices to play my media then select Automatically allow all computer and media devices Alternatively select More Streaming options to enable sharing on a per device basis 7 In the More streaming options window the radio will be listed as a blocked device Click on the button shown to select...

Page 33: ...deo content to suitable devices 4 The radio will now list the media categories which are made available by the UPnP server for example Album Artist and Genre Rotate the Tuning Control Rotary to highlight which category you wish to browse then press the Tuning Control Rotary to confirm your choice If you wish to use the search function rotate the Tuning Control Rotary until Search is selected on th...

Page 34: ... showing the tracks in that album or folder When searching by UPnP they will normally be listed in track number order but as with the search criteria this can vary according to the server application used 3 With the first track in the album indicated press the Tuning Control Rotary The album will then begin playing While the radio is playing from your media library you may use the menus as describ...

Page 35: ...from the point where it was paused 3 Press the Rewind button to start playback of the previous track in the list 4 Press the Fast forward button to start playback of the next track in the list 5 Press and hold the Fast forward or Rewind button to move through the current track The longer the button is pressed the greater the speed at which the player will move through the track Release the button ...

Page 36: ...utton to enter the main Music player menu Rotate the Tuning Control Rotary until Shuffle play is highlighted on the display Press the Tuning Control Rotary to turn on the shuffle function Your selected track will be shuffled and the shuffle indicator will show on the display 2 To turn off shuffle select the Shuffle play again If both Repeat and Shuffle playback options are activated then both Repe...

Page 37: ... UPnP server Your radio is able to display the album art for the track being played The ability of the radio to display art depends on the presence of the art in the fi le being played the art being not too large or being re sized by the server and the ability of the UPnP server to send the art to the radio Art sent to the radio needs to be in a JPEG format and no larger than 640 x 480 pixels If t...

Page 38: ... press and hold the Tuning Control Rotary and the display will show Added to My playlist 2 The track will be added to the playlist for playback later Adding an entire album or folder 3 When using a UPnP server highlight the chosen album artist or folder and press and hold the Tuning Control Rotary The display will show Added to My playlist 4 Each of the tracks within the album artist or folder sel...

Page 39: ...rol Rotary until My Playlist is highlighted on the display Press the Tuning Control Rotary button to enter the playlist 3 Rotate the Tuning Control Rotary until the track you wish to erase is highlighted Press and hold the Tuning Control Rotary 4 You will be asked to confirm the deletion To delete the track rotate the Tuning Control Rotary buttons until YES is highlighted on the display Press the ...

Page 40: ...otary until My playlist is highlighted on the display Press the Tuning Control Rotary button 3 To play the playlist from a particular track rotate the Tuning Control Rotary until the desired track is highlighted then press the Tuning Control Rotary to start play 4 While playing from the playlist you can use this function to jump to a particular track within the playlist While playing from the play...

Page 41: ...vers Your radio stores details of the UPnP servers that it has seen via its network connection in its internal memory If you use the radio at different locations you may find that there are servers listed by the radio that are no longer available The prune servers functions allows the list to be reinitialized so that only active UPnP servers on the currently connected network are shown when select...

Page 42: ...pple s iOS or Android operating systems In this mode the radio acts as a UPnP Renderer 1 In order to use the Play to function the radio must be actively connected to the network The first time that you use the Play to function you will need to allow Windows to recognize your radio To do this please go to step 2 If you have previously used Play to so that Windows remembers your radio and you have c...

Page 43: ...be added to the playlist in the current Play to window You may also delete or change the order of tracks within the Play to window 9 When you wish to exit DMR mode simply either switch off your radio or press the mode button to select a different operating mode Don t forget that in order to reselect the DMR mode and to be able to use Play to from Windows you must first ensure that your radio has a...

Page 44: ...o operate with the sound system However there are many different card variants available and not all cards can be guaranteed to work in the WFT 3 USB memory must use the FAT or FAT 32 filing system in order to operate in the WFT 3 Audio formats supported for playback are MP3 WMA AAC and WAV Playback does not support files encoded using WMA lossless WMA Voice WMA 10 professional nor files of any fo...

Page 45: ...te the Tuning Control Rotary to highlight the required folder and press the control to enter the current folder The list of tracks in the current folder will be displayed Alternatively if you have nested folders such as album folders within an artist folder then you will simply step to the next folder level 5 Rotate the Tuning Control Rotary to select the track and press the control to begin playi...

Page 46: ... increase and the stations will be added to the list which is stored in the radio The bar graph indicates the progress of the scan 5 When scanning is completed the radio will list the stations found in numeric alpha order 0 9 A Z unless it has previously been tuned to a DAB station Rotate the Tuning Control Rotary to scroll through the list of available DAB radio stations Press the Tuning Control ...

Page 47: ... not recently been detected by the radio It may still be available Secondary services Some DAB radio stations can have one or more secondary stations associated with them Typically these are not broadcast continually If a station has a secondary station available then the secondary will appear in the list of station names beneath the main or primary station Examples are the programs Daily Service ...

Page 48: ... strength graph can be used when positioning the radio or its antenna For good reception the graph should occupy three or more blocks e Bit rate and audio type Displays the digital bit rate and audio coding information for the station being listened to f Date Displays the current date A signal strength indicator is always shown in the lower area of the display on the right hand side If the broadca...

Page 49: ...at the display shows the DAB menu 2 Rotate the Tuning Control Rotary until Manual tune is highlighted 3 Press the Tuning Control Rotary to enter manual tune option 4 Rotate the Tuning Control Rotary to choose the required DAB channel 5 Press the Tuning Control Rotary to cause the radio to tune to the chosen channel When the radio has tuned the display shows the channel number and frequency and the...

Page 50: ...ghted on the display 5 Press the Tuning Control Rotary to enter the DRC adjustment mode The current DRC setting will be indicated with an asterisk 6 Rotate the Tuning Control Rotary to highlight the required DRC setting the default is Off DRC Off DRC is switched off Broadcast DRC will be ignored DRC high DRC is set as sent by broadcaster DRC low DRC level is set to 1 2 that sent by broadcaster 7 P...

Page 51: ... Rotary until Station order is highlighted Press the Tuning Control Rotary to enter the station order adjustment mode 5 Rotate the Tuning Control Rotary to choose between Alphanumeric Ensemble and Valid Alphanumeric sorts the station list alpha numerically 0 9 A Z Ensemble organizes the station list by DAB multiplex Valid shows only those stations for which a signal can be found The current settin...

Page 52: ...t the option 3 Press the Menu button to enter the DAB menu 4 Press the Tuning Control Rotary until Prune invalid is highlighted Press the Tuning Control Rotary 5 To cause the stations list to be pruned eliminating unavailable stations rotate the Tuning Control Rotary until YES is highlighted on the display 6 Press the Tuning Control Rotary to cause the invalid station names to be removed from the ...

Page 53: ...o repeat the scan operation To scan down in frequency rotate the Tuning Control Rotary in a anti clockwise direction first and then press the Tuning Control Rotary Your radio will scan down the FM band from the currently displayed frequency and will stop scanning when it finds a signal of sufficient strength 6 When the end of the waveband is reached your radio will recommence tuning from the oppos...

Page 54: ...hen the radio will only be able to display the frequency There will be no text or program type information available under these conditions The radio only provides displays when there is information available So if there is no text for example that display is not available The RDS indicator at the bottom of the display shows that there is some RDS data present in the broadcast being received The s...

Page 55: ...an setting is indicated with an asterisk 4 To set your radio so that only the stations with the strongest signals are found during scanning rotate Tuning Control Rotary until YES is highlighted Press the Tuning Control Rotary to confirm the setting Normally this will restrict scanning to local transmissions Alternatively to set your radio so that all available stations are found during scanning lo...

Page 56: ...etting is highlighted on the display Press the Tuning Control Rotary to enter the audio setting mode The current setting is indicated with an asterisk 4 To switch to mono in order to reduce the hiss from a weak FM signal rotate the Tuning Control Rotary until YES is highlighted Press the Tuning Control Rotary to confirm the setting Alternatively to return to the normal automatic stereo or mono mod...

Page 57: ...set button Repeat this procedure as needed for the remaining presets 4 Stations which are already stored in the presets may be over written by following the above procedure Note The radio station presets are retained in memory when the radio is switched off and disconnected from the mains supply Recalling a preset in DAB and FM modes 1 Press the Standby button to switch on your radio 2 Select the ...

Page 58: ...n this radio s power please refer to Configuration in the previous section Note It is necessary that your radio and your smartphone connect to the same wifi network so that you can find the radio on your smartphone or tablet later Ensure your radio has the Keep Network Connected option turned on to enable Spotify Connect to access the radio in Standby mode or non network mode DAB FM 2 Open Spotify...

Page 59: ...anufacture s support site as a firmware upgrade may be required 5 Control playback Use the controls on your Connect enabled device i e Smartphone tablet or controls on your radio to play or pause audio navigate tracks and control volume 6 Disconnect Spotify from your radio Press the icon and you will see your smartphone on the list press the item and Spotify will play via your smartphone In additi...

Page 60: ...lays the bit rate and sampling rate of the track currently playing e Playback buffer Displays the radios internal buffer level Note If the Audio streaming from Spotify Connect is interrupted or stopped e g control passed to another device the message Waiting for Users is displayed Spotify 14 51 Sweet Talker Artist Jessie J Spotify 1 2 8 7 Spotify 14 50 Sweet Talker Album Sweet Talker Deluxe Versio...

Page 61: ...e that your computer Smartphone is on the same network as the radio Enter the IP address noted above into the address bar of your web browser 2 When you enter the radio s configuration web page the top page allows you to choose the streaming quality 96k 160k 320k The selected streaming quality will be applied when your radio streams music from a new playlist of Spotify Friendly name Spotify Connec...

Page 62: ...n 1 With your radio switched on press the Menu button to access the menu for the current mode 2 Rotate the Tuning Control Rotary until System settings is highlighted on the display Press the Tuning Control Rotary to enter the system settings menu 3 Rotate the Tuning Control Rotary until Time Date is highlighted on the display Press the Tuning Control Rotary to enter the time setup 4 Rotate Tuning ...

Page 63: ...tate the Tuning Control Rotary until Set format is highlighted on the display Press the Tuning Control Rotary to enter the clock format menu The current clock display format is marked with an asterisk 5 Rotate the Tuning Control Rotary to select either 12 or 24 hour format Press the Tuning Control Rotary to confirm your choice of clock format The display will then revert to the previous menu If th...

Page 64: ...time go to step 13 To change the current time or date setting rotate the Tuning Control Rotary until Time Date is highlighted on the display then press the Tuning Control Rotary to enter the time and date setting screen 5 Rotate the Tuning Control Rotary until Set Time Date is highlighted on the display Press the Tuning Control Rotary to enter the clock setup The day digits will flash 6 Rotate the...

Page 65: ...ne which is applicable to your location then press the Tuning Control Rotary to confirm the setting 13 Rotate the Tuning Control Rotary until Daylight savings is highlighted on the display then press the Tuning Control Rotary The asterisk shows the current setting In the UK ON is equivalent to British Summer Time OFF is equivalent to Greenwich Mean Time 14 Rotate the Tuning Control Rotary to highl...

Page 66: ...il the desired alarm 1 or 2 is highlighted on the display Press the Tuning Control Rotary to enter alarm setup 4 Rotate the Tuning Control Rotary until Time is highlighted on the display Press the Tuning Control Rotary to adjust the alarm time 5 Rotate the Tuning Control Rotary to choose the alarm hour Press the Tuning Control Rotary to confirm the setting 6 Rotate the Tuning Control Rotary to cho...

Page 67: ... will disable the alarm Press the Tuning Control Rotary to confirm the selection If you choose to set the alarm to Once you will also need to set the date using the Tuning Control Rotary 8 The alarm can be set to buzzer Internet radio DAB radio FM radio For whichever radio mode is selected the radio alarm may be set to any of the stations which have been stored as presets or to the station most re...

Page 68: ...til Save is highlighted Press the Tuning Control Rotary to store the alarm settings Your radio will show Alarm saved and will then go back to the list of alarms with the new alarm setting shown in the display If you decide not to save the settings press the Back button The display will show Save changes with a YES or NO option Rotate the Tuning Control Rotary to choose NO and then press the Tuning...

Page 69: ...m is sounding the sound of the alarm will come out from your earphone Disabling alarms 1 To disable a single alarm enter the alarm setup menu and rotate the Tuning Control Rotary until the desired alarm is highlighted on the display Press the Tuning Control Rotary to confirm 2 Rotate the Tuning Control Rotary until the Enable option is highlighted on the display Press the Tuning Control Rotary 3 R...

Page 70: ... the Tuning Control Rotary to enter the setup Sleep off will appear on the display 3 Rotate the Tuning Control Rotary to select the desired sleep time The options are 15 to 90 minutes in 15 minutes increment Use the OFF option to cancel the sleep function 4 Your radio will switch off after the preset sleep time has elapsed 5 Your radio will switch into standby mode after the preset time has elapse...

Page 71: ...e setup Options for idle time will appear on the display 3 Rotate the Tuning Control Rotary to select the desired idle time Use the OFF option to cancel the inactive standby function 4 You radio will switch to standby mode when your radio idle for a preset period of time Mute function Press the Mute button on the radio or the remote control it will mute the output of the headphones 1 Press the Mut...

Page 72: ... is highlighted Press the Tuning Control Rotary to enter the setup 2 Rotate the Tuning Control Rotary until Equalizer is highlighted on the display Press the Tuning Control Rotary to confirm 3 Rotate the Tuning Control Rotary to cycle through and highlight the various modes Press the Tuning Control Rotary to confirm your selection a Flat b Rock c Pop d Jazz e Classic f News g Movie h My EQ The cur...

Page 73: ...ment mode and rotate the Tuning Control Rotary until the desired level between 10 and 10 is displayed The sound will change as you adjust the level Press the Tuning Control Rotary when you are happy with the treble setting 5 To adjust the loudness rotate the Tuning Control Rotary until Loudness is highlighted on the display Press the Tuning Control Rotary to enter the setting and repeatedly press ...

Page 74: ... brightness when the radio is in stanby Rotate the Tuning Control Rotary to select your option and press the Tuning Control Rotary to confirm your setting Language selection By default your radio will display all menus and messages in English You can choose your preferred language 1 Access the menu for the current mode by pressing the Menu button Rotate the Tuning Control Rotary until System setti...

Page 75: ...e sound pressure from earphones and headphones can cause hearing loss To prevent possible hearing damage do not listen at high volume levels for long periods Line out socket 3 5mm Jack A pair of Line out RCA jack located on the rear of your radio is provided for connecting the audio signal to an external amplifier The signal on the Line out socket is unaffected by the volume control Except Europea...

Page 76: ...aximum and most of iPhone models However it does not support external Hard disk drive and all mobile phones and electronic device The charger may not supply power to some USB devices Do not connect power source to USB port Otherwise there is risk of fire The USB port is only intended for charging lower voltage device Do not insert a nail wire etc into USB power supply port Otherwise a circuit shor...

Page 77: ...then press the Tuning Control Rotary to confirm the setting The display will revert to the previous menu 4 With YES highlighted a full reset will be performed and the radio will restart as if first plugged in The DAB stations list together with any preset stations will be erased and your wireless network connection details will be lost All configuration settings will be restored to their defaults ...

Page 78: ...ow and then press the Tuning Control Rotary to confirm the setting The radio will check to see if an update is available The display will show Checking for new versions If there are no updates then the display will show Software up to date If a software update is available your radio will then offer the choice of updating the software or not displaying New version available Update software Select ...

Page 79: ...ol Rotary to enter the settings menu 2 Rotate the Tuning Control Rotary until Network is highlighted on the display Press the Tuning Control Rotary to enter the Network settings menu 3 Rotate the Tuning Control Rotary until Network profile is highlighted on the display Press the Tuning Control Rotary to see the stored profiles The profile which is currently in use if any is marked with an asterisk...

Page 80: ...radio switched on and in the Internet Radio mode rotate the Tuning Control Rotary until Station list is highlighted on the display and the Tuning Control Rotary 2 Rotate the Tuning Control Rotary until Help is highlighted on the display Press the Tuning Control Rotary to enter the Help menu 3 Rotate the Tuning Control Rotary until FAQ is highlighted Press the Tuning Control Rotary to display some ...

Page 81: ...ess the Standby button to switch the unit on Then press the Mode button and rotate the Tuning Control Rotary as needed until the Music Player mode display is shown Press the Tuning Control Rotary to select the option The main Music Player menu will then be displayed Set up UPnP access on a Windows PC cont 4 Rotate the Tuning Control Rotary until Shared media is highlighted and press the Tuning Con...

Page 82: ...mes and protocols even within UPnP In general your radio will play the supported formats with most common UPnP servers Bit Rates The following table summarizes the maximum supported bit rates for the various audio formats that are playable on your radio Higher rates may be playable in some cases but performance of the product may be affected Codec Maximum supported rate AAC LC 320 kbits sec MP3 32...

Page 83: ... be restricted by covering it with items such as newspapers tablecloths curtains etc No naked flame sources such as lighted candles should be placed on the product It is recommended to avoid using or storing the product at extremes of temperature Avoid leaving the unit in cars on windows sills in direct sunlight etc The radio must be used in a moderate climate The apparatus shall not be exposed to...

Page 84: ...ith SP 40 speaker Headphone socket 3 5 mm diameter stereo Optical SPIDF output socket Coaxial SPIDF output socket Toslink RCA Line Out socket 3 5mm diameter subwoofer Aerial System DAB Telescopic aerial FM Telescopic aeria Maximum supplying power of USB socket 5V 1A If at any time in the future you should need to dispose of this product please note that Waste electrical products should not be disp...

Reviews: