background image

5

GB

   Snooze

. When the alarm sounds, press Snooze button or any 
    button other than the Standby button will silence the 
    alarm for 5 minutes. “SNOOZE’ will appear on the 
    display.

. To adjust the silence time for the snooze timer, press 
    and hold the Info/menu button to enter the menu 
    setting.

. Press the Tuning up/down button until “SNOOZE X” 
    appears on the display, then press the Select button 
    to enter the setting. Press the Tuning up/down button 
    to adjust the silence time. There are 5, 0, 5 and 0 
    minutes for the snooze timer.

4. To cancel the snooze timer while the alarm is suspended, 
    press the Standby button.

Summary of Contents for RCR-9

Page 1: ...Version 1 GB RCR 9...

Page 2: ...ing stations in AM FM mode 14 15 Recalling a preset in AM FM mode 15 Setting the time format 16 Setting the date format 17 Setting the clock time 18 21 Setting the alarm clock 22 23 When the alarm sou...

Page 3: ......
Page 4: ...ect button Band button Tuning up button Dimmer button upper part of the button Snooze button lower part of the button Tuning down button Standby button Sleep timer button Clock Volume control Speaker...

Page 5: ...tery indicator RDS indicator Sleep Snooze indicator Nap indicator Alarm 1 with buzzer alarm indicator Alarm 1 with radio alarm indicator Alarm 2 with buzzer alarm indicator Alarm 2 with radio alarm in...

Page 6: ...lug the adaptor into a standard 13 amp mains socket outlet The display will show time zone for a few seconds and then the display will ask you to set your time zone To set the time zone press the Tuni...

Page 7: ...used as the means of connecting the clock radio to the mains supply The mains socket used for the clock radio must remain accessible during normal use In order to disconnect the radio from the mains c...

Page 8: ...ess and hold the Tuning Up button Your radio will scan in an upwards direction low frequency to high frequency and stop automatically when it finds a station of sufficient strength 5 After a few secon...

Page 9: ...y to low frequency press and hold the Tuning Down button 8 When the waveband end is reached your radio will recommence tuning from the opposite waveband end 9 Adjust the Volume buttons to the required...

Page 10: ...na for FM reception 3 Press the Tuning Up Down button to tune to a station The frequency will change in steps of 50 kHz 100 kHz in FM or 9 kHz in AM 4 When the waveband end is reached the radio will r...

Page 11: ...o select 50 kHz 100 kHz for FM radio and 9 kHz 10 kHz for AM radio Then press the Select button to confirm the setting Display modes FM Your radio has four display modes for FM radio These use data pr...

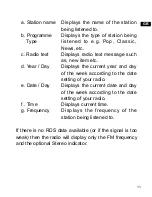
Page 12: ...Displays the current year and day of the week according to the date setting of your radio e Date Day Displays the current date and day of the week according to the date setting of your radio f Time Di...

Page 13: ...button to enter the menu setting 2 Rotate the Tuning up down button till the range of FM shows on the display Press the Select button to confirm the desired FM range FM range setting is then complete...

Page 14: ...e to the required FM radio station as previously described 3 Press and hold the Menu Info button to enter the menu setting 4 Press the Tuning up down button until FM AUTO or FM MONO shown on the displ...

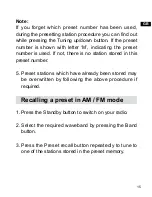
Page 15: ...t the desired waveband Tune to the required radio station as previously described 3 Press the Memo button and the letter M will be shown on the display 4 Press the Tuning up down button or the Preset...

Page 16: ...ber is used If not there is no station stored in this preset number 5 Preset stations which have already been stored may be overwritten by following the above procedure if required Recalling a preset...

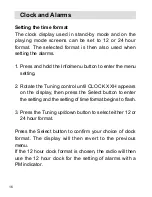
Page 17: ...2 Rotate the Tuning control until CLOCK XXH appears on the display then press the Select button to enter the setting and the setting of time format begins to flash 3 Press the Tuning up down button t...

Page 18: ...series digit for month date day shown on the display Press the Select button to enter the date format setting and the digit for month and date will flash 3 Press the Tuning up down button to select t...

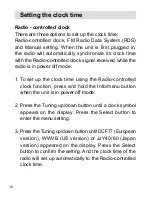
Page 19: ...e 1 To set up the clock time using the Radio controlled clock function press and hold the Info menu button when the unit is in power off mode 2 Press the Tuning up down button until a clock symbol app...

Page 20: ...nterval of 3 seconds 5 The radio will synchronize its clock time on the hour If the radio time has been synchronized with radio controlled clock time the radio controlled time icon will stay on the LC...

Page 21: ...down button until MANUAL appeared on the display then press the Select button to select the setting 3 Press and hold the Info menu button to enter the menu setting again Press the Tuning up down butt...

Page 22: ...l a clock symbol appears on the display Press the Select button to enter the setting 3 Press the Tuning up down button until RDS CT appears on the display Press the Select button to confirm the settin...

Page 23: ...button to select the required alarm hour and press the Select button to confirm the setting Press the Tuning up down button to select the required alarm minute and press the Select button to confirm t...

Page 24: ...he preset number on the display will begin to flash Press the Tuning up down to adjust the required radio frequency or the required preset number for the radio alarm then press the Select button to co...

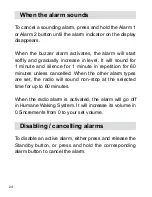
Page 25: ...r 1 minute in repetition for 60 minutes unless cancelled When the other alarm types are set the radio will sound non stop at the selected time for up to 60 minutes When the radio alarm is activated th...

Page 26: ...for the snooze timer press and hold the Info menu button to enter the menu setting 3 Press the Tuning up down button until SNOOZE X appears on the display then press the Select button to enter the set...

Page 27: ...n and the Sleep Timer options will start switching on the display Stop until the required Sleep Timer setting appears on the display The setting will be saved and the LCD will return to normal display...

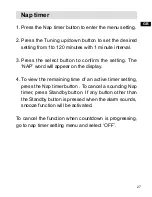
Page 28: ...confirm the setting The NAP word will appear on the display 4 To view the remaining time of an active timer setting press the Nap timer button To cancel a sounding Nap timer press Standby button If a...

Page 29: ...ay Press the Select button to enter the setting 3 Press the Tuning up down button to choose the Time zone setting for your area then press the Select button to confirm the setting 4 Press and release...

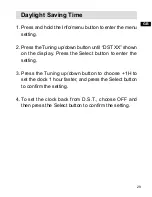
Page 30: ...button until DST XX shown on the display Press the Select button to enter the setting 3 Press the Tuning up down button to choose 1H to set the clock 1 hour faster and press the Select button to conf...

Page 31: ...on the display Press the Select button to enter the setting 3 Press the Tuning up down button to choose ON to turn on the loudness function then press the Select button to confirm the setting 4 To tu...

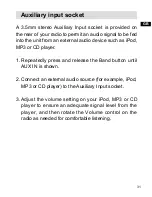
Page 32: ...h as iPod MP3 or CD player 1 Repeatedly press and release the Band button until AUX IN is shown 2 Connect an external audio source for example iPod MP3 or CD player to the Auxiliary Input socket 3 Adj...

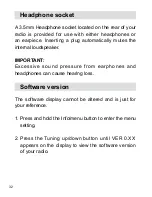
Page 33: ...e internal loudspeaker IMPORTANT Excessive sound pressure from earphones and headphones can cause hearing loss Software version The software display cannot be altered and is just for your reference 1...

Page 34: ...e Select button to enter the setting 3 Press the Tuning up down button to select YES and press the Select button to confirm the setting A full reset will be performed The station list and presets will...

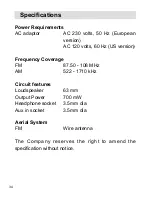
Page 35: ...120 volts 60 Hz US version Frequency Coverage FM AM 87 50 108 MHz 522 1710 kHz Circuit features Loudspeaker Output Power Headphone socket Aux in socket 63 mm 700 mW 3 5mm dia 3 5mm dia Aerial System F...

Page 36: ...of this product please note that Waste electrical products should not be disposed of with household waste Please recycle where facilities exist Check with your Local Authority or retailer for recyclin...

Reviews: