background image

Using a Mobile Phone

(Continued)

Bluetooth

66

1,2,3,4

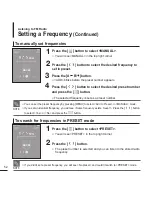
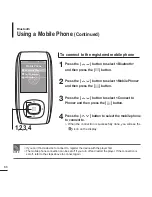
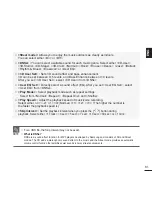
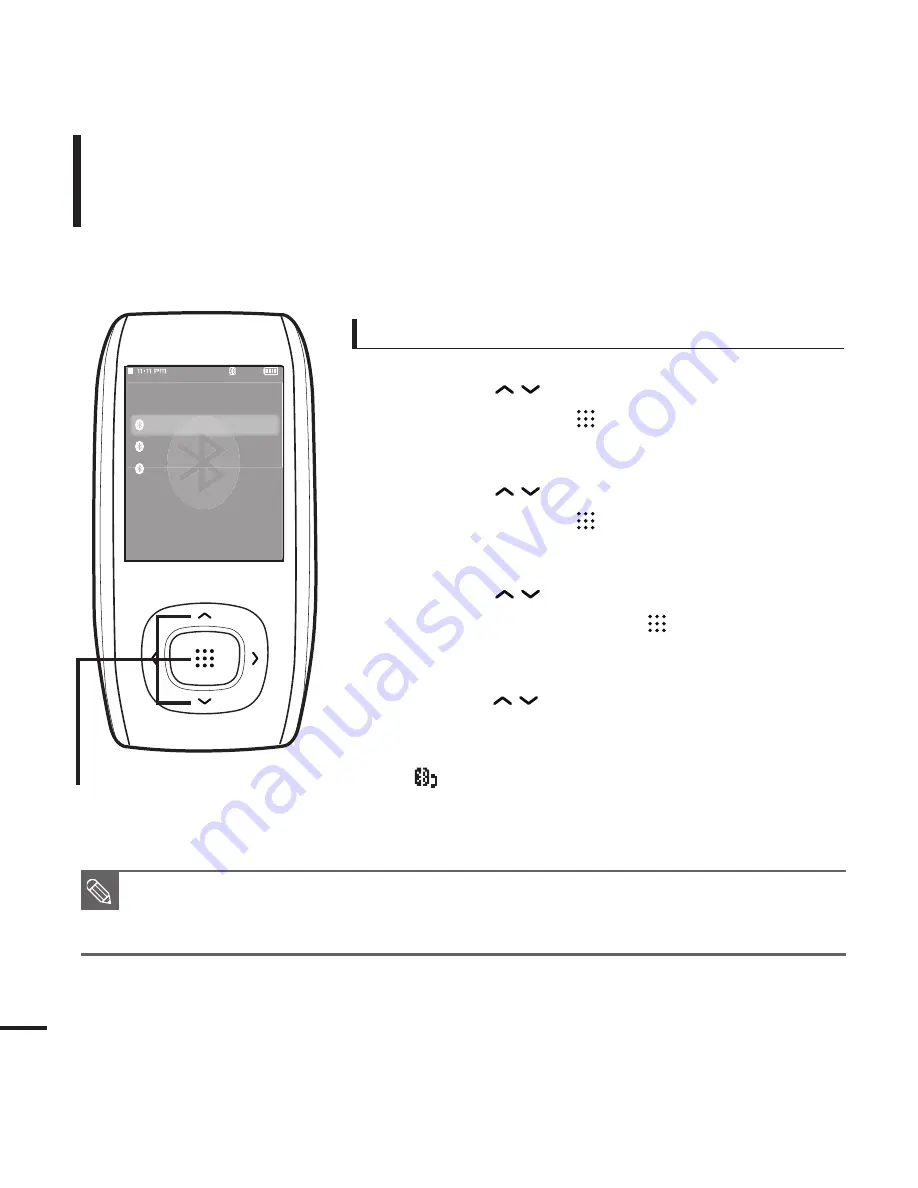
To connect to the registered mobile phone

1

Press the [

] button to select <Bluetooth>

and then press the [

] button.

2

Press the [

] button to select <Mobile Phone>

and then press the [

] button.

4

Press the [

] button to select the mobile phone

to connect to. 

When the connection is successfully done, you will see the

icon on the display.

3

Press the [

] button to select <Connect to

Phone> and then press the [

] button.

Connect to Phone

Call by Number

Call History

Mobile Phone

■   

If you can’t find a device to connect to, register the device with the player first.

■   

The mobile phone connection can be set off if you turn off and restart the player. If the connection is
set off, refer to the steps above to connect again.

NOTE

Summary of Contents for YP-T9JBAB

Page 1: ...YP T9J ...

Page 2: ...experience ringing in your ears while using the earphones remove the earphones immediately and lower the volume To avoid a risk of traffic accident Do not use the earphones while you are driving a bicycle automobile or motorcycle It can cause a serious accident and furthermore is prohibited by law in some areas Using the earphones while walking in particular on a crosswalk can lead to a serious ac...

Page 3: ...he product Do not cause excessive impact on the product by dropping it Do not place heavy objects on top of the product Prevent any foreign particles or dust from entering into the product Always use the accessories provided by or approved by Samsung Do not spray water on the product Never clean the product with chemical substances such as benzene or thinner as it may cause fire electric shock or ...

Page 4: ... with Samsung Media Studio 20 Chapter 3 Multimedia function Listening to Music 22 Listening to Music 22 Section Repetition 25 Creating Playlist Using Samsung Media Studio 26 To Play a Playlist 28 Using Music menu 31 Video 35 Video 35 Using Video menu 38 Photo Viewing 39 Photo Viewing 39 Using Photo menu 41 Text Viewing 45 Text Viewing 45 Using Text menu 46 Listening to FM Radio 49 Listening to FM ...

Page 5: ...nsferring Files 70 Setting a Bluetooth 75 Using Bluetooth menu 77 Game 78 Game 78 Chapter 4 Setting Settings 80 Setting Music 80 Setting Record 82 Setting Time 83 Setting Display 85 Setting Language 87 Setting System 88 Chapter 5 Troubleshooting Troubleshooting 90 Chapter 6 Appendix Menu Tree 93 Product Specifications 94 ...

Page 6: ...6 Components Basic Information Checking the Accessories Design of accessories is subject to change for the purpose of improvement without notice Player Earphones USB Cable Installation CD ...

Page 7: ...and Top Earphone Connection Jack Neck String Hole Microphone Screen Display Section Repeat A B Recording Button Back Button Move File Browser Button Move Volume Control Button Select Button MENU Button Power Play Pause Button ...

Page 8: ...8 Bottom and Left Side USB Connection Port Hold Switch Components Continued Basic Information Earphone Connection Top Earphones ...

Page 9: ...atus Bar 7 Play Time Display 8 Bluetooth Display The Bluetooth function supports only these models YP T9B T9JB 10 Current Music Number Total Music Number Display 9 Battery Status Display 11 Total Play Time Display 1 Mono Stereo Display 3 Frequency Location Display 2 Frequency Display 4 Battery Display 5 6 Preset Manual Add Preset Remove Preset Display RDS Display Music FM Radio Audio Track 1 00 01...

Page 10: ...ress to move to the selected menu confirm and save your selection Press and hold to quickly scan tracks Press to move to next track Press to increase the volume or move to an upper item menu Press to reduce the volume or move to a lower item menu Press to display the menu screen Buttons Functions and Use Push in the direction of the arrow to lock the button functions Press and hold to quickly scan...

Page 11: ...kes about 4 hours for the player to fully charge although this may vary depending on your PC environment Battery Use Recharge and store within the temperature range of 5 C 35 C 40 F 95 F Do not overcharge longer than 12 hours Excessive charging or discharging may shorten the battery s life Battery life naturally shortens slowly over time as it is a consumable item NOTE If you are charging the play...

Page 12: ...ing the Power Off Press and hold the button Power is turned off 1 Press the button to select Music and then press the button 2 Press the button to select the desired music file 3 Press the button The music file will begin playing NOTE Power is automatically turned off when none of the buttons have been pressed for a preset period of time Default 1 minute in the pause mode Page 83 NOTE Audio Track ...

Page 13: ...e the volume or the button to decrease it In Hold mode all buttons are disabled This function is useful when you are walking or jogging 1 Push the HOLD switch in the direction of the arrow 2 Push the HOLD switch in the opposite direction of the arrow to release the Lock function Audio Track 1 Hold 00 01 42 00 05 06 ...

Page 14: ...n the selected folder Use the button to move to the upper step 3 Press the button to select a folder of your choice 6 Press the button The selected file will start playing Press the button The File Browser folder list containing Music Text Pictures and Video appears 2 Press the button to select a file of your choice 5 1 Press the button to select File Browser ...

Page 15: ... a product malfunction occurs you can re initialize the system Press and hold the MENU and A B buttons at the same time The system will be initialized Your settings and files will not be affected Reset Function ...

Page 16: ...PC to the player Loading Your Desired File Before you start Insert the installation CD provided with the player into the CD ROM drive 2 Click NEXT Media Studio installation starts An icon is created on the desktop after installation is complete and Media Studio starts 1 Click Install now ...

Page 17: ...e player CAUTION If you connect the player through a USB hub the connection may be unstable Please connect the player to the computer directly The PC system must meet the following minimum specifications Pentium 300MHz or higher USB Port 2 0 Windows XP Service Pack 2 or higher DirectX 9 0 or higher 100MB of free hard disc space CD Rom Drive 2X or higher Windows Media Player 10 0 or higher Resoluti...

Page 18: ... Please refer to Help for more information on how to use Media Studio Click MENU Help Help from the menu on the top of the Media Studio program 3 3 2 YP T9 YP T9 MTP Media Studio enables you to select and organize files and folders in preparation for transfer to your player ...

Page 19: ...con to display etc list The ETC list includes file types ex TXT XOV etc other than music photo and video files 3 Click Add Folder on the bottom of Media Studio The Open Folder window will appear Before you start Connect the player to your PC Media Studio must be installed on your PC To add folders 3 Click Add File on the bottom of Media Studio The Open window will appear 4 Select the files to add ...

Page 20: ... Music Recognition ServiceSM CDDB is a registered trademark of Gracenote The Gracenote logo and logotype the Gracenote CDDB logo and logotype and the Powered by Gracenote CDDB logo are trademarks of Gracenote Music Recognition Service and MRS are service marks of Gracenote Perform the following steps to transfer files from your PC to the player 4 3 2 Portable window YP T9 MTP YP T9 ...

Page 21: ... etc list The ETC list includes file types ex TXT XOV etc other than music photo and video files 3 Select the file to transfer in the left file list Do not disconnect the USB cable during file transfer This may cause damage to the player or your PC CAUTION When transferring a photo or video file to the player using Media Studio it is automatically converted into JPG photo or SVI video format befor...

Page 22: ...m Tracks To play in numeric or alphabetical order Genres To play by genre Playlists To play by Playlist NOTE The music files compatible with the player are MP3 WMA MP1 or MP2 files which only have a changed extension to MP3 may not play on the player A file without an ID3 Tag Unknown is displayed as Unknown If the ID3 tag track information includes an album image the image is displayed on the play...

Page 23: ...tton again The music will play from the point where it stopped To search within a track 1 Press and hold the button while the selected track is playing It searches to the beginning or the end of the track 2 Release the button at the point you wish to start It starts playing from the point you release the button ...

Page 24: ...inning To play the previous next track Press the button within 5 seconds of play The previous track will start playing Press the button The next track will start playing CAUTION When playing VBR files the previous track may not play even if you press the button within 5 seconds of the play Listening to Music Continued Listening to Music ...

Page 25: ... Press the A B button again during Section Repeat Section Repeat will be canceled 2 Press the A B button at the beginning of the section you want to repeat The starting point is set and A will appear in the screen display window 3 Press the A B button again to set the ending of the section you want to repeat A B will appear on the screen and the specified section starts to play repeatedly You can ...

Page 26: ... on the top of Media Studio The My Album window appears 2 Click New Album on the bottom The Creation window appears 3 Type in the album title and click OK A new album playlist will be created and stored in the My Album section of Media Studio 1 2 3 3 A playlist is a list of your favorite songs ...

Page 27: ...les that you want to transfer in the My PC window 1 Click My Album on the top of Media Studio The My Album window appears 2 Click Portable in the right corner of the window The Portable window appears 3 Select a desired album in the My Album list 4 Click icon The selected album will be transferred to the player and stored in File Browser Playlists 5 Click icon The selected files will be added to t...

Page 28: ...player To Play a Playlist You can easily listen to your favorite music by adding it to a Playlist Listening to Music To make your own Playlist HowTo1 Music Song 1 Song 2 Song 3 Song 4 Song 5 1 Press the button to select File Browser and then press the button 2 Press the button to select Music and then press the button The file list appears 3 Press the button to select a file to add to the playlist...

Page 29: ... the playlist and then press the MENU button 4 Press the button to select Add to Favorites and then press the button Next to the selected file the mark appears and the file is included in File Browser Playlists Favorites NOTE If you want to remove a file from the Favorites select a file marked with and then press the A B button Alternately you can press the MENU button to select Delete from Favori...

Page 30: ...The Playlist s will appear 3 Press the button to select the playlist of your choice then press the button The music files saved in the selected Playlist will appear 4 Press the button to select the file to play and then press the button The music file will start playing Playlists Favorites My music New music To Play a Playlist Continued Listening to Music ...

Page 31: ...lect On 1 Press the MENU button when you are in the music playback mode 2 Press the button to select DNSe and then press the button 3 Press the button to select the desired mode and then press the button Select either 3D User 3D Studio 3D Stage 3D Club Normal Rock House Dance Jazz Ballad Rhythm Blues Classical or User EQ Using Music menu Listening to Music To exit the menu press the MENU button St...

Page 32: ... FLASH1 FLASH2 FLASH3 Album Cover Photo or Auto Selecting Auto will change the background image by picking one from FLASH1 to FLASH3 each time a different file is played Using Music menu Continued Listening to Music NOTE If there is an image contained in the tag information of a music file it will be displayed as a background image when you have selected Album Cover Album Cover supports only less ...

Page 33: ...on Select either 3 2 1 0 Normal 1 2 or 3 The larger the number the faster the speed of play 1 Press the MENU button when you are in the music playback mode 2 Press the button to select Skip Interval and then press the button 3 Press the button to select the desired skip interval and then press the button Select either 1track 3sec 5sec 7sec 10sec 30sec or 1min 00 01 42 00 05 06 00 01 42 00 05 06 St...

Page 34: ...u are in the music playback mode 2 Press the button to select Bookmark and then press the button The Bookmark menu appears 3 Press the button to select Go to or Delete and press the button Go to will move to the selected bookmark and Delete will remove the selected bookmark Street Mode DNSe Play Mode Music Backgrou Play Speed Skip Interval Bookmark 00 01 42 00 05 06 00 01 42 00 05 06 Audio Track 1...

Page 35: ...video clip and then press the button The selected video file starts to play NOTE When transferring a video file to the player using Media Studio it is automatically converted into SVI format before transfer The file size is automatically adjusted too 1 2 To stop playing the video file Press the button in Video mode Each time you press the button the player stops playing the video file or resumes p...

Page 36: ...eo appears Press the button again to disappear the information Video Information Display 1 Play Pause Indicator 3 Play Position Indicator 2 File Name 4 Current Play Time Indicator 5 Volume Level Indicator 6 Full play time for the current video 1 2 3 4 5 6 Video Continued Video ...

Page 37: ...his enables you to scroll through the current video file 2 Release the button when you have moved to the desired position The video starts playing from the position Press the button within 5 seconds after the current video started playing This will return to the previous movie Press the button This will move to the next movie any story 1 any story 2 ...

Page 38: ...the button to select Go to or Delete and press the button Go to will move to the selected bookmark and Delete will remove the selected bookmark Press the A B button at the desired scene The currently played stopped point is set to a bookmark any story 1 NOTE You can set a maximum of 20 bookmarks Go to Delete Using Video menu Video any story 2 ...

Page 39: ...ss the button to select the desired photo and then press the button The selected photo is displayed NOTE When transferring a photo file to the player using Media Studio it is automatically converted into JPG format before transfer The file size is automatically adjusted too You can also use the File Browser to search for a photo file Page 14 You can keep listening to music even if you select Photo...

Page 40: ... in preview mode to display the previous or next photo Photo Display Window To move to the previous next photo 1 Preview Pane 3 Thumbnails 2 File Name 4 The current file number total number of photos Photo test0 1 20 1 2 3 4 Photo Viewing Continued Photo Viewing ...

Page 41: ... while viewing a photo 2 Press the button to select Start Slideshow and then press the button The slideshow will start Press the button in Slideshow mode This will stop the slideshow Using Photo menu Photo Viewing Start Slideshow Zoom As Music Backgr Save as a back ...

Page 42: ...scale factor and then press the button You can select either 100 200 or 400 4 Press the to move to the portion of the photo to magnify 5 To cancel the magnification select 100 from the Zoom options and then press the button This returns to the original size 100 200 400 NOTE Press the button in the Photo Viewing mode to display the Zoom Setting menu Using Photo menu Continued Photo Viewing ...

Page 43: ... button The Music Background Image Setting menu appears 4 Press the button to select Yes and then press the button The selected photo file is set to a background image for music NOTE Press the A B button while viewing a photo to display the Music Background Setting menu Even if you turn off and restart the player the selected photo file will be retained as music background image Audio Track 1 00 0...

Page 44: ... then press the button The confirmation window appears 4 Press the button to select Yes and then press the button The selected photo file is saved as a background image NOTE Even if you turn off and restart the player the selected photo file will be retained as music background image If you do not want to use a background image select a desired theme in Display Color Theme page 85 Start Slideshow ...

Page 45: ...Browser to search for a text file page 14 This product supports the TXT file format in Text mode You can keep listening to music even if you select Text Press the button if you want to play a music while viewing text Press the button again to stop playing the music 1 2 To scroll the text by the line Press the button Once you set Scroll By Page in Text mode you can move to the previous next page of...

Page 46: ...lected Go To then it will move to the selected bookmark and Delete will remove the selected bookmark from the text file Press the A B button while viewing a text The current text screen is set to a bookmark with the symbol displayed on the top left corner The bookmark can be deleted by pressing the A B button in the bookmarked page Using Text menu Text View NOTE You can set a maximum of 20 bookmar...

Page 47: ... MENU button while viewing a text 2 Press the button to select Scroll By and then press the button The Scroll option menu appears 3 Press the button to select the desired option and then press the button You can select either Page or Line Page Use the button to scroll through the file by the page Line Use the button to scroll through the file by the line NOTE You can press the button to change the...

Page 48: ...Horizontal To set the text viewer color 1 Press the MENU button while viewing a text 2 Press the button to select Text Viewer Color and then press the button The Text Viewer Color menu appears 3 Press the button to select the desired text viewer color Select either Auto Blue Green Orange Pink or Purple Selecting Auto will set the viewer color to the same as the main menu Go to 1st Page Bookmark Sc...

Page 49: ...nect the earphones then turn on the player and check the battery Press the button to select FM Radio and then press the button FM radio reception will start To use Mute function Press button during listening to FM radio Sound is muted Press button once again to sound back ...

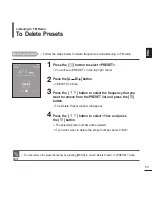
Page 50: ... top right corner 2 Press the button Moves to frequencies whenever the button is pressed NOTE In PRESET mode press MENU and use the button to select Go to Manual Mode and press the button You will switch to MANUAL mode In MANUAL mode press MENU and use the button to select Go to Preset Mode and press the button You will switch to PRESET mode Auto Searching Always connect your earphones to the play...

Page 51: ... to then are stored 2 Press the button to select Auto Preset and then press the button The Auto Preset Confirm window will appear 3 Press the button to select Yes and then press the button You will see the Auto Preset window that allows you to set up to 30 frequencies Go to Preset Mo Add to Preset RDS Display Auto Preset FM Region FM Sensitivity To set Auto Preset again after setting preset existi...

Page 52: ...quency is set as a preset number To search for frequencies in PRESET mode 1 Press the button to select PRESET You will see PRESET in the top right corner 2 Press the button The preset number is selected and you can listen to the stored radio frequency You can set the preset frequency by pressing MENU to select Add to Preset in MANUAL mode If you set an identical frequency you will see Same frequen...

Page 53: ...ove from the PRESET list and press the button The Delete Preset window will appear 4 Press the button to select Yes and press the button The selected preset number will be deleted If you don t want to delete the preset number select NO Before you start Follow the steps below to delete frequencies while listening to FM radio You can remove the preset frequency by pressing MENU to select Delete Pres...

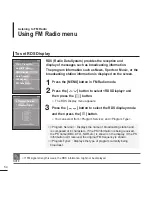
Page 54: ...s the button to select the RDS display mode and then press the button You can select from Program Service and Program Type Go to Preset Mo Add to Preset RDS Display Auto Preset FM Region FM Sensitivity Program Service Program Type If FM signal strength is weak the RDS information might not be displayed NOTE Program Service Displays the name of broadcasting station and is composed of 8 characters I...

Page 55: ...n You can select from High Middle and Low The higher FM Sensitivity is the more frequencies can be received Frequency range by region Korea US Search for FM frequencies in 100 kHz increments between 87 5 MHz 108 0 MHz Japan Search for FM frequencies in 100 kHz increments between 76 0 MHz 108 0 MHz Other Countries Search for FM frequencies in 50 kHz increments between 87 50 MHz 108 00 MHz FM region...

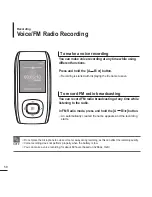
Page 56: ...ding NOTE Recording Recording File names during recording 1 In recording a recording file name is automatically specified in such as Xmmddhhmmss Where X indicates the recording type mm for a month dd for a date mm for minutes and ss indicates seconds 2 The type of recording is as follows Voice V Radio F FM 3 For instance the file name V0911103020 indicates a voice recording was made 10 o clock 30 ...

Page 57: ... buttons to set your recording options 2 Press the button to select the desired recording mode and press the button The appropriate window appears 3 Press the A B button Recording is started with displaying the file name to save To stop recording 1 Press the A B button while in recording You will see a message that prompts you to confirm your choice 2 Press the button to select Yes or No and press...

Page 58: ...old the A B button An automatically created file name appears and the recording starts You can record FM radio broadcasting at any time while listening to the radio Recording Voice FM Radio Recording Do not place the microphone too close or too far away during recording as this can affect the recording quality Voice recording does not perform properly when the battery is low You can make a voice r...

Page 59: ...l contact on the transmitter or receiver system of the player stereo headset hands free mobile phone or external device Electrical variation from electrical jamming by the wall corner or office partitioning Electrical interference from the same frequency band devices including medical equipment microwave oven and wireless LAN The farther the distance between player and stereo headset hands free mo...

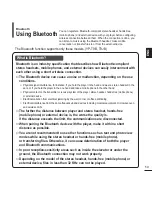
Page 60: ...ignal strength but requiring more power from the battery Standard Specifications The transmission output is comparatively low which causes more reduction of the signal strength but minimizing the power consumption to increase the battery life When not in use set the Bluetooth Mode to Off If you stay in On for Bluetooth Mode the battery usable time is reduced The Bluetooth function of the player ar...

Page 61: ...on can be used only while you are listening to music or radio It is not supported while you are enjoying a video or playing a game Make sure to connect the earphone using as antennas if you listen to the radio using the stereo headset You can listen to the sound via the earphone while you are recording a radio program The maximum distance that enables wireless connection between the player and the...

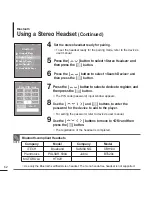
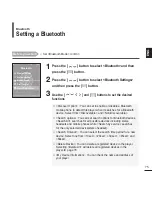
Page 62: ...word input window appears 8 Use the and buttons to enter the password for the device to add to the player For setting the password refer to device s user manual 9 Use the buttons to move to OK and then press the button The registration of the headset is completed Bluetooth Mode Stereo Headset Mobile Phone File Transfer Bluetooth Settings Bluetooth Enter PIN code Company Model Company Model i TECH ...

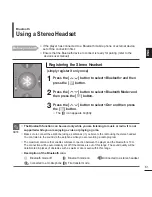
Page 63: ...t a stereo headset to connect and then press the button When the connection is successfully done you will see the icon on the display Bluetooth Mode Stereo Headset Mobile Phone File Transfer Bluetooth Settings Bluetooth If you can t find the desired headset to connect register it first If you turn off the player or the headset and then turn it on the bluetooth communication may be disconnected If ...

Page 64: ...press the button In some mobile phones the functions of search device and mobile conversation placing receiving calls can not work properly due to difference of the hands free system If you press a button on the mobile phone or make or end a call under Bluetooth connection between the player and the mobile phone there may occur noise from the player You are recommended to use English for the devic...

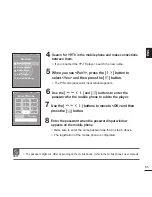
Page 65: ...for the mobile phone to add to the player 7 Use the buttons to move to OK and then press the button 8 Enter the password when the password input window appears on the mobile phone Make sure to enter the same password as that in step 6 above The registration of the mobile phone is completed Bluetooth Mode Stereo Headset Mobile Phone File Transfer Bluetooth Settings Bluetooth Enter PIN code The pass...

Page 66: ...phone to connect to When the connection is successfully done you will see the icon on the display 3 Press the button to select Connect to Phone and then press the button Connect to Phone Call by Number Call History Mobile Phone If you can t find a device to connect to register the device with the player first The mobile phone connection can be set off if you turn off and restart the player If the ...

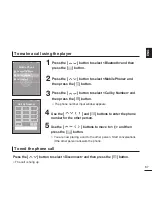
Page 67: ...to select Call by Number and then press the button The phone number input window appears 4 Use the and buttons to enter the phone number for the other person 5 Use the buttons to move to and then press the button You are now placing a call to the other person Start conversations if the other person answers the phone Connect to Phone Call by Number Call History Mobile Phone Call by Number To make a...

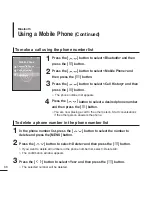
Page 68: ...he button If you want to delete all numbers in the phone number list select Delete All The confirmation window appears 3 Press the button to select Yes and then press the button The selected number will be deleted 4 Press the button to select a desired phone number and then press the button You are now placing a call to the other person Start conversations if the other person answers the phone Con...

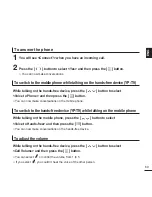
Page 69: ... to the mobile phone while talking on the hands free device YP T9 While talking on the mobile phone press the button to select Voice to Hands free and then press the button You can now make conversations on the hands free device To switch to the hands free device YP T9 while talking on the mobile phone While talking on the hands free device press the button to select Call Volume and then press the...

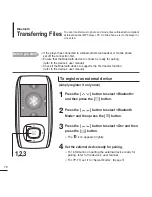
Page 70: ... user manual Check if the Bluetooth device to supports the file transfer function refer to the device s user manual 1 2 3 To register an external device simply register it only once 1 Press the button to select Bluetooth and then press the button 2 Press the button to select Bluetooth Mode and then press the button 3 Press the button to select On and then press the button The icon appears brightly...

Page 71: ...move to OK and then press the button 11 When you see the device name and the message of Pair press the button to select Yes and press the button 12 Enter the password when the password input window appears on the external device You must enter the same password as that in step 9 above When done you will see the file list of the external device on the player s display If you want to transfer files ...

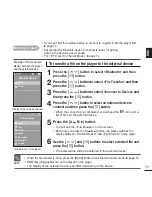
Page 72: ...Press the button to select an external device to connect and then press the button When the connection is completed you will see the icon and a list of files on the external device 5 Use the and buttons to select a desired file and press the button The selected files on the external device will be transferred to the player Files transferred to the player are saved in File Browser Copied folder Whe...

Page 73: ... then press the button 4 Press the button to select an external device to connect and then press the button When the connection is completed you will see the icon and a list of files on the external device 5 Press the A B button You will see the File Browser on the screen Each time you press the A B button the player switches the display between External Device and File Browser of the player 6 Use...

Page 74: ...o transfer a file on the player to the external device you should first set it ready for pairing 2 Press the button to select File Transfer and then press the button 3 Press the button to select Server Mode and then press the button The player switches to server mode 4 Set an external device ready for connecting Refer to the device s user manual To exit the server mode press the BACK button 5 When...

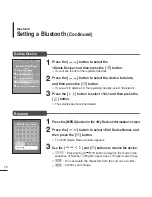
Page 75: ...Discoverable Search options You can set search options for Bluetooth devices Search All searches for all possible devices including stereo headsets and mobile phones while Search by service searches for the only selected device stereo headset Search Timeout You can select the search time period for a new device Select one from 10sec 20sec 30sec 45sec and 60sec Delete Device You can delete a regist...

Page 76: ...n delete the characters from the end one at a time Confirm your change Edit Device Name Rename 1 Press the button to select the Delete Device and then press the button You will see the list of the registered devices 2 Press the button to select the device to delete and then press the button If you want to delete all of the registered devices select Delete All 3 Press the button to select Yes and t...

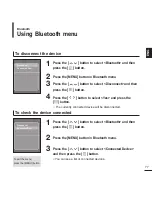
Page 77: ...onnected device will be disconnected To check the device connected 2 Press the MENU button in Bluetooth menu 3 Press the button to select Connected Device and then press the button You can see a list of connected devices To exit the menu press the MENU button Disconnect Connected Devi Disconnect Connected Devi 1 Press the button to select Bluetooth and then press the button 1 Press the button to s...

Page 78: ... the button The Game menu appears 2 Press the button to select the desired game and then press the button The bundle games can be added or changed without notice NOTE This is a family game that provides you with dynamic animation and various characters making you feel yourself in a real baseball stadium Press the button to select a menu or function Press the button to pitch or hit the ball Basebal...

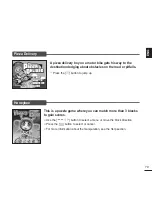
Page 79: ... road or pitfalls Press the button to jump up Pizza Delivery This is a puzzle game where you can match more than 3 blocks to gain scores Use the button to select a menu or move the block direction Press the button to select or cancel For more information about the manipulation see the Help section Honeybee ...

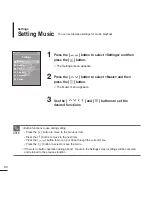
Page 80: ...Language System Button functions to use during setting Press the button to move to the previous item Press the button to move to the next item Press the button to move up or down through the current menu Press the button to select or save the menu If there is no button operation during about 1 minute in the Settings screen settings will be canceled and returned to the previous function NOTE Settin...

Page 81: ... EQ from DNSe Play Mode Select playback mode such as repeat settings Select from Normal Repeat Repeat One and Shuffle Play Speed Adjust the playback speed of music voice recording Select either 3 2 1 0 Normal 1 2 3 The higher the number is the faster the playback speed is Skip Interval Set the playback interval when you press the button during playback Select either 1 Track 3 sec 5 sec 7 sec 10 se...

Page 82: ... Recording Bit Rate You can choose the recording quality for FM radio Select one from 96kbps 128kbps 160kbps 192kbps The greater the number is the better the quality is but the file size is bigger Voice Recording Bit Rate You can select the voice recording quality Select one from 32kbps 64kbps 96kbps 128kbps The greater the number is the better the quality is but the file size is bigger Setting Re...

Page 83: ...in 90 min or 120 min LCD Off If no button is pressed within the time set shown below the display screen will automatically turn off Select either 15 sec 30 sec 1 min 3 min 5 min or Always On Press any key to turn it back on Auto Power Off Automatically turns power off when there is no button operation after the preset time in the pause mode Select either 15 sec 30 sec 1 min 3min or 5 min Screen Sa...

Page 84: ...s the button to select Yes and press the button The set time date will be saved No will cancel the time setting 1 Press the button to select Date Time Set and then press the button Date Time Setting Time Date Time Set Sleep LCD Off Auto Power Off Screen Saver Date Time Set AM PM Hour Min AM 3 8 Year Month Date 2006 5 19 Setting Time Continued Settings ...

Page 85: ...ove is selected the background image will be changed to a feminine image page 86 Music Background You can select the background image to add to your listening experience Select either FLASH 1 FLASH 2 FLASH 3 Album Cover Photo or Auto Selecting Auto will change the background image by picking one from FLASH1 to FLASH3 each time a different file is played Text Viewer Color You can set the background...

Page 86: ...turn on the player The background image will be changed to White Love 1 Press the button to select White Love and then press the button You will see the confirmation window of Color Theme White Love Setting Color Theme Blue Green Orange Pink Purple Custom Backgrou White Love Setting Display Continued Settings ...

Page 87: ...ska ID3 Tag Set the track information language Select from Afrikaans Basque Catalan Chinese S Chinese T Czech Danish Dutch English Estonian Finnish French German Greek Hrvatski Hungarian Icelandic Italian Japanese Korean Norwegian Polish Portuguese Romany Russian Slovak Slovene Spanish Swedish Turkish and Vietnamese Setting Language Set the language for the menu and track information ID3 Tag Setti...

Page 88: ...t file will play from the point it was previously stopped Button Sound Sets the beep sound for button operations to on or off Select either On or Off Volume Limit You can avoid hearing damage by setting the limit of the volume when using the earphone On will limit the maximum volume level up to 20 The maximum volume level when Volume Limit is set to Off is 40 Default Set Returns all settings to th...

Page 89: ...settings to default No Cancels default settings Default Set System Booting Mode Resume Button Sound Volume Limit Default Set Memory Firmware Version Regarding the Built In Memory 1GB 1 000 000 000bytes actual formatted capacity may be less as the internal firmware uses a portion of the memory NOTE ...

Page 90: ...ress and hold the MENU and A B buttons at the same time to reset the system The screen may not be visible under direct sunlight When LCD Off is selected from Settings Display the LCD can be turn off Press any button and see if it turns on The power is automatically turned off when the battery is fully discharged Recharge the battery Battery life differs from the Manual The battery time can vary de...

Page 91: ...set an appropriate language The file transfer rate is too low If you have formatted the player on Windows 2000 the file transfer can be delayed Format the player on Windows XP and try again If you are running multiple programs including Media Studio on your PC the file transfer rate will be low So make sure to exit unnecessary programs before proceeding Playing is disabled File upload is disabled ...

Page 92: ...le phone Check if the stereo headset is Bluetooth certified The mono hands free headset is not supported If you want to talk on your mobile phone check if you have set off the Bluetooth connections between player and stereo headset If you want to talk on your mobile phone check if you have set to Discoverable from Bluetooth Settings Discover Option If set to Non Discoverable you can t find the pla...

Page 93: ...n Time Date Time Set Sleep Timer LCD Off Auto Power Off Screen Saver Display Color Theme Music Background Text Viewer Color Text Viewer Type LCD Brightness Language Menu ID3 Tag System Booting Mode Resume Button Sound Volume Limit Default Set Record FM Recording Bit Rate Voice Recording Bit Rate Menu Tree You can quickly view the menu structure The Bluetooth function supports only these models YP ...

Page 94: ...r of folders and Files Folder Max 500 File Max 5000 Include folder Earphone Output 20mW France 5mW CH 16Ω Output Frequency Range 20Hz 20KHz Noise Ratio 85 dB with 20kHz LPF based on 1KHz 0 dB Play Time Maximum of 30 hours for music playback based on MP3 128kbps Volume 20 Normal Mode Maximum of 6 hours for video playback Temperature Range for Operation 5 35 C 23 95 F Case Plastics Weight 49g Dimens...

Page 95: ...er DC 3 7V RF Power 0 02mW Transmit Frequency 2402MHz 2480MHz Receive Frequency 2402MHz 2480MHz No of channels 79 ch Temperature 10 C 50 C Modulation System GFSK Communication Mode Semi duplex Operation Humidity 95 Wireless System ...

Page 96: ...0 6225 www samsung com latin GUATEMALA 1 800 299 0013 www samsung com latin JAMAICA 1 800 234 7267 www samsung com latin PANAMA 800 7267 www samsung com latin PUERTO RICO 1 800 682 3180 www samsung com latin REP DOMINICA 1 800 751 2676 www samsung com latin TRINIDAD TOBAGO 1 800 7267 864 www samsung com latin VENEZUELA 0 800 100 5303 www samsung com latin COLOMBIA 01 8000112112 www samsung com co ...

Page 97: ...0 0400 www samsung uz UKRAINE 8 800 502 0000 www samsung com ur LITHUANIA 8 800 77777 www samsung lt LATVIA 800 7267 www samsung com lv index htm ESTONIA 800 7267 www samsung ee AUSTRALIA 1300 362 603 www samsung com au CHINA 800 810 5858 010 6475 1880 www samsung com cn HONG KONG 3698 4698 www samsung com hk INDIA 3030 8282 1800 110011 www samsung com in INDONESIA 0800 112 8888 www samsung com id...

Page 98: ...t This product should not be mixed with other commercial wastes for disposal EUROPE ONLY License The product unit accompanying this user manual is licensed under certain intellectual property rights of certain third parties This license is limited to private non commercial use by end user consumers for licensed contents No rights are granted for commercial use The license does not cover any produc...

Page 99: ...REV 2 0 ...

Reviews: