

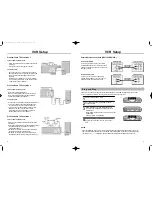


For the best picture quality when playing a cassette, the video heads must be aligned with the recorded track.
This alignment is called tracking. When playing back a tape, your VCR automatically adjusts the tracking on a
video tape, but occasionally a cassette may require some manual adjustment. Keep in mind that picture distortion
often occurs at the beginning of a tape.
Automatic Tracking
1
Turn the TV on and insert a cassette into your VCR.
Press the PLAY button, if necessary.
2
If the VCR indicator on the front panel does not light,
press the TV/VCR button. After a few seconds of auto
tracking, you will hear sound from the video tape.
Note: Press the A.TRK button to automatically
adjust cassette tracking again.
Manual Tracking
Press the CH/TRK buttons on the remote control up or
down until the picture improves.
Note: Depending on the tape used, the noise on the screen
may not be completely eliminated, depending on the
tape used, especially when the tapewas recorded on
another VCR.
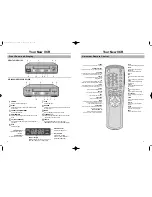
VCR Operation
15
Slow Motion
Press the SLOW + or – button while a cassette is playing for slow motion.
Press the SLOW buttons repeatedly to vary slow motion speed from 1/5 to 1/30 of normal
playback. Press the PLAY button twice to resume normal viewing.
Note : It is available in the only SLP mode for VR3160C.
Replay
Press the REPLAY button when a video is playing at normal speed or in slow motion, and the
VCR will rewind for about five seconds of material in SPmode or about fifteen seconds in SLP
mode, then play back the section again.
Shuttle Buttons
Shuttle buttons on the remote control offer one-touch search speed playback.
Press 6to advance or 4 to reverse playback in play mode. Playback speed is determined by
how many times you press the shuttle button.
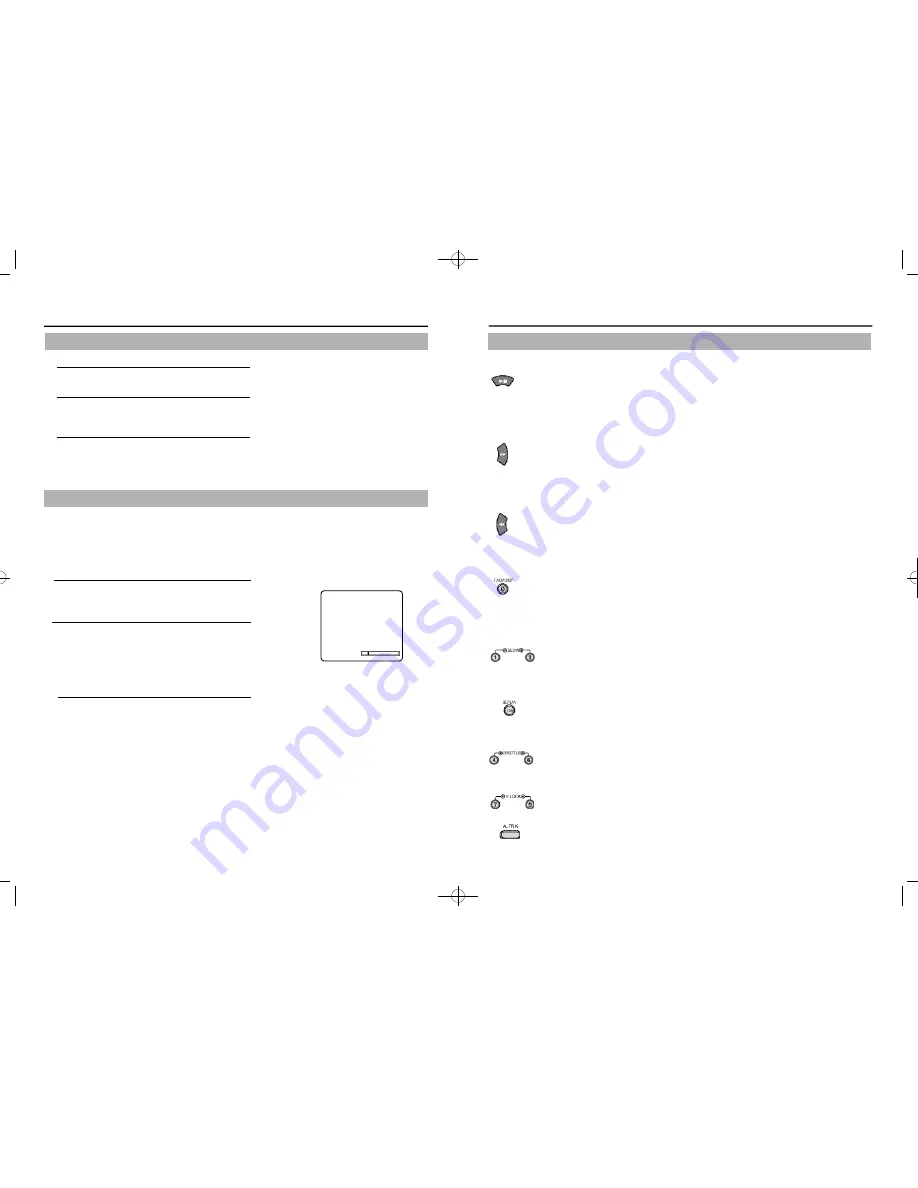
V-LOCK
During still mode, press the V-LOCK buttons to reduce picture “jitter” (bouncing up and down).
A small amount of “jitter” or some “streaks” are normal during still viewing.
Automatic Tracking (A.TRK)
Press the A.TRK button to automatically adjust cassette tracking.
VCR operation
14
Tape Controls
Playing a cassette
1
Load a recorded cassette.
Power is automatically turned on.
2
Press the PLAY button to start playback.
When playback starts, the VCR automatically adjusts
the tracking for clear pictures and sound.
3
To stop playback, press the STOP button.
Play and Pause/Still
•
Press the PLAY button on the remote control or on the front of the VCR to play a video. (If Auto
play is selected and the video tape has no safety tab, it will begin playing automatically when
you insert it in the VCR.)
•
In play or slow motion mode, press the STILL button to stop the tape on a single still frame.
Press the button again to resume normal viewing.
Fast Forward and Forward Search
•
Press the FF button when the tape is stopped to fast-forward the cassette at top speed.
•
Press the FF button once while a tape is playing for forward search. Press the PLAY button to
stop search.
•
Press and hold to increase speed by 7 times for tapes recorded at SPspeed and 21 times for
tapes recorded at SLP speed. Release button to play.
Rewind and Reverse Search
•
Press the REW button when the tape is stopped to rewind the cassette at top speed.
•
Press the REW button once while a tape is playing for rewind search. Press the PLAY button to
stop search.
•
Press and hold button while tape is playing to increase reverse speed by 7 times for tapes
recorded at SPspeed and 21 times for tapes recorded at SLPspeed. Release button to play.
Frame Advance and Skip Search
•
Press the F.ADV/SKIP button repeatedly to advance a video tape frame by frame in still mode.
Press the PLAY button to resume normal viewing.
•
For Skip Search, press F.ADV/SKIP once to skip ahead 30 seconds.
Press the F.ADV/SKIP button twice to skip ahead 60 seconds, three times to skip ahead 90
seconds and four times to skip ahead 120 seconds.
Tracking
TRACKING
01063A VR8170C/5170C-ENG 9/8/56 12:16 PM Page 14