background image

-6

ES

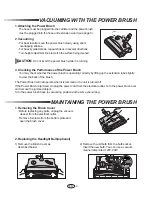
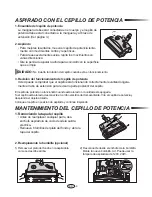
ASPIRADO CON EL CEPILLO DE POTENCIA

1. Ensamble del cepillo de potencia

La manguera debe estar conectada en el cuerpo y el cepillo de
potencia debe estar conectado a la manguera y al brazo de
extensión.(Ver página 3.)

2. Aspirado

• 

Para mejores resultados, mueva el cepillo de potencia lenta-
mente con movimientos cortos y repeti tivos.

• 

Para áreas severamente sucias, repita los movimientos en

varias direcciones.

• 

Gire la perilla de ajustar la altura para coincidir con la superficie

que se lmpia.

3. Revisión del funcionamiento del cepillo de potencia

Usted puede comprobar que el cepillo está funcionando correctamente levantando ligera-
mente el tubo de extensión para revisar la parte posterior del cepillo.

El cepillo de potencia no funcionará cuando esté atorado o la unidad esté apagada.
Si el cepillo está atorado, desconecte el cordón eléctrico del tomacorriente. Vire el cepillo de potencia y
desprenda el objeto atorado.
Coloque el cepillo en posición de aspirado y continúe limpiando.

CUIDADO: 

No invierta la rotación del cepillo cuando está en funcionamiento.

MANTENIMIENTO DEL CEPILLO DE POTENCIA

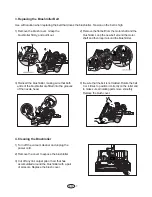
2) Desconnecte desde el enchufe de la bombilla.

Monte la nueva bombilla. Ud. Puede usar la
lámpara de aspiradora de 120V, 20W.

1) Remueva el plato del fondo en la aspiradora

como se describe arriba.

1. Removiendo la tapa del cepillo

• 

Antes de reemplazar cualquier parte, des-

enchufe aspiradora de vacío desde la salida
eléctrica.

• 

Remueva 6 tornillos del plato del fondo y abra la

tapa del cepillo.

2. Reemplazando la bombilla (opcional)

Summary of Contents for VAC-9073R

Page 1: ...cciones de Operación For household use only Model VAC 9073R VACUUM CLEANER ASPIRADORA Before operating this unit please read the instructions carefully Antes de usar esta unidad lea cuidadosamente las instrucciones por favor EN ES ...

Page 2: ...r and anything that may reduce air flow 10 Keep hair loose clothing fingers and all other parts of the body away from openings and moving parts 11 Do not vacuum anything that is burning or smoking such as cigarettes matches or hot ashes 12 Do not use without dust bag and filters in place 13 Turn off all controls before unplugging 14 Use extra care when cleaning on stairs 15 Do not use to vacuum fl...

Page 3: ... Full indicator switches to RED while you are cleaning the dust bag is full and must be replaced If the Dust Full indicator continues to display RED even after changing the dust bag turn the cleaner off and check whether the hose tube or nozzle is clogged NOTE ...

Page 4: ...and onto the Power Brush Wand unitl it Clicks into place Fig A C They can be removed by pressing the button on the Extension Wand The Extension wand can be adjusted to your height Hold the central area with one hand while pulling the smallest tube out or pushing into the desired length with the other hand POWER CORD 1 PULLING OUT The power cord is long enough to be drawn out for convenience 2 REWI...

Page 5: ...ontrol The flexible hose hose handle suction control has a manual air flow regulator which allows you to briefly alter the suction level the further open the regulator is the weaker the suc tion power Dusting brush for furniture shelves books etc Upholstery brush for cushions and drapery Crevice tool for radiator crevices corners between cushions Power brush The rotating brush ensures that cleanin...

Page 6: ...ull and use it again 2 Remove the dust bag from the cleaner 4 Press the dust cover down gently until the clamp relocks 3 After removing the used dust bag insert the cardboard bag collar of the new dust bag into the suction inlet all the way A used dust bag can be sealed by removing the paper from the adhesive strip and sealing the strip over the suction opening 1 To open the dust cover of the dust...

Page 7: ...iew the back of the brush The Power Brush will not operate when it is jammed or the unit is turned off If the Power Brush is jammed Unplug the power cord from the electrical outlet Turn the power brush over and remove the jammed object Turn the power brush back to vacuuming position and resume vacuuming CAUTION Do not invert the power brush while it is running MAINTAINING THE POWER BRUSH 2 Remove ...

Page 8: ...ller making sure that both ends of the brushroller are fitted into the grooves of the nozzle head 1 Remove the brush cover Grasp the brushroller firmly and pull it out Use with caution when replacing the belt that drives the brushroller Tension on the belt is high 1 Turn off the vacuum cleaner and unplug the power cord 2 Remove the cover to expose the brushroller 3 Cut off any lint carpet pile or ...

Page 9: ...ck cable plug and socket Suction force is gradually reduced Filter nozzle suction hose tube blocked or bag full Remove the obstruction or replace bag Cord does not rewind fully Check that the cord is not twisted or wound unevenly Pull the cord out 6 10ft push down the cord rewind button CARE OF MOTOR FILTER The motor filter protects the motor from dirt and ensures long lasting and efficient operat...

Page 10: ... 9 EN Model Specifications The model and serial number are located on the nameplate on the underside of the cleaner as illustrated below ...

Page 11: ...educir el flujo de aire 10 Mantenga su cabello ropas flojas dedos y otras partes del cuerpo alejados de las aberturas y de las partes móviles 11 No aspire nada que se esté quemando o humeando como cigarrillos fósforos o cenizas calientes 12 No usar sin la bolsa para el polvo y filtros en su lugar 13 Apague todos los controles antes de desconectar 14 Tenga cuidado adicional cuando limpie en escaler...

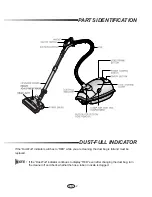
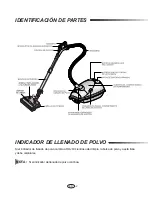
Page 12: ...ACIÓN DE PARTES INDICADOR DE LLENADO DE POLVO Si el indicador de llenado de polvo cambia a ROJO mientras usted limpia la bolsa de polvo ya está llena y debe cambiarse Si el indicador de llenado de polvo continúa NOTA ...

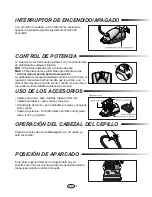
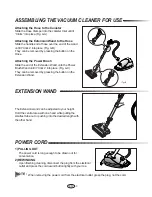
Page 13: ...de la vara hasta que hagalo clic en lugar Fig A B Puede quitarselos por presionar el botón en la manguera Conectar la escobilla de alimentación Deslize el extremo de la vara de extensión encima de la vara de la escobilla de alimentación hasta que hagalo clic hacia lugar Fig A C Puede quitarselos por presionar el botón en la vara de extensión CORDON DE CORRIENTE 1 EXTENSION El cordón de corriente e...

Page 14: ... manguera flexible control de succion tiene el regulador manual para el flujo de aire que le permite a ud a alter ar brevemente el nivel de succion cuanto mos se abre el regu lador tanto se debilita la potencia de succion Cepillo para polvo para muebles repisas libros etc Cepillo para tapices para cojines y tapicería Herramienta de ranura para radiadores ranuras y esquinas entre cojines Cepillo de...

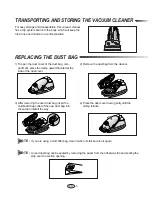
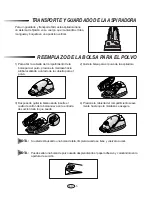
Page 15: ...Quite la bolsa para el polvo de la aspiradora 4 Presione la cubierta del compartimiento suave mente hasta que la mordaza se asegure 3 Después de quitar la bolsa usada inserte el cuello de cartón de la bolsa nueva en la entrada de succión todo lo que pueda Puede sellar una bolsa de polvo usada desprendiendo el papel adhesivo y colocándolo en la apertura de succión 1 Para abrir la cubierta del compa...

Page 16: ...n para revisar la parte posterior del cepillo El cepillo de potencia no funcionará cuando esté atorado o la unidad esté apagada Si el cepillo está atorado desconecte el cordón eléctrico del tomacorriente Vire el cepillo de potencia y desprenda el objeto atorado Coloque el cepillo en posición de aspirado y continúe limpiando CUIDADO No invierta la rotación del cepillo cuando está en funcionamiento ...

Page 17: ...que los dos extremos del rodillo del cepillo sean fija dos en la fisura del cabezal de la boquilla 1 Remueva la tapa de aspiradora de vacío Agarre el rodillo dor de cepillo a tiempo y sàquelo Use con cuidado cuando reemplace la correa que opera el arrollador del cepillo El voltaje en el cinturón es alto 1 Apague la aspiradora y desenchufe la cuerda de potencia 2 Remueva la tapa para exponer el rod...

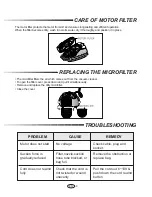
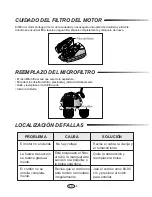
Page 18: ...de succión se reduce gradual mente Está bloqueado el filtro el tubo la manguera de succión o la boquilla o la bolsa está llena Quite la obstrucción y reemplace la bolsa El cordón no se enrolla completa mente Revise que el cordón no esté torcido o enrollado irregularmente Jale el cordón unos 60 90 cm y presione el botón para enrollar CUIDADO DEL FILTRO DEL MOTOR El filtro del motor protege al motor...

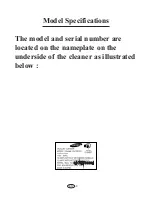
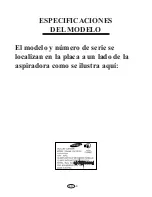
Page 19: ... 9 ES ESPECIFICACIONES DEL MODELO El modelo y número de serie se localizan en la placa a un lado de la aspiradora como se ilustra aquí ...

Page 20: ...DJ68 40015P REV 0 0 ...
Reviews: