4-55
4. Troubleshooting
4-4-3 White Balance - Adjustment
ADC/WB
White Balance
(low light)
(hight light)
Sub Bright
R offset
G offset
B offset
Sub Contrast
R gain
G gain
B gain
(W/B adjustment Condition refer next page)
4-5. Servicing Information
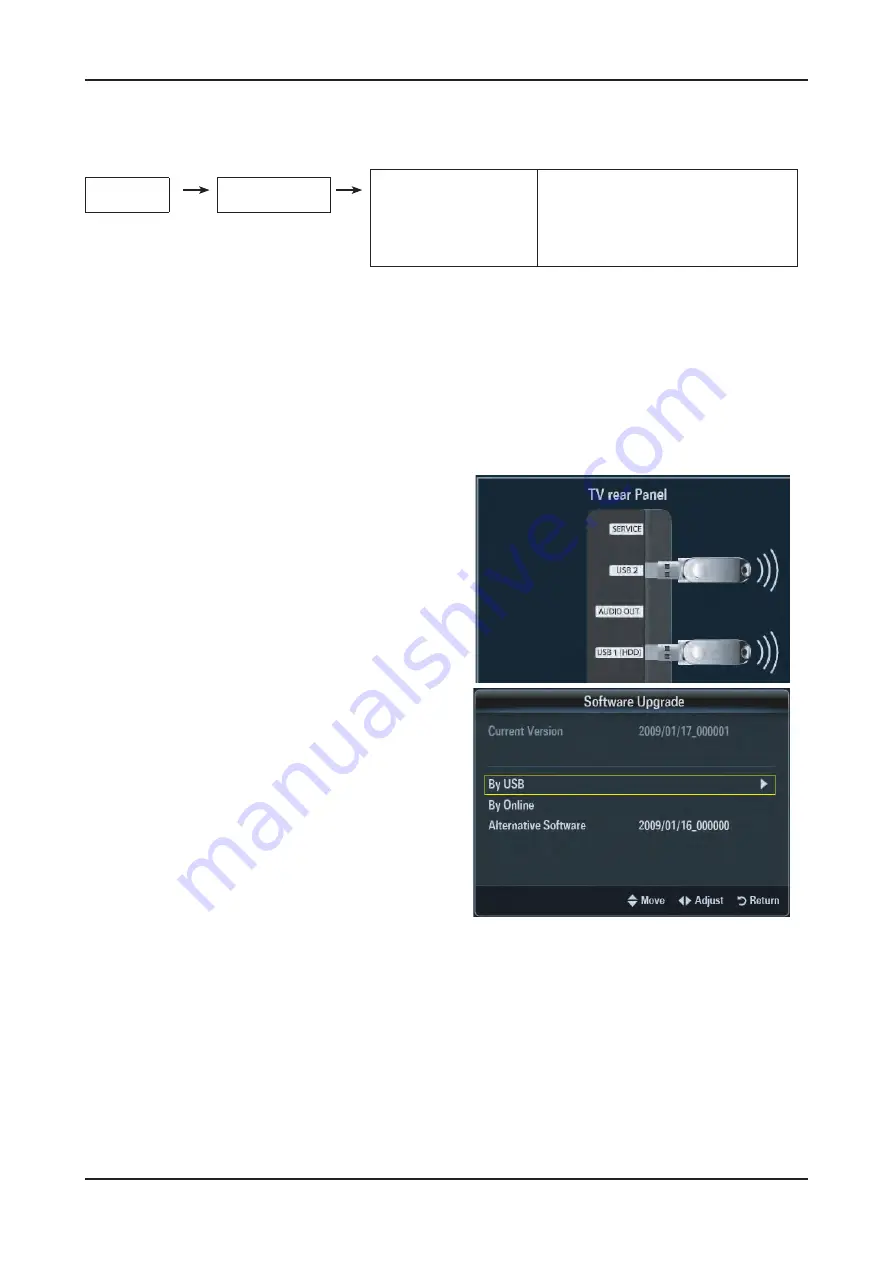
4-5-1 Upgrading the Software
Samsung may offer upgrades for TV’s firmware in the future. Please contact the Samsung call center at 1-800-
SAMSUNG (726-7864) to receive information about downloading upgrades and using a USB drive. Upgrades will
be possible by connecting a USB drive to the USB port located on your TV.
Insert a USB drive containing the firmware upgrade
1.
into the Wiselink Pro port on the side of the TV.
If pop up is showed, press the exit or or press the No
2.
button. (If you press Yes button, display is changed to
Wiselink Pro Menu )
Press the
3.
MENU
button to display the menu.
Press the ▲ or ▼ button to select “Setup", then press
the
ENTER
button.
Press the ▲ or ▼ button to select “SW Upgrade", then
4.
press the
ENTER
button.
Press the
5.
ENTER
button.
The message “Scanning for USB... It may take up to 30
seconds." is displayed.
The message “Upgrade version XXXX to version XXXX?
6.
The system will be reset after upgrade." is displayed.
Press the ◄ or ► to select the “OK", then press the
ENTER
button.
Please be careful to not disconnect the power or remove
the USB drive while upgrades are being applied. The TV
will turn off and turn on automatically after completing
the firmware upgrade. Please check the firmware version
after the upgrades are complete. When software is
upgraded, video and audio settings you have made will
return to their default (factory) settings.
We recommend you write down your settings so that you
can easily reset them after the upgrade.
Summary of Contents for UN46C9000ZF
Page 95: ...4 3 4 Troubleshooting ...
Page 103: ...4 11 4 Troubleshooting Location Main TOP BOTTOM B A E C D Detail A B C D E ...
Page 105: ...4 13 4 Troubleshooting Location Main TOP BOTTOM B A Detail A B ...
Page 106: ...4 14 4 Troubleshooting WAVEFORMS 1 2 PC Input V Sync H Sync 3 LVDS Out CLK ...
Page 108: ...4 16 4 Troubleshooting Location Main TOP BOTTOM C B A Detail A B C ...
Page 111: ...4 19 4 Troubleshooting Location Main TOP BOTTOM B A C Detail A B C ...
Page 112: ...4 20 4 Troubleshooting WAVEFORMS 5 Tuner CVBS Out Pattern Grey Bar 6 Eagle Out Clk H Sync ...
Page 114: ...4 22 4 Troubleshooting Location Main TOP BOTTOM B A C Detail A B C ...
Page 115: ...4 23 4 Troubleshooting WAVEFORMS 5 Tuner CVBS Out Pattern Grey Bar 7 TS DATA Out Clk Data 0 ...
Page 117: ...4 25 4 Troubleshooting Location Main TOP BOTTOM B A C Detail A B C ...
Page 118: ...4 26 4 Troubleshooting WAVEFORMS 5 Tuner CVBS Out Pattern Grey Bar ...
Page 120: ...4 28 4 Troubleshooting Location Main TOP BOTTOM B A C Detail A B C ...
Page 121: ...4 29 4 Troubleshooting WAVEFORMS 5 Tuner CVBS Out Pattern Grey Bar 9 Component Input Y Pb ...
Page 123: ...4 31 4 Troubleshooting Location Main TOP BOTTOM B D A C Detail A B C D ...


