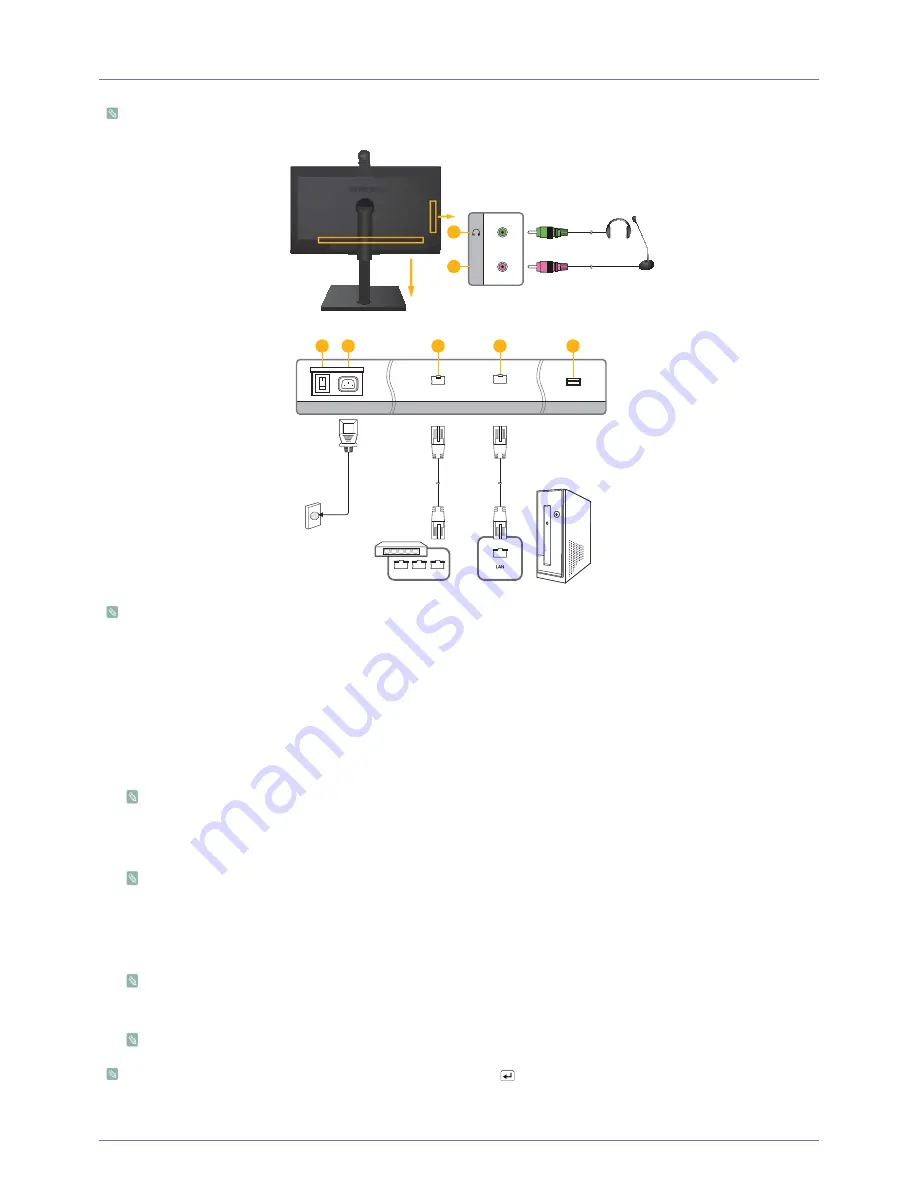
Installing the Product
1-6
1-6
Connecting to the Video Conference Monitor
The connecting part may differ depending on the product model.
•
Connect the monitor to your PC as illustrated when you intend to use the monitor as a computer display and to send and
receive video calls or participate in video conferences.
•
Ensure that only one of the two [LAN] ports is connected to the network using a LAN cable.
To connect the monitor to your PC and use it as a computer display and for video calls and video conferences, follow these
steps:
1.
POWER S/W : Turns the product on and off.
2.
Connect one end of the power cord to the [POWER] port of the product and connect the other end of the power cord to the
220V or 110V wall outlet.
The monitor recognizes the input voltage and switches automatically.
3.
Connect between the [LAN] port on the product and your network using a LAN cable
.
4.
Connect the LAN cable between the [LAN] port on the product and the [LAN] port on your PC.
You do not have to connect the monitor to a PC to make video calls.
When using the same IP for both the PC and the Video Conference Monitor, you must connect the LAN cables as shown above.
5.
SERVICE : Dedicated to A/S
6.
Connect the headphone cable to the headphone port on the product.
Connect it only when needed, since this product has an internal speaker. Note that it can only be used for a video call.
7.
Connect the microphone cable to the microphone port on the product.
Connect it only when needed, since this product has an internal microphone. Note that it can only be used for a video call.
Once the connection is finished, turn on the power and press the [
/SOURCE] button to select <VC> as the input signal.
7
POWER
POWER S/W
SERVICE
1
5
4
3
2
Computer
Hub
LAN
LAN
MIC
6


