


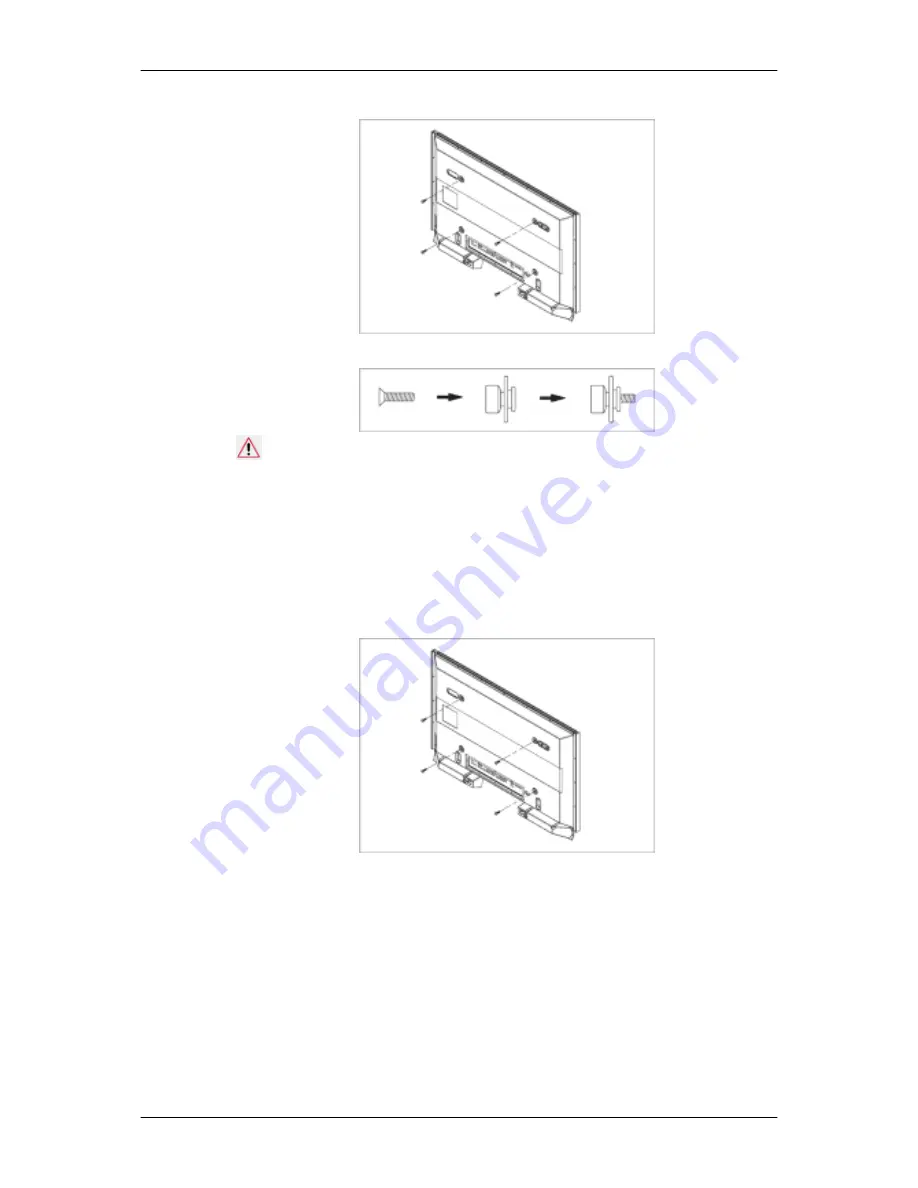
1. Remove the 4 screws on the back of the product.
2. Insert the screw B into the plastic hanger.
Notice
• Mount the product on the wall bracket and make sure it is properly fixed to the left
and right plastic hangers.
• Be careful when installing the product on the bracket as fingers can be caught in the
holes.
• Make sure the wall bracket is securely fixed to the wall, or the product may not stay
in place after installation.
3. Tighten the 4 screws in step 2 (plastic screw B)to the rear holes of the product.
4. Remove safety pin (3) and insert the 4 product holders into the corresponding bracket
holes (1). Then place the product(2) so that it is firmly fixed to the bracket. Make sure to
re-insert and tighten the safety pin (3) to securely hold the product to the bracket.
Introduction
Summary of Contents for SyncMaster P50FN
Page 1: ...SyncMaster P50F P50FN P63F P63FN PDP Monitor User Manual...
Page 20: ...Mechanical Layout P50F N Mechanical Layout NETWORK MODEL SIZE Introduction...
Page 36: ...Applicable to the P50FN P63FN model only Connections...
Page 38: ...6 Choose a folder to install the MagicInfo Pro program 7 Click Install Using the Software...
Page 93: ...Zoom Displays a reduced picture Close Closes the image control Menu Adjusting the PDP Display...


