background image

15

GB

14

GB

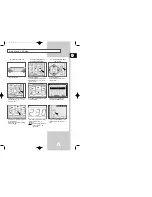
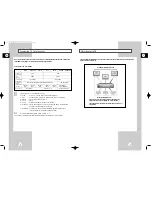
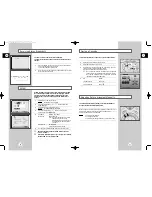
Setting the VCR RF out System

The VCR RF out system and channel is used to connect the 
SV-2000M to a TV with RF coaxial jacks. 
The RF out system is automatically set by country selection (See
page 12). 

If your selection of the country set is CANADA, the RF
out system is automatically set to CANADA-M system.

If after making your country selection, you have picture distortion
or no sound, you must set the RF out system and channel manually.
Change the RF out system according to the table below.

TV

RF out

Broadcast         

system

NATION

system

M

M

U.S.A, CANADA, KOREA,

JAPAN, BRAZIL,--

N

M

URUGUAY, ARGENTINA,--

B/G

G

GERMAN, IRAN, SAUDI ARABIA,--

I

I

U.K, HONGKONG,--

D/K

K

CHINA, CIS (RUSSIA), --

If you want to know the broadcast system of your
specific country, see the World Broadcast Systems
(page 46).

*SECAM-L(FRANCE) is not available on this VCR.

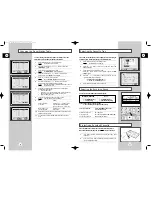
1

Press the MENU button on the remote control.
Result:

The MAIN menu is displayed.

2

Press the 

or 

button to select installation.

Press the OK button to select this option.
Result:

The 

I N S T A L L A T I O N

menu is displayed.

3

Press the  , 

button to select 

MANUAL SET UP

.

Result:

The 

MANUAL SET UP

menu is displayed.

4

Press the 

button until the cursor is placed in front of 

R F   O U T

system. 

5

Press the 

or 

button to change the RF OUT system.

Result:

The 

RF OUT

system is changed.

If the RF OUT system is not matched your TV system,
then no color or picture distortion is occurred.

O K

E N D:

M E N U

I N S T A L L A T I O N

COUNTRY SET
AUTO SET UP
MANUAL SET UP

E N D:

M E N U

* *MANUAL SET UP * *

MANUAL TUNING
RF OUT M/G/I/K

: G

RF OUT CH 21-69 : 6 0

E N D:

M E N U

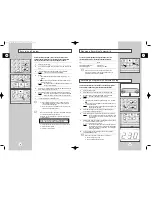
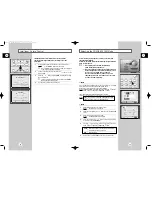
Your VCR contains a 24H clock and calendar used to:

preset your VCR to record a program automatically.

You must set the date and time when:

you purchase the video cassette recorder; or

the power supply remains off for more than 1 hours.

Do not forget to reset the time when you change
clocks from standard to daylight savings time and vice
versa.

1

Press the MENU button on the remote control.
Result:

The MAIN menu is displayed.

2

Press the 

or 

button, until the cursor is placed in front of the

C L O C K S E T

option.

3

Press the OK button to select this option.
Result:

The 

C L O C K S E T

menu is displayed.

4

Press 

or 

to select the hour, minutes, day, month and year.

Result:

The option selected flashes.

5

Press the 

or 

button to increase or decrease the value.

Result:

The day of the week is displayed automatically.

You can hold the 

or 

button down to scroll more quickly

through the values.

6

On completion, press the MENU button twice to exit the menu.

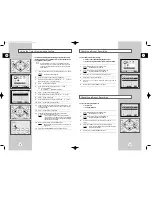
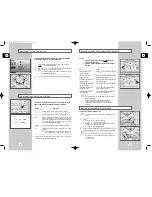
Your VCR displays most information both on the VCR and television.
You can choose to display or not to display this information on the
television screen (except for the Index, Timer Programming
function, Picture, which cannot be turned off).

1

Press the MENU button on the remote control.
Result:

The MAIN menu is displayed.

2

Press the corresponding 

or 

button, until the cursor is placed 

in front of the 

USER SET

option.

3

Press the OK button to select this option.

4

To:

Press the 

or 

button, until:

display on-screen information

O N

is displayed.

turn on-screen information off

O F F

is displayed.

5

On completion, press the MENU button twice to exit the menu.

Setting the Date and Time

1

2

5

5

To turn On-Screen Information on/off

O K

E N D:

M E N U

CLOCK SET

E N D:

M E N U

12:00   1/JAN/2000

S A T

O K

E N D:

M E N U

USER SET

O S D

: O N

TAPE SELECT

:E 1 8 0 /

T 1 2 0

COLOR SYSTEM

: A U T O

I P C

: O N

N I C A M

: O N

E N D:

M E N U

2

00872A SV-2000M/xev-GB1  9/8/56 12:10 PM  Page 14

Summary of Contents for SV-2000M

Page 1: ...MULTI SYSTEM VIDEO CASSETTE RECORDER SV 2000M Owner s Instructions 00872A SV 2000M xev GB1 9 8 56 12 10 PM Page a ...

Page 2: ...remote control Press REC for at least one second to start recording Enter the Timer program data Then press the MENU button Press REC for at least one second to start recording When you have finished recording press STOP Press REC several times until the required recording time is displayed Result Recording stops automati cally at the end of the required time Press VCR STANDBY ON to turn off the V...

Page 3: ...lay Indicators 7 Infrared Remote Control 7 CONNECTING YOUR VIDEO CASSETTE RECORDER Worldwide TV Color System 8 Multi System VCR 9 Deciding How to Connect Your VCR 10 Connecting Your VCR to the TV 11 SETTING UP YOUR VIDEO CASSETTE RECORDER Inserting the Batteries in the Remote Control 12 Initial Setup 12 User Set Setting 13 Setting the Date and Time 14 To turn On Screen Information on off 14 Settin...

Page 4: ...our VCR to the television Set the date and time used to display information on the television screen Preset the stations All these operations are essential so you must follow the step by step instructions carefully REMOTE CONTROL BATTERIES AAA OWNER S INSTRUCTIONS POWER ADAPTOR COAXIAL CABLE EUROPE A V RCA CABLES The following illustrations represent the precautions to be taken when using this vid...

Page 5: ...S CLEAR RESET BUTTON SLOW BUTTONS JOG SHUTTLE RING 2 9 10 4 6 3 1 5 7 8 Display Indicators Infrared Remote Control 1 Timer indicator 2 Recording speed indicator 3 Cassette in out indicator 4 Color system indicator 5 Multi function display 6 Hi Fi Indicator 7 Stereo system Indicator 8 Audio Level meter 9 VCR TV mode Indicator 10 IPC on off mode Indicator ANTENNA IN RF CONNECTOR Front View of the VC...

Page 6: ... China and Singapore SECAM France Eastern Europe and CIS PAL M Brazil PAL N Argentina The tape is the same as that of PAL NTSC4 43 Pseudo NTSC signal which is made to use NTSC tape in the Middle East The tape is the same as that of NTSC3 58 MESECAM The name of a tape which uses the SECAM signal recording method The output signal during playback is SECAM signal Worldwide Broadcasting system is B G ...

Page 7: ...l cable supplied Otherwise no picture will be visible on the screen when the VCR is switched off 2 3 5 TV 4 Deciding How to Connect Your VCR You must take into account various factors when deciding how to connect your various audio and or video systems Types of connectors available on your systems Systems connected permanently to the VCR satellite receiver for example or from time to time camcorde...

Page 8: ...king care to respect the polarities on the battery with on the remote control on the battery with on the remote control 3 Replace the cover by aligning it with the base of the remote control and pushing it back into place The VCR automatically displays the initial setup MENU when the VCR is plugged into the AC outlet for the first time 1 Plug the VCR into the AC outlet Result The LANGUAGE SET is d...

Page 9: ...et your VCR to record a program automatically You must set the date and time when you purchase the video cassette recorder or the power supply remains off for more than 1 hours Do not forget to reset the time when you change clocks from standard to daylight savings time and vice versa 1 Press the MENU button on the remote control Result The MAIN menu is displayed 2 Press the or button until the cu...

Page 10: ...ually see page 18 1 Press the MENU button on the remote control Result The MAIN menu is displayed Press the or button to select INSTALLATION Press the OK button to select this option 2 Press the button to select AUTO SET UP 3 Press the OK button to start the auto scanning Result The PLEASE WAIT indication flashes on the television screen The first frequency band is scanned and the first station fo...

Page 11: ...the cursor in front of the MFT Press the or button to adjust the picture if necessary Press the OK button to store the station Do notwish to Press the corresponding or button store the station to place the cursor in front of the CH displayed Press the or button to go on scanning the frequency band and display the next station Go back to the beginning of Step 12 13 Repeat this procedure from Step 6...

Page 12: ...END MENU You can rearrange the preset TV stations according to your own preferences program number assigned to the station 1 Press the MENU button on the remote control Result The MAIN menu is displayed 2 Press the corresponding or buttons to select the INSTALLATION option 3 Press the OK button to select this option Result The INSTALLATION menu is displayed 4 Press the corresponding or button unti...

Page 13: ...mode to avoid recording commercials or to change channels for example To press stop recording temporarily P STILL start recording again P STILL or REC If the VCR is left in pause mode for more than ten minutes recording will be stopped automatically to protect the heads and the cassette 22 GB Recording a Program Stopping a Recording Temporarily 5 7 6 4 4 6 4 4 5 This function enables you to record...

Page 14: ...to six programs can be preset Before presetting a recording check that the date and time are correct If not refer to page 14 If the clock has not been set the Date Time Setting function is activated automatically 1 Insert the cassette and press the MENU button on the remote control Result The MAIN menu is displayed 2 Press the OK button to select the timer programming 3 Select the required channel...

Page 15: ...e refer to page 31 1 Press MENU on the remote control Result The MAIN menu is displayed 2 Press the corresponding or buttons to select the USER SEToption 3 Press the OK button to select this option Result The USER SETmenu is displayed 4 Press the corresponding or button until the cursor is placed in front of the NICAM option 5 To select Press or until Mono mode OFF is displayed OFF Only set at thi...

Page 16: ... is a PAL system only TV set NTPB If your TV is Multi System TV NTSC 4 43 NT3 58 compatible set NT4 43 or NT3 58 and you can record NT4 43 or NT3 58 respectively CASE1 Press the COLOR SYSTEM button in the front panel or the SYSTEM button on the remote control to select color system mode Each time you press this button color mode is changed Result COLOR SYSTEM is changed NT3 58 NT4 43 NTPB or AUTO ...

Page 17: ...n is displayed 1 2 2 L R MIX L R MONO You can rewind or fast forward a cassette without seeing the picture on the television search for a given sequence forwards or backwards on the tape To press rewind the tape without REW when the cassette is stopped viewing the picture rewind the tape while REW when the cassette is playing viewing the picture Reverse Search function switch from reverse search R...

Page 18: ...uring X2 play or other variable speed play mode adjust the tracking manually for a cleaner picture Playing a Sequence at Variable Speeds Searching for a Specific Sequence LP on PAL SECAM MESECAM REVERSE X9 REVERSE X7 SP on All Systems SLP on NTSC REVERSE X3 REVERSE PLAY REVERSE SLOW 1 5 SLOW 1 5 SLOW 1 10 PLAY PLAY X2 PLAY X7 PLAY X9 REVERSE X15 REVERSE X9 REVERSE X5 REVERSE PLAY REVERSE SLOW 1 5 ...

Page 19: ...to the start point INTERVAL REPEAT is displayed Interval Repeat Play O K END MENU EASY OPERATION AUTO POWER OFF OFF REPEAT PLAY OFF NO OF INTERVAL REPEAT 5 END MENU O K END MENU EASY OPERATION AUTO POWER OFF OFF REPEAT PLAY OFF NO OF INTERVAL REPEAT 5 END MENU 7 0 00 00 2 4 The tape counter indicates the elapsed time in the play and record modes hours minutes and seconds is reset when a cassette i...

Page 20: ...ttons for television channels or the INPUT button for the L1 or L2 input sources Perform necessary hookups and activate source Refer to page 37 7 Press the P STILL button to start recording 8 When you have finished recording press STOP 3 5 2 4 6 6 7 8 The EURO AV connector on the rear of the VCR is used for equipment with a SCART input output such as a satellite tuner or VCR REAR OF THE VCR Satell...

Page 21: ... 7 6 2 To provide true Hi Fi audio sound with video entertainment and at the same time compatibility with regular VHS tapes your VCR employs a newly developed audio recording system Hi Fi audio signals 2 channel are recorded deep into the tape s magnetic coating and the video signal is recorded on top of the audio signals in a shallower layer At the same time another audio head records linear audi...

Page 22: ...evision is compatible with the remote control it is switched off It is now programmed to operate with the remote control If several codes are indicated for your television brand try each one in turn until you find one that works When you change the batteries in the remote control you must reprogramme the code following the same procedure You can then control the television using the following butt...

Page 23: ... 5 END MENU Recording system Rotary head azimuth recording luminance signal FM recording system Chrominance signal down converted phase shift recording system NTSC PAL Chrominance signal down converted direct recording system MESECAM Chrominance signal 1 4 frequency countdown direct recording system SECAM Color system NTSC NTSC4 43 PAL SECAM Tuning system B G D K I M RF out M UHF 14 69 CATV 116 12...

Page 24: ...d or F F button is pressed When the P STILL button is pressed A still picture may have noise bars depending on the during playback the still picture has severe condition of the tape Press the TRACKINGbuttons noise bar streaks or to minimize this effect If you are unable to solve the problem after reading the above instructions note the model and serial number on the rear of your VCR the warranty i...

Page 25: ...com North Latin America U S A United States America Tel 973 691 6200 1 800 Samsung Web site http www sosimple com Canada Tel 905 819 5031 1 800 Samsung Web site http www samsungcanada com Mexico Tel 52 5 686 0800 Web site http www samsung latin america co Panama Tel 507 210 1133 Web site http www samsung latin america co Brazil Tel 55 11 541 8500 Web site http www samsung latin america co Argentin...

Page 26: ...AC68 00872A BZ03 00872A SV 2000M xev GB5 9 8 56 12 13 PM Page 48 ...

Reviews: