English
_51
●
Live
LAyouT
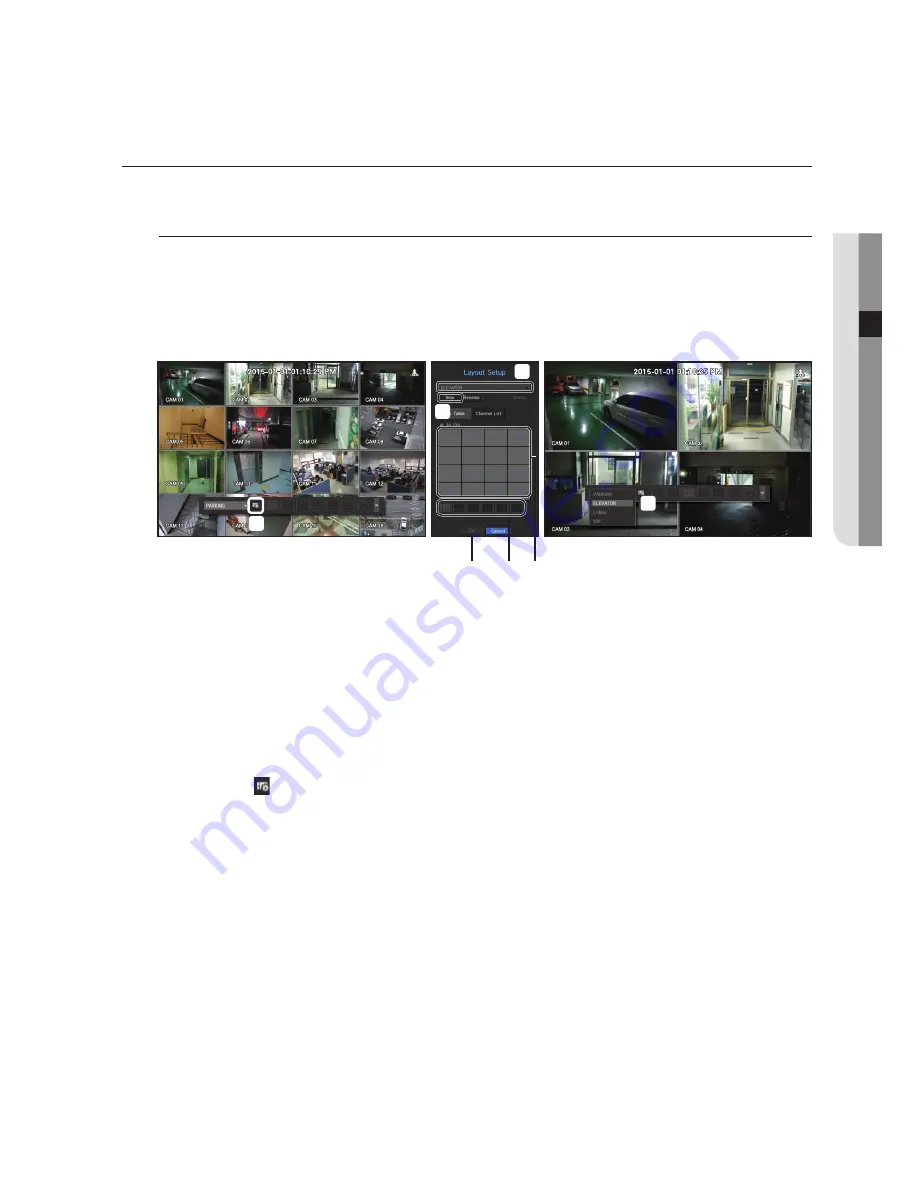
In the live screen, you can set the layout for each channel.
Setting up the Live Layout
This section outlines how to select a series of channels based on their purpose/accessibility and monitor them
in a single layout.
Example) Layout "Lobby" - Lobby camera 1, Lobby camera 2, Front entrance camera 2
Layout "VIP" - Directors' meeting room 1, Directors' meeting room 2, Directors' lounge 1, Corridor camera on
the 7th floor
To create a new layout, follow these steps:
a
Open the channel layout setup menu.
b
Click <
new
>.
c
Enter a name for the selected channels (e.g., ELEVATOR).
d
Select the channels that you want to add to the layout (e.g., 2, 7, 10, 15).
e
Choose a split mode to apply (e.g., 4-way split).
f
Click <
oK
>.
g
Choose a layout to view it on the screen (e.g., change to ELEVATOR).
1.
Select the <
>.
The layout setting screen will appear.
•
New : You can set the new layout.
•
Rename : You can make changes to the selected layout.
When the layout is changed, the channel order is initialized.
•
Delete : You can delete the selected layout.
•
Ch. Table : You can select channels in the table to be registered in, or removed from the layout.
•
Channel List : You can select channels in the list to be registered in, or removed from the layout.
2.
Press the <
new
> button and enter the name of layout to add.
3.
In the <
Ch. Table
> or <
Channel List
>, click and select the channel to be displayed on the layout screen.
4.
Click on <
oK
> to save the selected layout.
M
`
The layout for each user is saved separately.
a
g
d
e
f
c
b


