Disassembly and Reassembly
Samsung Electronics
4-5
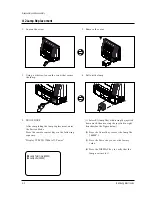
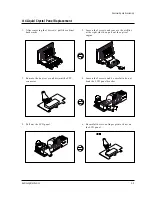
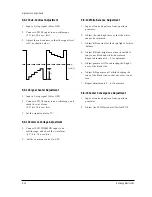
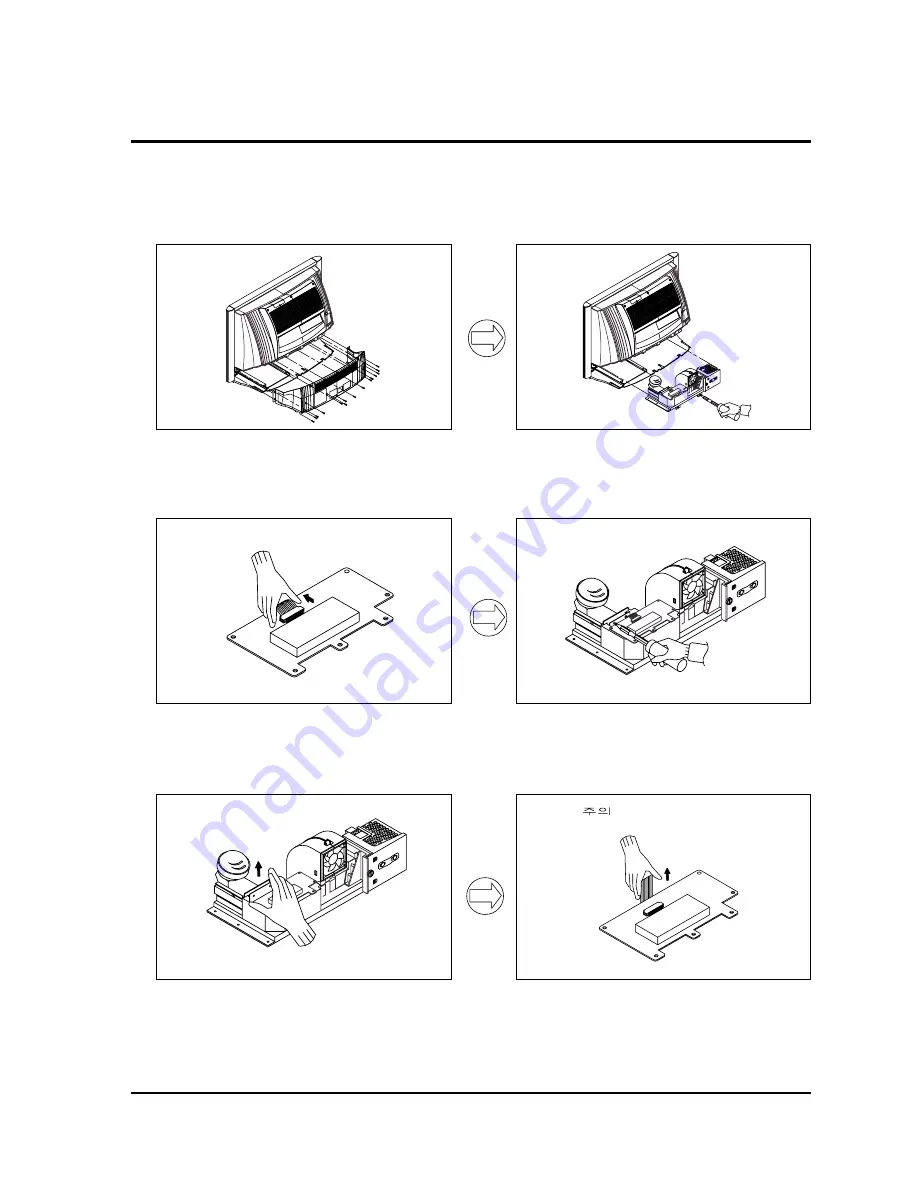
4-4 Liquid Crystal Panel Replacement
1. After removing the 16 screws, pull the cabinet
backwards.
3. Remove the dust cover and disjoint the FPC-
connector.
5. Pull out the LCD panel.
2. Loosen the 2 screws and remove the airfilter
at the right side then pull out the optical
engine.
4. Loosen the 2 screws and be careful to do not
bend the LCD panel bracket.
6. Be careful there is no finger print or dust on
the LCD panel.
Summary of Contents for SP43J6HDX/XEN
Page 2: ...ELECTRONICS Samsung Electronics Co Ltd MAY 2000 Printed in Korea 3M51A 4308 ...
Page 10: ...2 4 Samsung Electronics MEMO ...
Page 12: ...3 2 Samsung Electronics MEMO ...
Page 54: ...Schematic Diagrams 10 3 Samsung Electronics 10 3 MAIN POWER Power Line Signal Line ...
Page 55: ...Schematic Diagrams 10 4 Samsung Electronics 10 4 PROSCAN 1 Power Line Signal Line ...
Page 56: ...Schematic Diagrams 10 5 Samsung Electronics 10 5 PROSCAN 2 Power Line Signal Line ...
Page 57: ...Schematic Diagrams 10 6 Samsung Electronics 10 6 PROSCAN 3 Power Line Signal Line ...
Page 58: ...Schematic Diagrams 10 7 Samsung Electronics 10 7 PROSCAN 4 ...
Page 59: ...Schematic Diagrams 10 8 Samsung Electronics 10 8 MAIN u COM Power Line Signal Line ...
Page 61: ...Schematic Diagrams 10 10 Samsung Electronics 10 10 MAIN A V TERMINAL Power Line Signal Line ...
Page 66: ...Schematic Diagrams 10 15 Samsung Electronics 10 15 MAIN SUB LEDKEY LEVER SUB ...

