background image

3.9

Copying

Zoom rate

You can reduce or enlarge the size of a copied image from 25% to 
400% using Zoom Rate button on the operation panel. 

To select the zoom rate from pre-defined copy sizes:

1

Press Zoom rate until the setting you want appears on the 
display.

2

Press Enter to save the selection. 

To fine-tune the size of copies:

1

Press Zoom rate until you see “CUSTOM 100% (

)” on 

the display.

2

Press the Scroll buttons (

 or 

) to gradually increase or 

decrease the size by 1% increments. Pressing and holding 
the 

Scroll buttons will change the size 5% increments.  

N

OTE

:

 While the Paper Save mode is enabled, the Zoom Rate 

you previously selected is ignored.

Summary of Contents for SCX-1100

Page 1: ......

Page 2: ...t from the AC wall socket before cleaning Do not use liquid or aerosol cleaners Use only a damp cloth for cleaning 6 Do not place the product on an unstable cart stand or table It may fall causing serious damage 7 Your product should never be placed on near or over a radiator heater air conditioner or ventilation duct 8 Do not allow anything to rest on the power Do not locate your product where th...

Page 3: ...een spilled into the product If the product has been exposed to rain or water If the product does not operate properly after instructions have been followed If the product has been dropped or the cabinet appears damaged If the product exhibits a sudden and distinct change in performance 14 Adjust only those controls covered by the operating instructions Improper adjustment of other controls may re...

Page 4: ... 1 10 Installing Print Cartridges 1 12 Changing the Display Language 1 17 Turning Key Sound On or Off 1 17 Setting Ink Save Modes 1 18 Setting Paper Save Modes 1 18 Setting Power Save Mode 1 19 Installing Software 2 1 About Samsung Software 2 2 System Requirements 2 3 Installing Samsung Software 2 4 Configuring Fax Gate and Internet Gate 2 8 Uninstalling Samsung Software 2 12 Uninstalling the MFP ...

Page 5: ...ion 4 2 Guidelines for Special Media 4 3 Loading Specialty Paper 4 4 Paper Guidelines 4 5 Printing a Document 4 6 Printer Settings 4 8 Accessing Printer Settings 4 8 Printer Properties Tabs Windows 95 98 Me 4 9 Printer Properties Tabs Windows NT 4 0 4 14 Printer Properties Tabs Windows 2000 XP 4 16 Printer Properties Buttons Icons 4 17 Using the Printer Control Program 4 17 Accessing Printer Contr...

Page 6: ... from the Computer 6 13 Aligning Print Cartridges 6 14 Aligning Print Cartridges from the Product 6 14 Aligning Print Cartridges from the Computer 6 15 Cleaning Document Glass 6 17 Using Help List 6 17 Troubleshooting 7 1 Clearing Paper Jams 7 2 Tips for Avoiding Paper Jams 7 4 LCD Error Messages 7 5 Fixing Problems 7 6 Paper Feeding Problems 7 6 General Printing Problems 7 7 Colour Printing Probl...

Page 7: ...iv Contents MEMO ...

Page 8: ...ter provides step by step instructions on setting up the product and installing the software The chapter includes Contents Control Locations and Functions Operation Panel Button Functions Choosing a Location Setting Up Your Product Loading Paper Installing Print Cartridges Changing the Display Language Turning Key Sound On or Off Setting Ink Save Modes Setting Power Save Mode ...

Page 9: ... product 1 The shape of the power cord plug may differ depending on your country 2 CD ROM of the MFP driver SmarThru and OCR program SCX 1100 Colour and Black ink cartridges Power cord 1 USB cable CD 2 and SmarThru User s Guide Quick Install Guide User s Guide Warranty Card ...

Page 10: ...oment to familiarize yourself with the main components of your product Front View Output Tray Extension Output Tray Top Cover To open lift the cover Document glass Operation Panel see page 1 5 Cartridge Door Grab the handle of the door and open it wide Cartridge Holder ...

Page 11: ...1 4 Setting Up Your Product Rear View Top View Parallel Connector USB Connector Connector Door To access connectors open it wide AC Power Socket Paper Guide Paper Support Paper Bin ...

Page 12: ...ou can select the scan destination 3 Adjusts the copy quality Adjusts the copy contrast to make copies lighter or darker than the original Selects the number of copies Makes a copy smaller or larger than the original Makes a black and white copy Makes a colour copy Allows you to set up special copy features including Fit to Page Clone Poster and Mirror copy ...

Page 13: ... your product In direct sunlight Near heat sources or air conditioners In dusty or dirty environments 4 Cancels a scan or copy job or returns a menu item to its default setting 5 Shows the current status and guides you through various menu setup 6 Allows you to save ink 7 Allows you to save paper by printing 2 pages on a single sheet of paper Only available in Black copy 8 Enters menu mode 9 Scrol...

Page 14: ...1 7 Setting Up Your Product Setting Up Your Product 1 Remove the shipping tapes from the front back and sides of the product 2 Open the connector door ...

Page 15: ...EE 1284 compliant parallel cable purchase separately NOTES If you are using a USB cable you must be running Windows 98 or Me 2000 XP When you connect to a USB port on a Windows computer use the same USB port every time you connect your product 4 Close the connector door USB connection Parallel connection OR ...

Page 16: ...he other end into a properly grounded AC outlet As you plug it in your product will turn on automatically Wait for POWERING UP to disappear from the display indicating the machine is on To view your display text in another language see page 1 17 To turn off and back on use the power button on the operation panel ...

Page 17: ...r use Setup button to set the paper size For details see page 3 2 For PC printing you can use smaller sizes of paper For details see page 4 10 1 Pull the paper support on the paper bin all the way up 2 Fan the paper and insert it with the print side facing you Ensure that the right edge of the paper is in contact with the right side of the paper bin Do not exceed the specified capacity NOTES Do no...

Page 18: ...he right to match the width of the paper 4 Pull the output tray and output tray extender on the front of the product all the way out NOTE If you are using legal size paper do not pull the output tray out Push it in or it may cause paper jam when the paper prints out Paper guide ...

Page 19: ...e 6 9 NOTE There are two types in the black and the colour cartridge by the yield Standard and High yield Before proceeding to install you need to check which cartridge type you have When you install the cartridges you will be asked if it is Standard or High Yield To find out the type please refer to the table on the page 6 9 1 Unwrap and remove the colour print cartridge from its plastic bag Hold...

Page 20: ...f the holder The black or photo cartridge will be inserted into the right side of the cartridge holder and can be identified by a green tab on the top of the holder 4 Place the colour print cartridge into the left side of the holder 5 Push the colour cartridge back until it clicks into place Yellow tab indicates colour cartridge position Green tab indicates black or photo cartridge position colour...

Page 21: ...arefully remove the sealing tape covering the print head Place the black print cartridge into the right side of the holder 7 Push the black print cartridge back until it clicks into place 8 After installing the print cartridges close the cartridge door 9 When you close the door the display shows COVER CLOSED and then NONE CHANGED ...

Page 22: ... YIELD COLOR and then press Enter 13 The display shows NEW BLACK Press Enter 14 The display shows STANDARD BLACK If you have installed a standard capacity black cartridge press Enter If not press the Scroll buttons or to display HIGH YIELD BLACK and then press Enter 15 Cartridge Alignment begins automatically by printing the Cartridge Alignment form Use this form to identify the straightest line i...

Page 23: ...y print cartridge in the product The product will not print with only one print cartridge installed Keep a spare print cartridge on hand When buying print cartridges check the part numbers referenced below to ensure buying the correct print cartridge These print cartridges have been specifically designed to work with your product to produce results that are always clear and sharp If you want to pu...

Page 24: ...r until you see the language you want in the display and then press Enter to save the selection Turning Key Sound On or Off You can turn the key sound on or off If you turn the key sound on key tone sounds each time you press a button on the machine s operation panel 1 Press Setup on the operation panel 2 Press the Scroll buttons or until you see KEY SOUND on the display and then press Enter 3 Pre...

Page 25: ... Save mode is active and the machine uses less ink to print a document If the button backlight is off Ink Save mode is disabled and you will print with normal quality Setting Paper Save Modes You can enable or disable Paper Save featur with the touch of a button The Paper Save feature print 2 pages on a single sheet of paper to save paper 1 Press SAVE Paper on the operation panel The display shows...

Page 26: ...re it switches to a reduced power state 1 Press Setup on the operation panel The display shows the first menu LANGUAGE 2 Press the Scroll buttons or until you see POWER SAVE MODE in the display and then press Enter 3 The display shows the time available Press the Scroll buttons or until you see the desired time in the display The current setting is tagged with a at the end of the display 4 Press E...

Page 27: ...1 20 Setting Up Your Product MEMO ...

Page 28: ...ed Samsung software You must install the Samsung software to use your product as a printer and scanner The topics included in this chapter are About Samsung Software System Requirements Installing Samsung Software Configuring Fax Gate and Internet Gate Uninstalling Samsung Software ...

Page 29: ...ng software for your SCX 1100 multifunctional product SmarThru contains a powerful image editor that allows you to edit images in many ways and also includes powerful Internet mail client software With SmarThru you can save the scanned images in a dedicated storage area for subsequent editing sending via e mail or fax printing and processing by other programs of your choice OCR Software AnyPage Li...

Page 30: ...me edition or Professional Minimal Requirements Disk space 130 MB for installation Memory 64 MB CPU Pentium II 233 or higher Required software Internet Explorer 4 01 or above Recommended Disk space 250 MB for installation Memory 128 MB CPU Pentium II 400 or higher Required software Internet Explorer 5 5 or above NOTES Administrative rights should be set for installation on Windows NT 4 0 2000 XP W...

Page 31: ...upport USB connection 1 Insert the supplied SmarThru CD ROM into your CD ROM drive The SmarThru CD ROM should automatically run and opening window appears If the opening window does not appear click Start and then Run Type X Autorun exe replacing X with the letter of your drive and click OK If you are asked to select the language choose your desired language 2 Click Install the Samsung Software on...

Page 32: ...ompact Only the MFP driver will be installed Custom You may choose the options you want to install Recommended for advanced users 5 Click Next If you select the Custom installation you may choose the options you want to install SmarThru Software to scan and edit images and work with electronic documents OCR Software AnyPage Lite software to enable OCR MFP Driver to print and scan ...

Page 33: ...s Remote Fax or Remote Scan service If you selected SmarThru networking you can select to install server client or both Server allows you to share local fax modem and or scanner over a LAN You can control sharing by managing remote service user Client allows you to use Remote Fax or Remote Scan services provided by SmarThru Remote Services Server over a LAN You need to have a client account These ...

Page 34: ...your computer does not shut down and restart automatically you must shut it down manually and restart it before the changes will be saved NOTE When you install the software the Digital Signature Not Found window appears in Windows 2000 and Windows XP Click OK in Windows 2000 and click Continue Anyway in Windows XP ...

Page 35: ... only the first time you try to launch Mailbox in the SmarThru program For information on SmarThru please refer to the SmarThru User s Guide NOTE To configure the Internet gate you must enter your e mail address incoming POP3 or IMAP4 and outgoing SMTP mail server address and account name Ask your Internet service provider or on line service provider for the information on your Internet gate confi...

Page 36: ... The e mail address has been assigned to you by your Internet service provider 4 Enter the addresses of your incoming and outgoing mail servers Choose the incoming mail server type then click Next Your Internet service provider will be able to provide you with this information ...

Page 37: ...are 5 Enter your account name and password to access your Internet mail server then click Next Your Internet service provider will be able to provide you with this information 6 Enter the account record name then click Next ...

Page 38: ...Software 7 Click Finish to quit the wizard and enable Internet e mail service NOTE If you wish you can reconfigure the Internet gate later by using SmarThru Configuration For details refer to the SmarThru User s Guide ...

Page 39: ...on ensure all applications are closed on your PC A system reboot is required after the software is un installed Uninstalling the MFP Driver 1 Start Windows if not already started 2 From the Start menu select Programs then select Samsung SCX 1100 Series 3 You can select the component in the MFP driver to uninstall individually If you want to uninstall the scan driver select TWAIN Driver Uninstaller...

Page 40: ... you restart your computer Click OK then restart Windows NOTE If you want to install the printer driver or the scan driver using the SmarThru CD ROM make sure that you select the Setup Type to Compact Or select Custom then select MFP Driver For details see page 2 5 Uninstalling Samsung SmarThru 1 Start Windows if not already started 2 From the Start menu select Programs 3 Select Samsung SmarThru t...

Page 41: ...es all the SmarThru data and options No backup or copying takes place Be careful while using this option as you can easily lose your data Leave intact Uninstalls SmarThru software leaving data and option intact This can be useful if for example you decide to install Stand Alone configuration over SmarThru Networking In this case uninstall Samsung SmarThru having Leave intact option set and install...

Page 42: ...the un installation The SmarThru software and all components will be removed 7 When un installing is done click OK The message box recommends restarting your computer 8 Click OK Shut down and restart your computer to complete the un installation process and save your changes ...

Page 43: ...y run and the opening window appears If the opening window does not appear select Run from the Start menu then type X Autorun exe replacing X with the letter of your drive and click OK If you are asked to select the language choose your desired language 2 Click Uninstall the Samsung software on your PC 3 Follow the on screen instructions to complete un installation You must shut down and restart y...

Page 44: ...e operation panel let you make all the basic settings paper type and size copy size copy contrast and quality number of copies and colour or black and white This chapter includes Setting Paper Size and Type Loading the Original Documents Copying a Document Setting Copy Options Using Special Copy Changing Default Settings ...

Page 45: ...am you use Paper Size After loading paper take the following steps to set the paper size from the operation panel 1 Press Setup on the operation panel The display shows the first menu LANGUAGE 2 Press the Scroll buttons or until you see PAPER SIZE in the display 3 Press Enter The current setting is tagged with a at the end of the display 4 Press the Scroll buttons or until you see the paper size y...

Page 46: ... type using this menu 1 Press Setup on the operation panel The display shows the first menu LANGUAGE 2 Press the Scroll buttons or until you see PAPER TYPE in the display 3 Press Enter The current setting is tagged with a at the end of the display 4 Press the Scroll buttons or until you see the paper type you are using in the display 5 Press Enter to save the selection ...

Page 47: ...2 Place the document face down on the document glass Position it so the horizontal and vertical edges are carefully aligned with the scales along the sides of the document glass 3 Close the top cover slowly Be careful not to move the document top corner of document ...

Page 48: ...r scan a book You can remove the top cover to place an original document such as a book Lift the cover straight up to remove it To insert the cover in place hold it as shown and insert its hinges into the holes Then close the top cover ...

Page 49: ...these steps to copy using the operation panel 1 Place the original document face down on the document glass Close the top cover For details see page 3 4 2 Customize the copy settings including copy quality contrast number of copies and copy size if necessary See Setting Copy Options on page 3 7 3 When you are finished setting the copy options press Start Copy Black to begin a black and white copy ...

Page 50: ...nts with fine details The copy quality is good but the copy speed is low NORMAL mode works well for normal documents text DRAFT mode can be used for fast copying with lower resolution To select copy quality 1 Press Quality The current setting is tagged with a at the end of the display 2 Scroll through the options available by pressing Quality repeatedly or using the Scroll buttons or 3 When the de...

Page 51: ...pressing Contrast repeatedly or using the Scroll buttons or 3 When the desired mode is displayed press Enter to save the selection Copy page You can select the number of copies from 1 to 99 To change the number of copies 1 Press Copy page The current setting is tagged with a at the end of the display 2 Change the number of copies using the Copy page button or Scroll buttons Each time you press Cop...

Page 52: ...etting you want appears on the display 2 Press Enter to save the selection To fine tune the size of copies 1 Press Zoom rate until you see CUSTOM 100 on the display 2 Press the Scroll buttons or to gradually increase or decrease the size by 1 increments Pressing and holding the Scroll buttons will change the size 5 increments NOTE While the Paper Save mode is enabled the Zoom Rate you previously s...

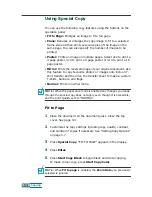
Page 53: ...os or images onto Iron on T shirt transfer and then iron the transfer sheet to make a custom T shirts banners and flags Normal Prints in normal mode NOTE When the paper save mode is enabled any changes you made through the special copy does not apply even though it is accessible and the print Quality sets to NORMAL Fit to Page 1 Place the document on the document glass Close the top cover See page...

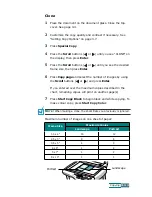
Page 54: ... press Enter 6 Press Copy page and select the number of images by using the Scroll buttons or and press Enter If you entered over the maximum copies described in the chart remaining copies will print on another page s 7 Press Start Copy Black to begin black and white copying To make colour copy press Start Copy Color NOTE When making a clone the Zoom Rate you previously is ignored Maximum number o...

Page 55: ...x2 3x3 4x4 6 Press Enter to save the selection 7 Press Start Copy Black to begin black and white copying To make colour copy press Start Copy Color NOTE When printing a Poster the Zoom Rate you previously selected is ignored Mirror 1 Place the document on the document glass Close the top cover See page 3 4 2 Customize the copy settings including copy quality contrast number of copies and zoom rate...

Page 56: ...the display then press Enter 3 Press the Scroll buttons or until you see DEFAULT SETUP on the display then press Enter The first setup menu CONTRAST appears 4 Use the Scroll buttons or to scroll through the setup menu available 5 When the desired menu appears press Enter to access the menu 6 Change settings using the Scroll buttons or and then press Enter to save the selection 7 Repeat steps 4 thr...

Page 57: ...3 14 Copying MEMO ...

Page 58: ... to learn how to select and load print media and how to use the print settings This topics included in this chapter are Paper Selection Loading Specialty Paper Printing a Document Printer Settings Using the Printer Control Program ...

Page 59: ... damaged edges Coated paper Paper developed for high quality printing with minimal or no smearing or running when in contact with water or damp surfaces Glossy Photo Paper A high gloss thicker paper that produces the look and feel of a photograph Use this paper to produce photo realistic prints from your printer Transparency Your transparencies should be products designed for use in Ink Jet produc...

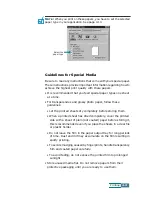
Page 60: ...inted sheets dry completely before storing them When a printed sheet has dried completely cover the printed side with a sheet of plain not coated paper before storing it this is recommended even if you place the sheets in a clear file or plastic holder Do not leave the film in the paper output tray for long periods of time Dust and dirt may accumulate on the film resulting in spotty printing To av...

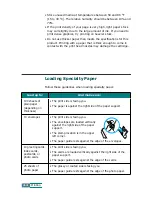
Page 61: ... when loading specialty paper Load up to And make sure 100 sheets of plain paper depending on thickness The print side is facing you The paper is against the right side of the paper support 10 envelopes The print side is facing you The envelopes are loaded vertically against the right side of the paper support The stamp location is in the upper left corner The paper guide rests against the edge of...

Page 62: ...minating your paper Always use paper and other media that conform with those listed under Specifications on page 8 4 Use only well constructed envelopes with sharp well creased folds DO NOT use envelopes with clasps and snaps DO NOT use envelopes with windows coated linings self adhesive seals or other synthetic materials DO NOT use damaged or poorly made envelopes 10 transparencies The rough side...

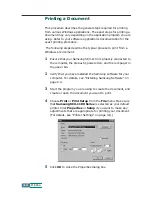
Page 63: ...y connected to the computer the product is powered on and there is paper in the paper bin 2 Verify that you have installed the Samsung software for your computer For details see Installing Samsung Software on page 2 4 3 Start the program you are using to create the document and create or open the document you want to print 4 Choose Print or Print Setup from the File menu Make sure that Samsung SCX...

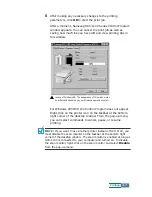
Page 64: ...ar at the bottom right corner of the desktop window From the pop up menu you can select commands to cancel pause or resume printing NOTE If you want to use another printer instead of SCX 1100 you must disable the scan monitor on the taskbar at the bottom right corner of the desktop window The scan monitor is enabled as long as SCX 1100 is connected to your computer and turned on To disable the sca...

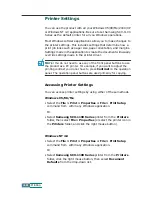
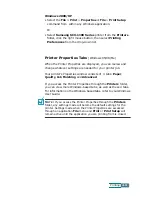
Page 65: ...r For example if you want to adjust the printing contrast you do not have to press Contrast on the operation panel The operation panel buttons are used primarily for copying Accessing Printer Settings You can access printer settings by using either of these methods Windows 95 98 Me Select the File Print Properties or File Print Setup command from within any Windows application Or Select Samsung SC...

Page 66: ...printer job Your printer s Properties window consists of 4 tabs Paper Quality Job Finishing and Advanced If you access the Printer Properties through the Printers folder you can view more Windows based tabs as well as these 4 tabs For information on the Windows based tabs refer to your Windows User Guide NOTE If you access the Printer Properties through the Printers folder any settings made will b...

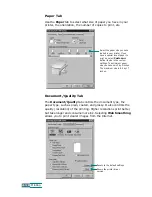
Page 67: ...ality resolution of the printing Higher resolutions print better but take longer and consume more ink Selecting Web Smoothing allows you to print clearer images from the Internet Select the paper size you have loaded in your printer If you have a special size of paper to print on select Custom and define its size in the custom settings The minimum paper size you can use is 3 by 5 inches The maximu...

Page 68: ...o sided printing Booklet The Booklet option allows you to print a document out as a booklet If the Print reloading instructions after the first side prints is checked a page will print directing you how to insert the paper so that the booklet prints correctly A bundle is any number of sheets of paper folded together When printing with a heavier paper stock select a smaller number of Sheets Per Bun...

Page 69: ...old it in half and set it aside 2 Fold and stack the rest of your bundles one on top of the other until your booklet is complete 3 Bind the bundles Poster Choose the Poster option to enlarge the printed document If you check Show Crop Marks the image will print with crop marks The white space around the image can be easily trimmed ...

Page 70: ...Handout Choose the Handout option to print multiple pages on a single sheet of paper Two Sided Printing Choose the Two sided printing option from the Job Finishing tab to print the document on both sides of the paper ...

Page 71: ...r handles colour printing You should rarely need to change these settings Printer Properties Tabs Windows NT 4 0 Page Setup Tab This tab allows you to set page properties including number of copies collate print quality orientation reverse order printing paper size and paper type ...

Page 72: ...ng brightness and contrast You can also select the colour appearance and the document colour Feature Tab You can select the Dry Time Delay option and the two sided printing option You can also access Cartridge Maintenance features from this tab NOTE In Windows NT 4 0 Poster Handout and Booklet printing are not provided ...

Page 73: ... allows you to select paper source paper type print quality and colour The Advanced button under this tab allows you to select advanced document settings including paper size print resolution and colour intent Layout Tab Use the Layout tab to select print orientation and page order ...

Page 74: ...ne the operation of your product NOTE The Printer Control Program is not available in Windows 2000 XP Accessing Printer Control Program 1 Click Start Programs SAMSUNG SCX 1100 Series Printer Control Program NOTE Windows NT 4 0 users can also access the Printer Control Program from the Printer Properties window See page 4 14 2 The Samsung SCX 1100 Series Control Program window appears The appearanc...

Page 75: ... the Control Program Options to Run Minimized using the options on page 4 19 Once a print job has started you can use this window to cancel the print job or monitor the job progress The ink level of your cartridges is also displayed Use the gauges to help you determine when they need replacing NT 4 0 provides this button in the Cartridge tab in case of Windows 98 ...

Page 76: ...me of the behaviour of the Control Program The options available will vary depending on your Windows operating system Some of the options activate under a specific printing environment such as network printing Click Help for further information in case of Windows 98 ...

Page 77: ...rom the internet NOTE If you are using either Windows 2000 or XP you can access to the Cartridge Maintenance tab through printer s properties of the Samsung SCX 1100 series About Tab The About tab gives you the program version number If you click on the globe image on the bottom of the window you will be connected to the Samsung web site provided you are an internet user in case of Windows 98 Not ...

Page 78: ...puter Then you can fax or e mail the files display them on your web site or use them to create projects that you can print out using Samsung SmarThru software which came with your product This chapter includes Scanning Basics Starting Scan from the Operation Panel Scanning Process with TWAIN enabled Software ...

Page 79: ...other software including Adobe PhotoDeluxe and Adobe Photoshop NOTES To scan with your product you must install the MFP driver Scanning is made through the same LPT or USB port which is currently assigned for your printer port Starting Scan from the Operation Panel You can quickly start scanning from the operation panel on your product The Samsung SmarThru program automatically launches and allows...

Page 80: ...rtical edges are carefully aligned with the scales on the sides of the document glass Then close the top cover 3 Press Scan to on the operation panel NOTE If you press Scan to when the scan monitor on the desktop window is disabled or turned off see page 5 2 PC NOT AVAILABLE appears on the display and you cannot achieve scanning ...

Page 81: ...e your product to produce professional quality copies You can adjust the image size and make advanced settings Scan to Email Lets you scan the original document then launches a New Message form to send the just scanned image attached to a new mail The email account must be configured in the Samsung SmarThru system to enable e mail service Scan to FAX Lets you scan the original documents then launc...

Page 82: ...sses or recognizes it Then you can edit it and either save the file or open it in any word processing program on your computer 5 Click the desired service 6 The Samsung Scan Manager for the selected service opens Adjust the scan settings You can use the Help button to get on line help 7 To start scanning click Scan For further information please refer to the SmarThru User s Guide which came with y...

Page 83: ...00 you will need to select it as your TWAIN source on the application you will use The basic scanning process involves a number of steps Placing your photo or page on the document glass Opening an application such as PhotoDeluxe or Photoshop Opening the TWAIN window and setting scan options Scanning and saving your scanned image You have to follow the program s instructions for acquiring an image ...

Page 84: ... information for maintaining the print cartridge and your product This chapter includes Maintaining Print Cartridges Viewing Ink Level Cleaning Print Cartridges Replacing Print Cartridges Aligning Print Cartridges When the procedure is finished click OK Cleaning Document Glass Using Help List ...

Page 85: ...orrectly if removed from the product and left exposed for an extended period of time Your product will not print with only one print cartridge installed If you do not have a new replacement for the empty print cartridge leave the empty cartridge in the cartridge holder of the product Do not swap the colour cartridge with the black cartridge The colour cartridge should be installed in the Left carr...

Page 86: ...emaining ink capacity of the maximum capacity displays 5 Press Cancel Reset to return to Standby mode Cleaning Print Cartridges Cleaning your print cartridges can improve the quality of printing If your printed page is missing lines or dots or contains ink streaks clean the print cartridges as described below There are two methods to clean the print cartridges Print a head cleaning page which can ...

Page 87: ...n page 5 Examine the cleaning pattern Compare the diagonal lines at the top and bottom of the test pattern A broken line shows any clogged nozzles If the bottom line shows improvement rerun this cleaning process two more times If this process does not improve the print quality your print cartridges may be low in ink Replace the print cartridge if necessary 6 If the line is still broken clean the p...

Page 88: ...rtridges tab 3 Click Clean Print Nozzles 4 The product feeds a sheet of paper and prints a cleaning pattern Examine the cleaning pattern Refer to step 5 under Printing a Cleaning Page from the Product on page 6 4 NOTE If you are using either Windows 2000 or XP you can access to the Cartridge Maintenance tab through printer s properties of the Samsung SCX 1100 series in case of Windows 98 ...

Page 89: ...e 2 Remove the print cartridges For details refer to step 3 under Replacing Print Cartridges on page 6 11 NOTES Keep new and used print cartridges out of the reach of children Once you have removed the print cartridges ensure that they are not out of the printer longer than 30 minutes Be careful not to touch the ink nozzles or the electrical contacts Touching these parts of the print cartridge can...

Page 90: ...careful to wipe the nozzles in only one direction so the colours do not mix 4 Allow the copper coloured area to dry 5 Reinstall the print cartridges and close the cartridge door The display prompts you to confirm NONE CHANGED Press Enter The display returns to Standby mode 6 Print a cleaning page and examine the cleaning pattern by following the instructions on page 6 3 If the line is still broken...

Page 91: ... the door handle at the top edge 2 After the print cartridges have moved to the centre of the product unplug the power cord to turn the power off with the cartridge holder in the centre 3 Remove the print cartridges For details refer to step 3 under Replacing Print Cartridges on page 6 11 ...

Page 92: ...e colour cartridge by the yield Standard and High yield Before proceeding to install you need to check which cartridge type you have When you install the cartridges you will be asked if it is Standard or High Yield To find out the type refer to the table below Please contact your nearest dealer for the following print cartridges Cartridge contact Cartridge type Part number Black cartridge High yie...

Page 93: ...nt head as well Replacement of the print cartridges can be done from the operation panel of your product or from the computer using the Samsung SCX 1100 Series Control Program Replacing Print Cartridges from the Product 1 Carefully unwrap the new ink cartridge s and remove the sealing tape Slowly pull straight out 2 Open the cartridge door by grabbing the door handle on the top edge The print cart...

Page 94: ...older 5 Place the new print cartridges into the holder and push it until it clicks into place NOTE Avoid touching the electrical contacts on the cartridge Ensure that there are no pieces of tape remaining on the cartridge 6 Close the cartridge door The display prompts you to confirm which cartridge s to be changed 7 You can choose from NONE CHANGED LEFT CHANGED RIGHT CHANGED or BOTH CHANGED by usi...

Page 95: ... in the display and press Enter NOTE If you make a mistake when confirming the cartridge capacity the ink level shown in the Printer Control Program may not be correct 11 If you have selected BOTH CHANGED at step 7 you will be guided to set the black or photo cartridge after you finish setting the colour cartridge 12 If you installed a new cartridge the cartridge alignment procedure begins automat...

Page 96: ...es dialog box to confirm the type of the cartridges you have installed 5 When you finish click OK If you have installed one or both cartridges as new the message dialog box appears to prompt you to align the cartridge Click Align 6 Your product prints the Cartridge Alignment form Complete the alignment procedure by following the instructions on the page 6 16 If you installed an old cartridge s the...

Page 97: ... using the Samsung SCX 1100 Series Control Program or from the operation panel of your product Aligning Print Cartridges from the Product 1 Press Setup on the operation panel 2 Press the Scroll buttons or until you see MAINTENANCE on the display then press Enter 3 Press the Scroll buttons or until you see ALIGN CARTRIDGE on the display then press Enter to start cartridge alignment 4 The product fe...

Page 98: ...the number of the line which appears the straightest from pattern A Press Enter to confirm your selection The alignment entry menu for the Alignment B pattern is displayed 8 Repeat step 6 for Alignment patterns B through F or D for colour and photo cartridges 9 After you enter the number for the last group Alignment F or D for colour and photo cartridges the display automatically returns to the St...

Page 99: ... form The Align Cartridges dialog box appears 6 Locate the number under each alignment group in the pattern that comes closest to forming a perfect straight line Then enter the number of the line or click repeatedly the or key to select the number 7 When the procedure is finished click OK ...

Page 100: ...soft cloth Do not spray the cleaner directly onto the document glass Always spray the cleaner onto the cloth Using Help List 1 Press Setup on the operation panel 2 Press the Scroll buttons or until you see MAINTENANCE on the display then press Enter 3 Press the Scroll buttons or until you see HELP LIST on the display then press Enter Document Glass ...

Page 101: ...6 18 Maintenance MEMO ...

Page 102: ...7 TROUBLESHOOTING This chapter gives helpful information for what to do if you encounter an error This chapter includes Clearing Paper Jams LCD Error Messages Fixing Problems ...

Page 103: ... slowly If jammed in the paper feed area at the rear of the product 1 Remove the stack of paper if necessary 2 Remove the jammed paper by gently pulling it straight up 3 After you remove the jammed paper reload the stack of paper back into the paper bin with the print side facing you Before loading ensure the edges of the stack of paper are even and straight 4 Adjust the paper guide to match the w...

Page 104: ...remove the jammed paper by pulling gently on the paper 6 Press Cancel Reset to clear the error message on the display NOTE If there is any resistance and the paper does not move immediately when you pull open the cartridge door and gently pull the jammed paper out of the printer ...

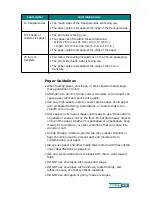
Page 105: ...uides are positioned correctly Do not overload the paper Up to 100 sheets can be loaded in the paper bin at a time Envelopes with self stick adhesives may cause wrinkling creasing or even jams and may even damage your product Fan stacks of labels or transparencies before loading them into the paper input bin If jams occur try feeding one sheet at a time Do not load wrinkled creased damp or highly ...

Page 106: ... empty If the product runs out of paper while printing it will restart printing when more paper is loaded Press Enter after loading paper SYSTEM BUSY You have tried to use the system when it is currently in use Wait for the current job to complete then try again SCAN MOTOR STALL LCD Scan Motor is stalled Turn the power off then back on NOT SUPPORTED IF YOU WANT COLOR COPY WITHOUT PAPER SAVE PLEASE...

Page 107: ...er do not feed Different types of paper may be stacked in the paper bin Load the paper of only one type size and weight When loading paper do not force the paper down into the printer If multiple sheets have caused a paper jam clear the paper jam See page 7 2 Paper skews or buckles Ensure there is not too much paper in the paper bin Depending on the thickness of your paper the paper bin can hold u...

Page 108: ...a different USB port than you have used before In this case your printer driver creates a virtual printer in the Printer folder on your computer system each time you use another different port You have to remove the newly created virtual printer s To remove 1 Open the Printer folder and right click on the last created Samsung SCX 1100 Series Copy x where x is the number of the created virtual prin...

Page 109: ...product from the PC and then connect back to the PC the printer might be set to Off line status Open the Windows Printer folder and check if the SCX 1100 is off line If so right click on SCX 1100 Series printer and deselect Use Printer Offline The paper is not feed into the product Paper has not been inserted correctly Remove and reinsert the paper correctly refer to Loading Paper on page 1 10 The...

Page 110: ...ndows and reboot the computer Turn the printer off and then back on again If using a parallel cable ensure that it is compliant with an IEEE 1284 rated cable Printing is too slow You may be using High or Maximum print quality See page 4 10 The higher quality the lower speed If you are using Windows NT the Scheduling setting may be set incorrectly From the Start menu select Settings and Printers Cl...

Page 111: ...status of the nozzles and clean the print cartridge page 6 3 Colours are missing The colour print cartridge may not be working properly Print a test page to make sure the ink cartridge is working correctly The print head may need to be cleaned Clean the print cartridges see page 6 3 Colours in a line are uneven or different from the previous lines You may have turned the product off paused and the...

Page 112: ...th ink See Cleaning Print Cartridges on page 6 3 White streaks or missing dots The moisture content of the paper is uneven or the paper has moist spots on its surface Try a different kind or brand of paper Print cartridges may be installed incorrectly Make sure the print cartridges are installed correctly A print cartridge may be empty Check the contacts of the print cartridge If there is not any ...

Page 113: ...unit may need servicing The print cartridges may need to be cleaned See page 6 3 The print cartridges may need to be aligned See page 6 14 Vertical lines in tables borders and graphics not smooth The print cartridge may need to be cleaned See page 6 3 The print cartridge may need to be aligned See page 6 14 Solid black areas contain white streaks Change the fill pattern in the application software...

Page 114: ...nfigured incorrectly Check scan setting in the SmarThru Configuration or the application you want to use to make certain that the scanner job is being sent to the correct port for example LPT1 The unit scans very slowly Graphics are scanned more slowly than text Communication speed becomes slow in scan mode because of the large amount of memory required to analyse and reproduce the scanned image S...

Page 115: ...7 14 Troubleshooting MEMO ...

Page 116: ...8 APPENDIX This chapter includes Printer Specification Scanner and Copier Specification General Specification Paper Specification ...

Page 117: ...ive printing width 203 1 mm Item Description Scanning method CCD Flat bed Scan resolution 600 x 600 dpi 1200 dpi class Scan mode True colour 256 grey Black and white Copy mode Colour Black and white Effective scanning width 210 mm Maximum document width 216 mm Multi copy range 1 99 Reduction Enlargement 25 400 in 1 increment Maximum print edge margin Top MAX 4mm Bottom MAX 5mm Side Letter 6 5 2 mm...

Page 118: ...er Sized Power rating See Rating Label attached on the back of the machine Power consumption 10 W in Power save mode 15 W in Standby mode 30 W during copy Weight 12 4 lb 7 8 kg Dimensions WxDxH 18 7 x 16 9 x 9 9 inch 476 x 429 x252 mm Ink Cartridge Life Black Cartridge High yield 1 100 sheets Standard 600 sheets based on ITU 5 chart see A Sample of ITU 5 Chart reduced to 60 on page 8 5 Colour Cart...

Page 119: ...55 6 8 5 X 14 JIS B5 182 x 257 7 17 x 10 12 A4 210x 297 8 27 x 11 69 Executive 184 2 x 266 7 7 25 x 10 5 A5 148 5 x 210 5 85 x 8 27 A6 card 105 x 148 5 4 13 x 5 85 Post Card 4x6 101 6 x 152 4 4 x 6 HagaKi 100 x 148 3 94 x 5 83 Envelope 7 3 4 98 4 x 190 5 3 88 x 7 5 Envelope COM 10 105 x 241 4 13 x 9 5 Envelope DL 110 x 220 4 33 x 8 66 Envelope C5 162 x 229 6 38 x 9 02 Custom 76 216 x 127 432 2 99 ...

Page 120: ...8 5 Appendix ...

Page 121: ...ve the mou plug Warning If you cut off the moulded plug get rid of it straight away You cannot rewire the plug and you may receive an electric shock if you plug it Important warning You must earth this machine The wires in the mains lead have the following colour code Green and Yellow Earth Blue Neutral Brown Live If the wires in the mains lead do not match the colours marked in your do the follow...

Page 122: ...y item will work correctly in all respects with another item of Telep equipment of a different make or model nor does it imply that any prod compatible with all of Telecom s network services This equipment shall not be set up to make automatic calls to the Telec Emergency Service This equipment may not provide for the effective hand over of a call to device connected to the same line Important Not...

Page 123: ...ics Co Ltd representative EC Certification Certification to 1999 5 EC Radio Equipment Telecommunications Terminal Equipment Directive FAX This Samsung product has been self certified by Samsung for pan European single terminal connection to the analogue public switched telephone network PSTN in accordance with Directive 1999 5 EC The product has been designed to work with the national PSTNs and co...

Page 124: ... 8 nozzle 6 6 clone special copy 3 11 collate print 4 10 colour copy 1 5 3 6 contrast copy 3 8 print 4 14 control program 4 17 copy contrast 3 8 page 3 8 quality 3 7 size 3 9 special option 3 10 D default setting contrast 3 13 copy page 3 13 quality 3 13 zoom rate 3 13 document type setting from printer 4 10 document glass clean 6 17 load document 3 4 E envelope load 4 4 error message 7 5 F fax ga...

Page 125: ... 2 jam 7 2 load 1 10 paper save 1 19 paper size set for copy 3 2 set for PC print 4 10 paper type select guideline 4 2 set for copy 3 3 set for PC print 4 10 parallel connection 1 8 photo cartridge 6 9 poster copy 3 12 print 4 12 print quality 4 10 printer control program 4 17 R reverse page order 4 10 S save ink 1 18 paper 1 18 shading adjust 6 16 SmarThru install 2 4 uninstall 2 13 special paper...

Page 126: ...Home Visit us at http www samsungelectronics com mfp P N JB68 00693A Rev 2 00 ...

Reviews: