49
49
ENGLISH
FRANÇAIS
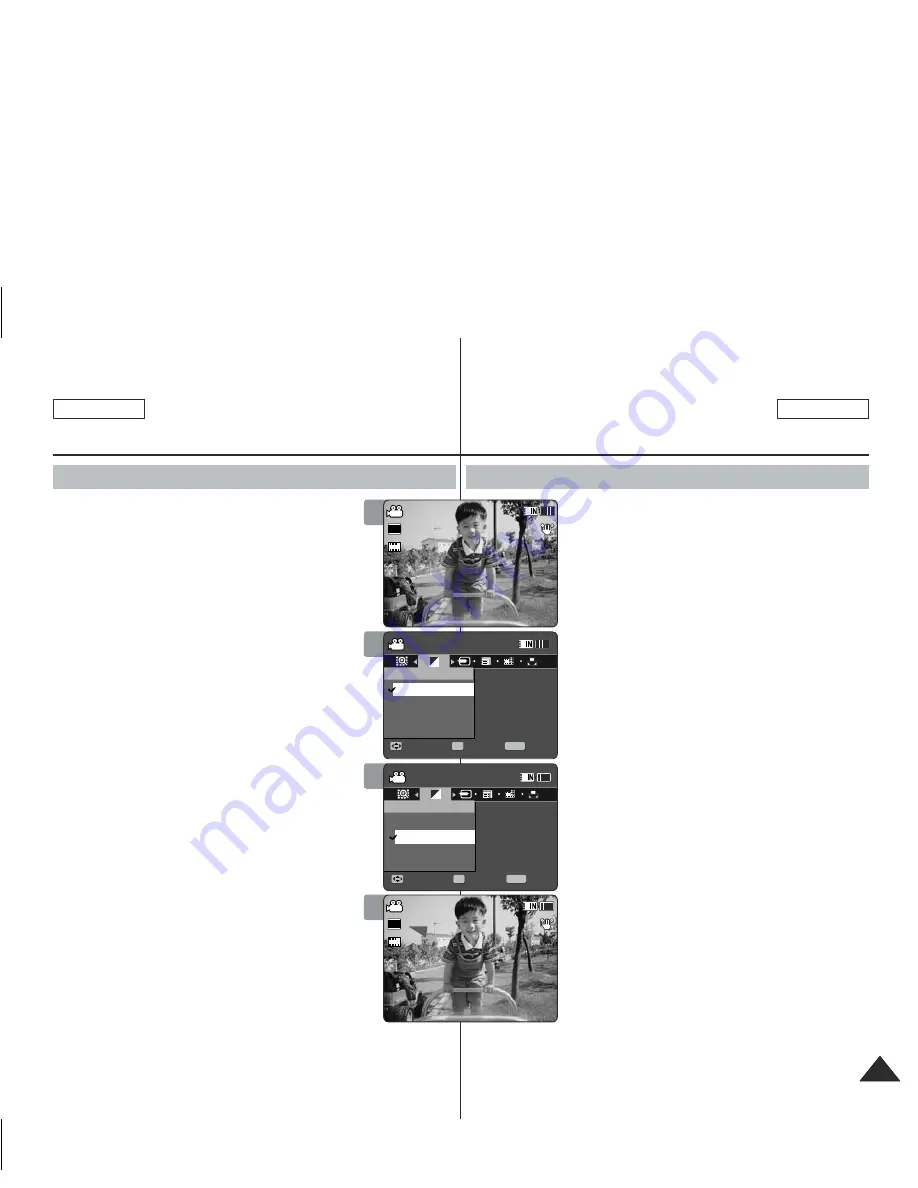
Movie Mode : Setting the Recording Options
Setting the Record Mode
You can set the proper record mode before starting
movie file recording.
1. Press the [POWER] button to turn on the
Memory Camcorder.
◆
The Movie Record screen appears.
2. Press the [MENU] button.
Move the [Joystick] left / right to select <Record
Mode>.
3. Move the [Joystick] up / down to select an
option, and then press the [Joystick(OK)].
◆
<TV>
: The system generates clear images
when played back on TV.
◆
<PC>
: The system generates clear images
when played back on PC.
◆
We recommend copying the file onto a PC or
connecting the Memory Camcorder to a TV for
a better playback picture.
4. Press the [MENU] button to exit the menu.
◆
If you select <TV>, <i> is displayed with size
icon.
◆
If you select <PC>, <p> is displayed with size
icon.
[ Notes ]
✤
If <TV> is selected as the Record Mode, the size
is set to 720i only.
✤
If <PC> is selected as the Record Mode, the size
is set to 720p or 352p.
✤
When the size is set to
352(352X240)
, <PC> is
automatically selected for movie files recording.
✤
While the menu screen is displayed, pressing the
[Record / Stop] button will move to Movie Record
mode.
Mode Movie :
Réglage des options d’enregistrement
Réglage du mode Record
Vous pouvez régler le mode d’enregistrement avant
de commencer à filmer.
1. Appuyez sur la touche [POWER] pour mettre
le caméscope sous tension.
◆
L’écran Movie Record apparaît.
2. Appuyez sur la touche [MENU].
Déplacez le [Joystick] vers la gauche ou vers
la droite pour sélectionner <Record Mode>.
3. Déplacez le [Joystick] vers le haut ou vers
le bas pour sélectionner une option, puis
appuyez sur [Joystick(OK)].
◆
<TV>
: le système reproduit des images plus
nettes à l’écran d’un téléviseur.
◆
< PC >
: le système reproduit des images
nettes à l’écran d’un ordinateur.
◆
Nous vous conseillons de copier vos
fichiers sur un ordinateur ou de raccorder le
caméscope à un téléviseur pour obtenir une
meilleure qualité d’image.
4. Appuyez sur la touche [MENU] pour quitter le
menu.
◆
Si vous sélectionnez le mode <TV>, un <i> s’
affiche près de l’icône de la taille.
◆
Si vous sélectionnez le mode <PC>, un <p> s’
affiche près de l’icône de la taille.
[ Remarques ]
✤
Si vous avez sélectionné <TV> en mode Record,
la taille est réglée à 720i uniquement.
✤
Si vous avez sélectionné <PC> en mode Record,
la taille est réglée à 720p ou 352p.
✤
Si vous avez sélectionné la taille <352>, la
fonction <PC> est automatiquement activée pour
l’enregistrement des films.
✤
Si vous appuyez sur la touche [Record / Stop] pendant que l’écran
menu est affiché, l’appareil passe en mode Movie Record.
1
2
3
Sepia
Recording...
12:00AM 2006/01/01
S
F
STBY 00:00:00/00:40:05
Sepia
Recording...
12:00AM 2006/01/01
S
F
STBY 00:00:00/00:40:05
Movie
Move
Exit
MENU
Select
OK
Record Mode
PC
TV
Movie
Move
Exit
Select
Record Mode
PC
TV
TV
PC
Sepia
Recording...
12:00AM 2006/01/01
S
F
STBY 00:00:00/00:40:05
Sepia
Recording...
12:00AM 2006/01/01
S
F
STBY 00:00:00/00:40:05
Movie
Move
Exit
Select
Record Mode
PC
TV
Movie
Move
Exit
MENU
Select
OK
Record Mode
PC
TV
TV
PC
4
Sepia
Recording...
12:00AM 2006/01/01
S
F
STBY 00:00:00/00:40:05
Sepia
Recording...
12:00AM 2006/01/01
S
S
720p
F
F
STBY
00:00:00/00:40:05
Movie
Move
Exit
Select
Record Mode
PC
TV
Movie
Move
Exit
Select
Record Mode
PC
TV
Sepia
Recording...
12:00AM 2006/01/01
S
S
720i
F
F
STBY
00:00:00/00:40:05
Sepia
Recording...
12:00AM 2006/01/01
S
F
STBY 00:00:00/00:40:05
Movie
Move
Exit
Select
Record Mode
PC
TV
Movie
Move
Exit
Select
Record Mode
PC
TV
SC-MM11-01064A-IB-USA+FRC.indb 49
SC-MM11-01064A-IB-USA+FRC.indb 49
2006-03-27 오후 4:07:09
2006-03-27 오후 4:07:09


