background image

English _

9

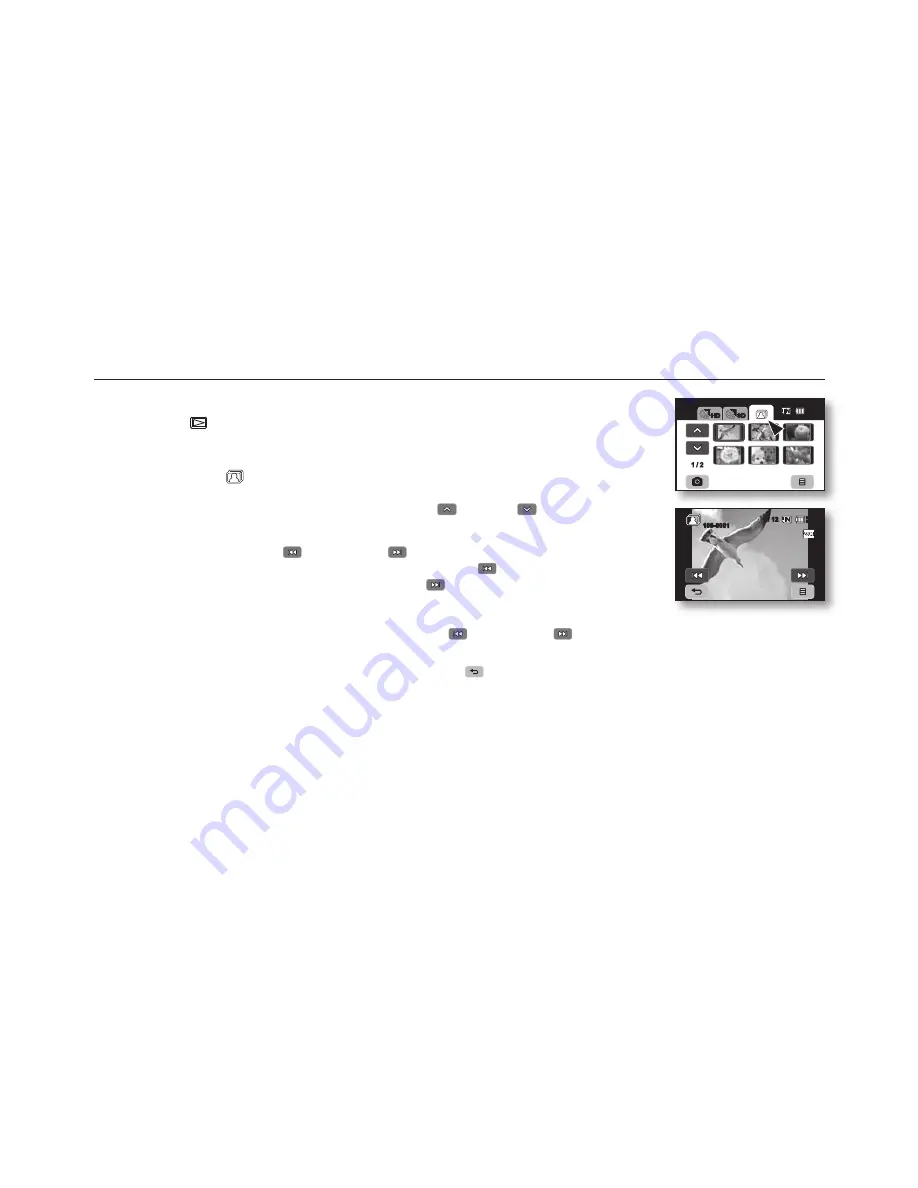
VIEWING PHOTO IMAGES

1.


Slide the 

POWER

 switch downward to turn on the power and press the 

MODE

 button 

to set Play (

).

•  Set the appropriate storage media.

(If you want to playback images on a memory card, insert the memory card.)

2. 

Touch the Photo (

) tab.

•  The thumbnail index view appears.

•  To change the current thumbnail page, touch the up (

) or down (

) tab.

3. 

Touch a desired photo image.

4. 

Touch the previous image (

)/next image (

) tab, search for the desired photo image.

•  To view the previous image, touch the previous image (

) tab.

•  To view the next image, touch the next image (

) tab.

•  Drag your finger from left to right to select the previous image on the LCD screen, 

reverse to select the next image.

•  Place and hold your finger on the previous image (

)/next image (

) tab to search for an image quickly. 

Actually the image number is changed during search with images not changed.

5. 

To return to the thumbnail index view, touch the Return (

) tab.

80

Min

1 / 12

100-0001

1 / 2

HD

SD

80

Min

2008-03-19

Summary of Contents for SC-HMX20C

Page 1: ...tal Camcorder quick start guide SC HMX20C imagine the possibilities Thank you for purchasing this Samsung product To receive more complete service please register your product at www samsung com global register 2008 03 19 ...

Page 2: ... speaker Display iCHECK button Flash button EASY Q button Jack cover COMPONENT AV S Video jack USB jack TFT LCD screen touch panel Recording start stop button Zoom W T button Q MENU button PHOTO button Zoom W T lever Swivel handle Built in flash Grip belt hook Grip belt The HDMI jack is on the Cradle 2008 03 19 ...

Page 3: ... switch Recording start stop button POWER switch CHG charging indicator MIC external microphone jack DC IN jack Battery pack Memory card cover ⓐ Battery pack release switch ⓑ Memory card slot ⓒ Battery pack slot Internal microphone Tripod receptacle Cradle receptacle ⓐ ⓑ ⓒ 2008 03 19 ...

Page 4: ... battery pack 1 Slide the POWER switch downward to turn off the power 2 Open the DC IN jack cover and connect the AC power adaptor to the DC IN jack 3 Connect the AC power adaptor to a wall socket 4 Once charged disconnect the AC power adaptor from the DC IN jack on your HD camcorder Even with the power switched off the battery pack will still discharge if it is left inserted in the HD camcorder C...

Page 5: ... exit Exit tab or Return tab repeatedly until menu disappears When you insert a memory card the storage media setup screen appears Touch Yes if you want to use a memory card or No if not INSERTING EJECTING A MEMORY CARD Inserting a memory card 1 Open the memory card cover by sliding the OPEN switch upward as shown in the figure 2 Insert the memory card into the slot until it softly clicks Make sur...

Page 6: ...Approx 5976 Approx 11952 2880x2160 Approx 478 Approx 957 Approx 1914 Approx 3829 Approx 7658 Approx 15316 2304x1728 Approx 494 Approx 988 Approx 1976 Approx 3953 Approx 7906 Approx 15812 2048x1536 Approx 928 Approx 1856 Approx 3713 Approx 7427 Approx 14854 Approx 29708 1440x1080 Approx 1802 Approx 3604 Approx 7208 Approx 14417 Approx 28834 Approx 57668 640x480 Approx 5106 Approx 10212 Approx 20424...

Page 7: ...stop recording press the Recording start stop button again 4 When recording is finished turn the HD camcorder off TAKING PHOTO IMAGES 1 Slide the POWER switch downward to turn on the power and press the MODE button to set Photo The lens opens automatically with HD camcorder on Set the appropriate storage media If you want to record on a memory card insert the memory card 2 Check the subject on the...

Page 8: ...Approx 5976 Approx 11952 2880x2160 Approx 478 Approx 957 Approx 1914 Approx 3829 Approx 7658 Approx 15316 2304x1728 Approx 494 Approx 988 Approx 1976 Approx 3953 Approx 7906 Approx 15812 2048x1536 Approx 928 Approx 1856 Approx 3713 Approx 7427 Approx 14854 Approx 29708 1440x1080 Approx 1802 Approx 3604 Approx 7208 Approx 14417 Approx 28834 Approx 57668 640x480 Approx 5106 Approx 10212 Approx 20424...

Page 9: ... 4 Touch the previous image next image tab search for the desired photo image To view the previous image touch the previous image tab To view the next image touch the next image tab Drag your finger from left to right to select the previous image on the LCD screen reverse to select the next image Place and hold your finger on the previous image next image tab to search for an image quickly Actuall...

Page 10: ...ideo files still images and other contents for creating a movie Before you begin Quit any other software you are using Check that there are no other application icons on the status bar Frame drop may occur in preview screen while you are using Power Producer However this does not affect any burned image on DVD title 2008 03 19 ...

Page 11: ...tion can differ For more information about the connection refer to the TV s user manual Use the supplied AC power adaptor as the power source Connecting to a high definition TV To play back the HD quality 1920x1080 movie images you need a high definition TV HDTV Method 1 Connect your HD camcorder to a TV with an HDMI cable HDMI cable is an optional accessory If an HDMI cable is used power is requi...

Page 12: ...AMSUNG 726 7864 www samsung com us RoHS compliant Our product complies with The Restriction Of the use of certain Hazardous Substances in electrical and electronic equipment and we do not use the 6 hazardous materials Cadmium Cd Lead Pb Mercury Hg Hexavalent Chromium Cr 6 Poly Brominated Biphenyls PBBs Poly Brominated Diphenyl Ethers PBDEs in our products 2008 03 19 ...

Reviews: