background image

04 PLAY

75

PLAY_


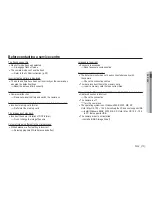
- Movie Clip

·With Audio (recording time : memory capacity dependent)


  ·Size :  640x480, 320x240 


  · Frame rate : 30 fps, 15 fps 


  · 5X Optical Zoom and Mute in Zooming 


  · Movie Editing (Embedded): Pause during 

recording, Still Image Capture

Storage - 

Media


  ·Internal memory : About 17MB flash memory


· 

External Memory (Optional) :

MMC card (Up to 2GB guaranteed) 
SD card (Up to 4GB guaranteed)
SDHC card (Up to 4GB guaranteed)


- File Format 


  ·Still Image :  JPEG (DCF), EXIF 2.2, DPOF 1.1, 

PictBridge 1.0


  ·Movie Clip : AVI (MJPEG)


  ·Audio : WAV


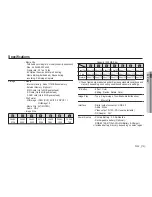
- Image Size

,

;

.

+

3648X

2736

3648X

2432

3648X

2052

3072X

2304

2592X

1944

2048X

1536

1024X

768

Specifications


  - Capacity (256 MB Size)

,

;

.

+

Super Fine About 59 About 66 About 79 About 83 About 110 About 171 About 479

Fine

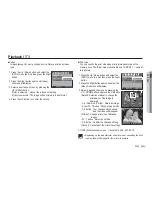
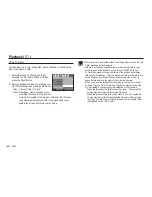
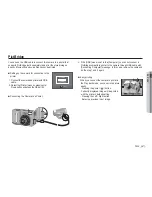
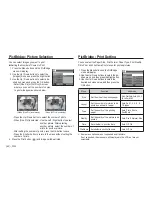
About 82 About 93 About 109 About 115 About 155 About 236 About 553

Normal About 141 About 155 About 183 About 191 About 253 About 371 About 607

Ä

These figures are measured under Samsung standard conditions and 
may vary depending on shooting conditions and camera settings.

“E” Button 

- Effect :  Color


- Editing :  Resize, Rotate, Color

Image Play  

- Type :  Single image, Thumbnails, Multi slide show, 

Movie Clip

Interface 

- Digital output connector : USB 2.0


- Audio : Mono


- Video output : NTSC, PAL (user selectable)


- DC Adapter : 3.3V

Power Source 

- Primary Battery : 2 X AA Alkaline 


-  Rechargeable battery (Optional) : 

SNB-2512B KIT( 2xAA Ni-MH Battery & Charger )

Ä

 Included battery may vary depending on sales region.

Summary of Contents for S1060

Page 1: ......

Page 2: ...he camera to your PC Please note that the manufacturer holds no responsibility for loss or damage of images on the memory card due to the use of a card reader The contents and illustrations of this ma...

Page 3: ...se a risk of electric shock WARNING indicates a potentially hazardous situation which if not avoided could result in death or serious injury Do not use the flash in close proximity to people or animal...

Page 4: ...ng an un clear image and possibly causing camera malfunction Avoid obstructing the lens or the flash when you capture an image Credit cards may be demagnetized if left near case Avoid leaving magnetic...

Page 5: ...the Fn menu 034 Size 034 Quality Frame rate 035 Metering 035 Drive mode 036 ISO 036 White balance 037 Exposure compensation Contents 038 Using the LCD monitor to adjust the camera settings 038 Record...

Page 6: ...Down button 055 Left Right Menu OK button 055 Printer button 055 Delete button 056 E Effect button Resize PLAY 50 057 E Effect button Rotating an image 057 E Effect button Colour 059 Setting up the p...

Page 7: ...tware 079 Setting up the application software 081 Starting PC mode 084 Removing the removable disk 085 Setting up the USB Driver for MAC 085 Using the USB Driver for MAC 085 Removing the USB Driver fo...

Page 8: ...sales region To buy the optional equipment contact your nearest Samsung dealer or Samsung service centre Included items Camera AA Alkaline Batteries USB cable AV cable Camera strap Software CD see p 7...

Page 9: ..._READY Identification of features Front Top Mode dial Self timer lamp AF sensor DC input connection port USB AV connection terminal Speaker Power button Flash Lens Lens cover Shutter button Microphon...

Page 10: ...ification of features Back 5 function button Play mode Printer button Fn Delete button LCD monitor Camera status lamp Zoom T button Digital zoom Zoom W button Thumbnail E Effects button Strap eyelet F...

Page 11: ...is taken in accordance with the subject s movement Camera Status Lamp Status Description Power on The lamp turns on and off when the camera is ready to take a picture After taking a picture The lamp...

Page 12: ...The batteries are listed below Non rechargeable batteries 2 X AA Alkaline High Capacity Rechargeable batteries Optional SNB 2512 Ni MH Important information about battery usage When camera is not in u...

Page 13: ...battery status on the LCD may be different from the actual battery status Insert the battery as shown Inserting the memory card Insert the memory card as shown Turn off the camera s power before inse...

Page 14: ...ptured with a dif ferent camera Turn off the camera power whenever the memory card is being inserted or removed Repeated use of the memory card will eventually reduce the memory card s performance Sho...

Page 15: ...top of the SD SDHC memory card before taking a picture When using a 256MB MMC memory the specified shooting capacity will be as follows These figures are approximate as image capacities can be affect...

Page 16: ...e 00 00 00 p 14 Image Full Status No Description Icons Page 5 Memory card icon Internal memory icon 6 Battery p 12 7 Image Size p 34 8 Image Quality Frame Rate p 34 9 Metering p 35 10 Drive mode p 35...

Page 17: ...r cover 4 Press the power button to turn on the camera If the date time that is displayed on the LCD monitor is incorrect reset the date time before taking a picture 5 Select the AUTO mode by rotating...

Page 18: ...rate in the DIS mode 2 If the lighting condition is brighter than fluorescent lighting conditions the DIS will not activate 3 If the lighting condition is darker than in fluorescent lighting condition...

Page 19: ...he shutter Guide list MENU Pressing the Left Right button Pressing the Left Right button Pressing the Up Down button Pressing the Right button Half press shutter button to focus Focusing status can be...

Page 20: ...ke a picture of fast moving objects for example children Landscape To take pictures of distant scenery Close Up Close up shooting for small objects such as plants and insects Text Use this mode to sho...

Page 21: ...file type AVI MJPEG Frame Rate 30 FPS 15 FPS Selectable How to use the Movie clip mode You can record the movie clip without sound Recording the movie clip without sound Using Successive Recording St...

Page 22: ...ompensation see page 37 Avoid obstructing the lens or the flash when you capture an image Compose the image by using the LCD monitor Things to Watch Out for When Taking Pictures Lightly press the shut...

Page 23: ...ter button down halfway activates the autofocus and checks the condition of the flash Pressing the shutter button down fully takes and stores the image If you select voice memo recording the recording...

Page 24: ...minimum setting is reached Digital zoom Optical zoom Images taken using the digital zoom may take a little longer for the camera to process Allow time for this to take place The digital zoom cannot b...

Page 25: ...ce is hidden When the person being taken does not look at the camera Camera doesn t detect a face as the brightness is too dark or too bright The distance between the camera and object are far The max...

Page 26: ...is not in the center The guiding sound can be set using the sound setting menu See p 42 While the menu is showing the Up button operates as a direction button If the menu screen does not appear infor...

Page 27: ...ted be particularly careful to avoid camera shake When you take a picture within 40cm Wide zoom or 50cm Tele zoom in the Macro mode select the FLASH OFF mode When you take a picture within the 10cm ma...

Page 28: ...compose the pic ture and fully depress the SHUTTER button Using the Focus Lock 1 Ensure the subject is in the centre of the autofocus frame 2 Press the SHUTTER button halfway When the green auto focus...

Page 29: ...ghly reflective When taking an image in poorly lit conditions with the flash there may be a white speck in the captured image The speck is caused by the flash light reflecting off atmospheric dust Fla...

Page 30: ...uit the prevailing conditions Slow synchro The flash operates with a slow shutter speed to obtain a balanced correct exposure In poor lighting conditions the camera shake warning indicator will displa...

Page 31: ...n Double self timer A picture will be taken after about 10 seconds and 2 seconds later a second picture will be taken When using the flash the 2 second self timer may be delayed for longer than 2 seco...

Page 32: ...camera doesn t sense stillness after sensing movement Motion Timer Motion Icon Self timer lamp Pressing the Shuter button after setting the Motion Timer Blink 1 second interval Detecting the subject...

Page 33: ...es will be stored in a sepia tone a gradient of yellowish brown colours Captured images will be stored in a red tone Captured images will be stored in a green tone Captured images will be stored in a...

Page 34: ...ft Right button SIZE 3648X2736 SIZE 3648X2432 1 Press the Fn button in an available mode 2 Select a desired menu by pressing the Up Down button And then a sub menu will be displayed at the bottom righ...

Page 35: ...ze Quality Frame rate You can select the image size appropriate for your application STILL IMAGE mode MOVIE CLIP mode SIZE 3648X2736 SIZE 640X480 You can select the compression ratio appropriate for y...

Page 36: ...the back lighting Center Weighted Exposure will be calculated based on an average of the available light in the image area However the calculation will be biased towards the centre of the image area...

Page 37: ...value increases making the image appear coarse You can select the ISO sensitivity when taking pictures The speed or specific light sensitivity of a camera is rated by ISO numbers ISO Auto Mode Icon De...

Page 38: ...until it is overwritten Exposure compensation This camera automatically adjusts the exposure according to the ambient lighting conditions You can also select the exposure value by using the Fn button...

Page 39: ...od Caf Menus are subject to change without prior notice Sharpness You can adjust the sharpness of the picture you are about to take You cannot check the sharpness effect on the LCD monitor before you...

Page 40: ...red Center AF Multi AF Voice Memo You can add your voice over to a stored still image Max 10 sec If the voice memo indicator is displayed on the LCD monitor the setting is completed Press the shutter...

Page 41: ...is turned off while the voice recording is paused the voice recording is cancelled Stop REC SH Recording Voice Recording A voice can be recorded for as long as the available recording time Max 10 hour...

Page 42: ...MENU button and select a desired sub menu Refer to page 19 for more information Sound menu In this mode you can set up sound settings You can use the setup menu in all camera modes except Voice Recor...

Page 43: ...the subject s face when taking a self portrait This feature can be set byusing the OFF and ON buttons SOUND Beep Sound Volume Start Sound Shutter Sound Sound 3 Off Sound 2 Back Set OK AF Sound Self Po...

Page 44: ...Sydney Okhotsk Wellington Auckland Samoa Midway Honolulu Hawaii Alaska Mode Menu Sub menu Page Display Date Time World Time LA San Francisco Denver Phoenix p 44 Chicago Dallas New York Miami Caracas...

Page 45: ...orld Time enables you to display the local date and time on the LCD monitor when travelling overseas Date type yyyy mm dd mm dd yyyy dd mm yyyy Off DISPLAY Set OK London GMT 2008 02 01 13 00 DST DISPL...

Page 46: ...uration set in the Quick View setup Quick view is possible only with still images Sub menus Off The quick view function can t be activated 0 5 1 3 sec The captured image is briefly displayed during th...

Page 47: ...rd A memory card that has a file this camera can t recognise or one that has been taken from another camera Always format the memory card using this camera If you insert a memory card that has been fo...

Page 48: ...naming format Reset After using the reset function the next file name will be set from 0001 even after formatting deleting all or inserting a new memory card Series New files are named using numbers...

Page 49: ...at Reset PAL NTSC Back Set OK Imprint Power Off Video Out This function switches the camera off after a set amount of time in order to prevent unnecessary battery drainage Sub menus Off The power off...

Page 50: ...to select the external or AV channel of the TV There will be a digital noise on the external monitor but it is not a malfunction If the image is not in the centre of the screen use the TV controls to...

Page 51: ...ra all the camera functions apply only to the internal memory Playing back a still image 1 Select the PLAY mode by pressing the play mode button Playing back a movie clip 1 Select the recorded movie c...

Page 52: ...want to play back by using the Left Right button 2 Press the play pause button to play back a recorded voice file To pause a recorded voice file while play ing it back press the play pause button aga...

Page 53: ...display will highlight the im age that had been showing at the time the thumbnail mode was selected 3 Press the 5 function button to move to a desired image 4 To view an image separately press the en...

Page 54: ...clips and WAV files can t be enlarged If an image is enlarged a loss of quality may occur The maximum enlargement rate in proportion to the image size Trimming You can extract part of the image that...

Page 55: ...mode the play pause down button works as follows If the menu is displayed Press the DOWN button to move from the main menu to a sub menu or to move down the sub menu cursor If a still image with a vo...

Page 56: ...yed on the LCD monitor the OK button is used for confirming data that is changed by using the 5 function button This deletes images stored on the memory card Printer button When the camera is connecte...

Page 57: ...ersa Only JPEG images can be resized Movie clip AVI Voice recording WAV files can t be resized You can change the resolution of only those files compressed in the JPEG 4 2 2 format The resized image w...

Page 58: ...ng the Up Down button and press the OK button Icon Descroption Captured images will be stored in black and white Captured images will be stored in a sepia tone a gradient of yellowish brown colours Ca...

Page 59: ...K button Select setup the Custom Colour Up Down button Selects R G B Left Right button Change the values Custom colour You can change the R Red G Green and B Blue values of the image Custom Color Move...

Page 60: ...p 66 Yes PLAY mode functions can be changed by using the LCD monitor In the PLAY mode pressing the MENU button displays the menu on the LCD monitor The menus you can set up in Play mode are as follows...

Page 61: ...t the MULTI SLIDE SHOW menu tab Start the Multi Slide Show The Multi Slide Show can start only in the Show menu 1 Use the Up Down buttons to select the Show menu and press the Right button 2 Select a...

Page 62: ...can change and cancel the images which were saved as Select1 Select2 and Select3 3 Press the OK button and the settings are saved Selecting Images Unique screen effects can be used for the Multi Slide...

Page 63: ...ti Slide Show play interval 1 Select the Interval sub menu by pressing the UP DOWN button and press the RIGHT button 2 Use the Up Down buttons to select the desired interval 3 Press the OK button to s...

Page 64: ...eted and a No Image message will appear 3 After deletion the screen will be changed to the play mode screen Confirm OK Delete All No Yes This deletes images stored on the memory PLAYBACK Protect Copy...

Page 65: ...angle image Some photo labs may not support the wide angle size print DPOF Playback Standard This function allows you to embed printing quantity information on a stored image 1 Press the Up Down butt...

Page 66: ...d then press the Right button 2 Press the Right button again and select the Size Sub menu will display 3 Select a desired sub menu by pressing the UP DOWN button and press the OK button Select Selecti...

Page 67: ...l be displayed If there is not enough space available in the memory card to copy saved images in the internal memory About 17MB the Copy To Card command will copy only some of the images and display M...

Page 68: ...ing Up Down button and press the OK button Select USB Computer Printer Confirm OK If the USB menu is set to the Computer you cannot connect a Pictbridge compatible printer to the camera through USB ca...

Page 69: ...H OK 0 0 PICTBRIDGE Size Layout One Pic Images Date Type Back Set OK All Pics Quality PictBridge Print Setting You can select the Paper Size Print Format Paper Type Print Quality Date Print and File N...

Page 70: ...ed to direct sunlight or the inside of a vehicle in hot weather Environments where there is high magnetism or excessive vibration Areas with high explosives or highly flammable materials Do not leave...

Page 71: ...nt notes If the camera is exposed to an electronic interference it will turn itself off to protect the memory card Camera Maintenance Use a soft brush available from photo stores to gently clean the l...

Page 72: ...ite protect switch to the top of the memory card Memory Full The memory card or internal memory is full Insert new memory card Delete the unnecessary image files No Image There are no images stored on...

Page 73: ...ing the Shutter button There is insufficient memory capacity Delete unnecessary image files The memory card has not been formatted Format the memory card p 46 The memory card is exhausted Insert a new...

Page 74: ...change the image file name Colour of image is different to the original scene White balance or effect setting is incorrect Select appropriate White balance and effect Images are too bright Exposure i...

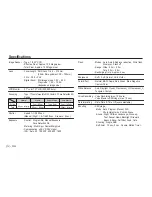
Page 75: ...posure Face Detection AE Metering Multi Spot Center Weighted Compensation 2EV 1 3EV steps ISO Auto 50 100 200 400 800 1600 Flash Modes Auto Auto Red eye reduction Fill in flash Slow sync Flash off Ran...

Page 76: ...pecifications Capacity 256 MB Size Super Fine About 59 About 66 About 79 About 83 About 110 About 171 About 479 Fine About 82 About 93 About 109 About 115 About 155 About 236 About 553 Normal About 14...

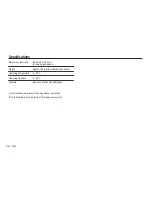
Page 77: ...ng protrusions Weight Approx 160g without batteries and card Operating Temperature 0 40 C Operating Humidity 5 85 Software Samsung Master Adobe Reader Specifications are subject to change without prio...

Page 78: ...aused by inappropriate use Using a Hand made PC or a PC and OS that has not been guaranteed by the manufacturer is not covered by the Samsung warranty Before reading this manual you should have a basi...

Page 79: ...Disk in Windows Explorer or My computer A USB Storage Driver is provided only for Windows A USB Driver for MAC is not included with the Application CD You can use the camera with Mac OS 10 0 10 4 Sams...

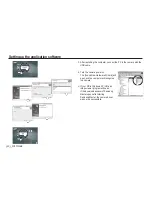
Page 80: ...program You can visit the Samsung web site through the internet http www samsungcamera com English http www samsungcamera co kr Korean 1 The auto run frame will display Click the Samsung Digital Camer...

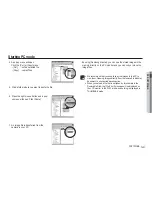
Page 81: ...the camera If your OS is Windows XP Vista an image viewer program will open If the download window of Samsung Master opens after starting Samsung Master the camera driver was set up successfully 3 Af...

Page 82: ...Software CD ROM To install the Adobe Reader 6 0 1 correctly Internet Explorer 5 01 or later has to be installed Visit www microsoft com and upgrade the Internet Explorer If you connect the USB cable...

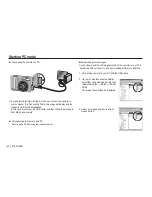
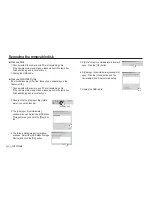
Page 83: ...d In this case disconnect the USB cable and then follow the procedure from Step 2 and onward Downloading stored images You can download the still images stored on the camera to your PC s hard disk and...

Page 84: ...to your PC By using Samsung Master you can see the stored images in the memory directly on the PC monitor and you can copy or move the image files We recommend that you should copy the images to the...

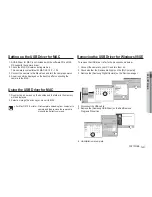
Page 85: ...nd is constantly on 2 Unplug the USB cable Windows 2000 ME XP Vista The illustrations may differ from those shown depending on the Windows O S 1 Check whether the camera and PC are transferring a file...

Page 86: ...ng the camera to the MAC 1 Double click a new icon on the desktop and the folder in the memory will be displayed 2 Select an image file and copy or move it to MAC For Mac OS 10 0 or later First comple...

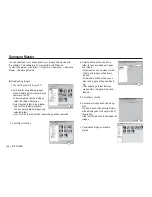
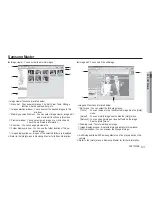
Page 87: ...Start button to download the images 7 Downloaded images will be dis played You can download view edit and save your images and movies with this software This software is only compatible with Windows...

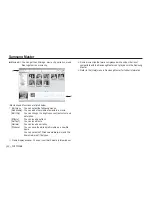
Page 88: ...tion of the se lected image Image display window Images of the selected folder are displayed Refer to the Help menu in Samsung Master for further information Image edit You can edit the still image Im...

Page 89: ...an insert a narration Produce You can save the edited multi media as a new file name You can select AVI Windows media wmv and Win dows media asf file types Frame display window You can insert multi me...

Page 90: ...front of the computer When the camera is connected to the USB port located on the front of the computer the computer may not recognise the camera Connect the camera to the USB port located on the bac...

Page 91: ...entioned above occasionally happen Close the Samsung Master program by clicking the Samsung Master icon on the Taskbar Install all the application programs included in the software CD Correct Disposal...

Page 92: ...t the interference by one or more of the following measures Reorient or relocate the receiving antenna Increase the distance between the equipment and receiver Connect the equipment to an outlet on a...

Page 93: ...92 MEMO...

Page 94: ......

Reviews: