31
ENGLISH
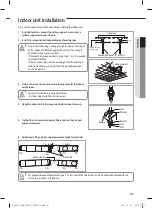
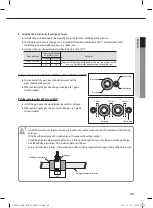
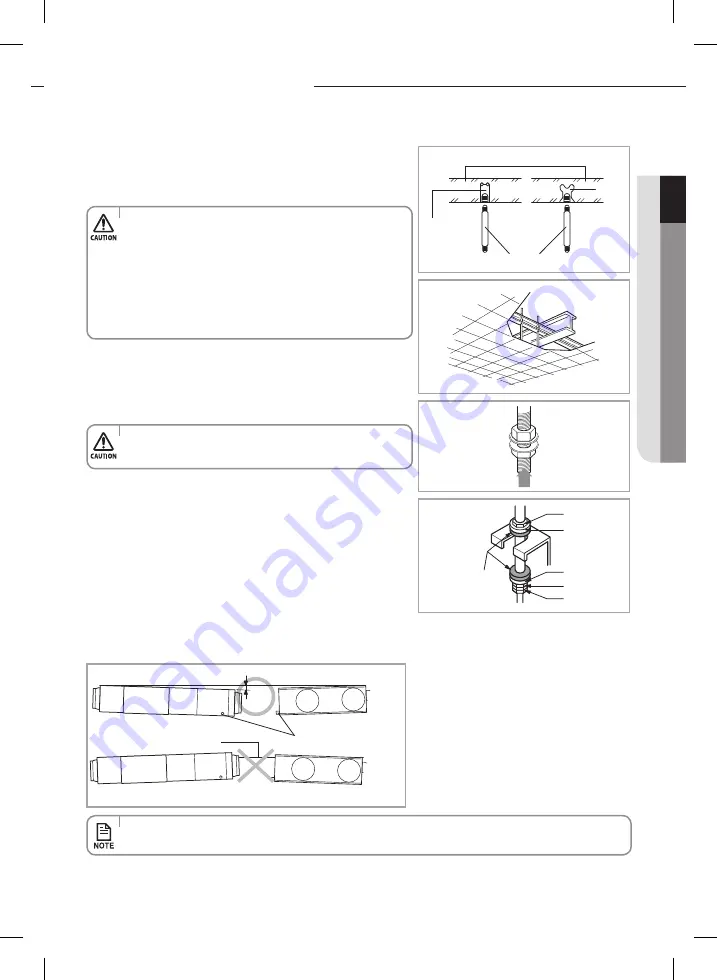
1. Insert bolt anchors, use existing ceiling supports or construct a
suitable support as shown in figure.
2. Install the suspension bolts depending on the ceiling type.
3. Fit two nuts on each suspension rod allowing space for the indoor
unit between.
4. Hang the indoor unit to the suspension bolts between two nuts.
5. Tighten the nuts securely to clamp the brackets on the unit and
prevent movement.
6. Adjust level of the unit by using measurement plate for all 4 sides.
Concrete
Suspension bolt( 3/8” or M10)
Hole in anchor
Hole in plug
Insert
Rubber
Nut
Nut
Washer
Washer
Nut
Ceiling support
It is recommended to install the Y-joint before installing the indoor unit.
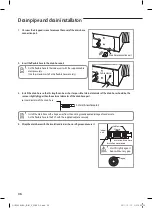
• For proper drainage of condensate, give 1° or less slant to the side of the unit which will be connected with the
drain hose, as shown in the figure.
• Ensure that the ceiling is strong enough to support the weight
of the indoor unit. Before hanging the unit, test the strength
of each attached suspension bolt.
• If the length of suspension bolt is more than 1.5m, it is required
to prevent vibration.
• If this is not possible, create an opening on the false ceiling in
order to be able to use it to perform the required operations
on the indoor unit.
• You must install the suspension bolts more
than four when installing the indoor unit.
Indoor unit installation
1° or less
1° or less
Drain hole
Horizontal line
OA
SA
SA
SA
SA
RA
RA
OA
RHF050KHEA_IB,IM_E_32885-3.indd 31
2011-10-12 오후 5:30:31


