background image

14

Caution

!

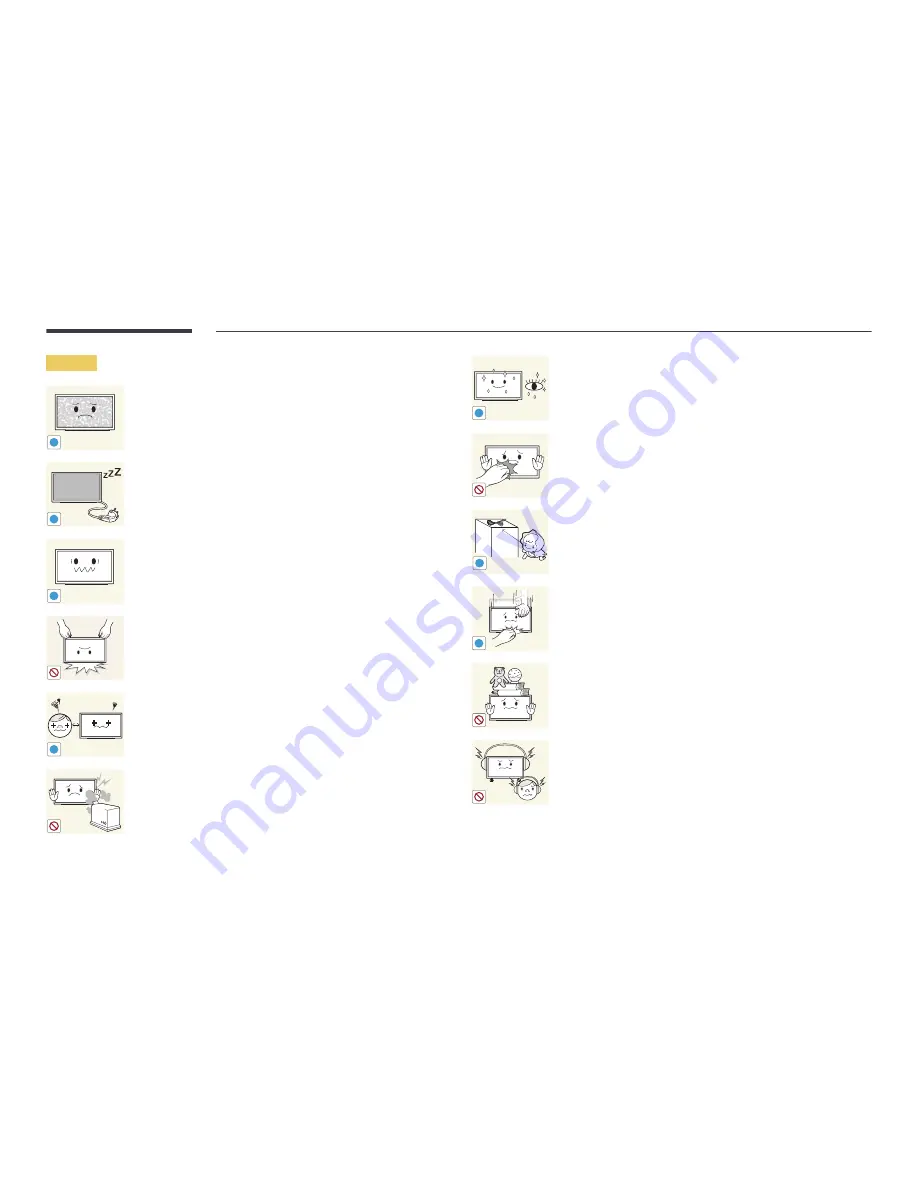
Leaving the screen fixed on a stationary image for an extended period of 
time may cause afterimage burn-in or defective pixels.


Activate power-saving mode or a moving-picture screen saver if you 
will not be using the product for an extended period of time.

-_-

!

Disconnect the power cord from the power socket if you do not plan on 
using the product for an extended period of time (vacation, etc).


Dust accumulation combined with heat can cause a fire, electric shock 
or electric leakage.

!

Use the product at the recommended resolution and frequency.


Your eyesight may deteriorate.

Do not hold the product upside-down or move it by holding the stand.


The product may fall and become damaged or cause an injury.

!

Looking at the screen too close for an extended period of time can 
deteriorate your eyesight.

Do not use humidifiers or stoves around the product.


A fire or electric shock may result.

!

Rest your eyes for more than 5 minutes for every 1 hour of product use.


Eye fatigue will be relieved.

Do not touch the screen when the product has been turned on for an 
extended period of time as it will become hot.

!

Store small accessories out of the reach of children.

!

Exercise caution when adjusting the product angle or stand height.


Your hand or finger may get stuck and injured.


Tilting the product at an excessive angle may cause the product to fall 
and an injury may result.

Do not place heavy objects on the product.


Product failure or personal injury may result.

When using headphones or earphones, do not turn the volume too high.


Having the sound too loud may damage your hearing.

Summary of Contents for RH55E

Page 1: ...ending on the product and the specifications are subject to change without prior notice to improve the performance Recommended hours of use per day of this product is under 16 hours If the product is...

Page 2: ...7 Connection Using an HDMI Cable 28 Connection Using an HDMI DVI Cable 28 Connecting to a Video Device 29 Connection Using the AV Cable 29 Connection Using an HDMI DVI Cable 30 Connection Using an HDM...

Page 3: ...Adjustment 68 PC Screen Adjustment 68 Picture Off 69 Reset Picture 69 OnScreen Display PIP 70 PIP Settings 70 Display Orientation 72 Onscreen Menu Orientation 72 Source Content Orientation 72 Aspect R...

Page 4: ...Settings 109 Screen Mirroring 110 Screen Mirroring 110 Device Name 110 System Accessibility 111 Audio Description 111 Subtitle 111 Menu Transparency 112 High Contrast 112 Enlarge 112 Setup 113 Initia...

Page 5: ...a USB device 142 Using a USB device 144 Playing media content from a PC mobile device 145 Features provided in the media content list page 146 Menu items in the media content list page 147 Available...

Page 6: ...sed by customer s fault 169 Others 169 WEEE 170 Correct Disposal of This Product Waste Electrical Electronic Equipment 170 Correct disposal of batteries in this product 170 Optimum Picture Quality and...

Page 7: ...n VESA DPM and DDC are registered trademarks of the Video Electronics Standards Association Ownership of all other trademarks is attributed to their due owner An administration fee may be charged if e...

Page 8: ...ol are prohibited Instructions marked by this symbol must be followed Cleaning Exercise care when cleaning as the panel and exterior of advanced LCDs are easily scratched Take the following steps when...

Page 9: ...single power socket Overheated power sockets may cause a fire Do not touch the power plug with wet hands Otherwise an electric shock may result Insert the power plug all the way in so it is not loose...

Page 10: ...e plug when disconnecting the power cord from the power socket An electric shock or fire may result Installation Warning DO NOT PLACE CANDLES INSECT REPELLANTS OR CIGARETTES ON TOP OF THE PRODUCT DO N...

Page 11: ...uct may fall and become damaged and or cause an injury Using the product in an area with excess vibration may damage the product or cause a fire Do not install the product in a vehicle or a place expo...

Page 12: ...e to consult Samsung Customer Service Centre if you want to install the product at such a place Operation Warning There is a high voltage inside the product Never disassemble repair or modify the prod...

Page 13: ...lectric shock or fire may result from a damaged cable Do not use or keep combustible spray or an inflammable substance near the product An explosion or fire may result Ensure the vents are not blocked...

Page 14: ...ged or cause an injury Looking at the screen too close for an extended period of time can deteriorate your eyesight Do not use humidifiers or stoves around the product A fire or electric shock may res...

Page 15: ...of the internal liquid Use only the specified standardized batteries and do not use a new battery and a used battery at the same time Otherwise the batteries may be damaged or cause fire personal inj...

Page 16: ...th the product To install a stand you can purchase one separately Checking the Components Components Components may differ in different locations Quick Setup Guide Warranty card Not available in some...

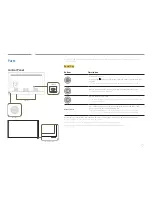
Page 17: ...nge the channel in TV mode Move to the left or right menu You can adjust the volume by moving the panel key left or right when the control menu is not displayed Remote sensor Press a button on the rem...

Page 18: ...press the panel key Menu Display the OSD menu Move the panel key left to select Menu in the control menu The OSD control screen will appear Move the panel key right to select the desired menu You can...

Page 19: ...RS232CIN VIDEO AUDIO R L Port Description COMMON INTERFACE Connect to a CI card PC IN Connects to a source device using a D SUB cable LAN Connects to MDC using a LAN cable USB 0 5A USB 1 0A Connect to...

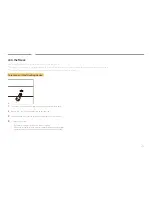
Page 20: ...at is shown in the images To lock an anti theft locking device 1 Fix the cable of your anti theft locking device to a heavy object such as a desk 2 Put one end of the cable through the loop on the oth...

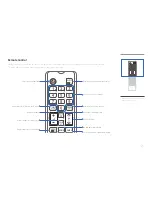
Page 21: ...ption in the image below is not supported on the product PRE CH GUIDE HOME CH LIST TTX MIX Display and select available video sources Have direct access to channels Cut off the sound temporarily Go to...

Page 22: ...urrent menu Manually select a connected input source from PC HDMI AV or MagicInfo E Play photos videos or music Quickly select frequently used functions Return to the previous menu It sets safe lock f...

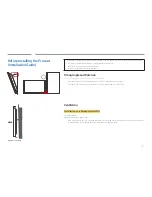
Page 23: ...Rotation Contact Samsung Customer Service Centre for further details The product can be tilted at a maximum angle of 15 from a perpendicular wall surface To use the product vertically portrait turn i...

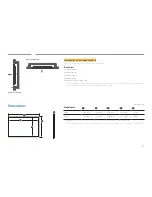
Page 24: ...pecified above between the product and wall for ventilation and ensure that the ambient temperature is kept below 35 C Dimensions 1 2 3 4 5 Unit mm inches Model name 1 1 2 2 3 4 3 4 5 RH48E 1076 1 42...

Page 25: ...etailed information on installing the wall mount see the instructions provided with the wall mount We recommend you contact a technician for assistance when installing the wall mount bracket Samsung E...

Page 26: ...ndard screw specifications the length of the screws may differ depending on the wall mount specifications Do not fasten the screws too firmly This may damage the product or cause the product to fall l...

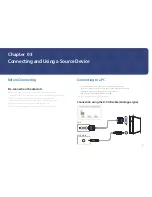
Page 27: ...ctly left white and right red Check the types of ports at the back of the product you want to connect Connecting to a PC Do not connect the power cable before connecting all other cables Ensure you co...

Page 28: ...a computer to the product with an HDMI DVI cable make sure to configure the settings as shown below to enable the video and audio from the computer Sound set HDMI Sound to PC DVI Picture set each scre...

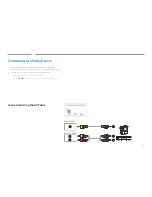
Page 29: ...power cable You can connect a video device to the product using a cable Connecting parts may differ in different products Press the SOURCE button on the remote control to change the source Connection...

Page 30: ...N VIDEO AUDIO R L Connection Using an HDMI Cable Using an HDMI cable up to 1080p For better picture and audio quality connect to a digital device using an HDMI cable An HDMI cable supports digital vid...

Page 31: ...232CIN VIDEO AUDIO R L Connecting the antenna Connecting parts may differ in different products When the product is powered on for the first time basic settings are configured automatically Take extra...

Page 32: ...onnecting parts may differ in different products LAN PC IN LAN USB 0 5A USB 1 0A HDMI 1 ANT IN HDMI 2 ARC HDMI 3 AV IN PC AUDIO IN AUDIO OUT RS232CIN VIDEO AUDIO R L Use Cat7 STP Type cable for the co...

Page 33: ...vice provider When the configuration of channel information has finished the message Updating Completed is displayed indicating the channel list is updated You must obtain a CI or CI CARD from a local...

Page 34: ...button on the remote control The screen may not display correctly if an incorrect source is selected for the source device you want to convert to To view detailed information about connected source d...

Page 35: ...y of content from internal and external storage devices Clone Product Picture Mode ID Settings On OffTimer Connectivity Ticker Network Status More settings Device Name Signage Internal storage GB avai...

Page 36: ...g templates is connected Play scheduled content My Templates Play a template in My Templates stored in the internal memory of the product Player Device All Content All Sort by File Name Options 2 item...

Page 37: ...ch for a desired content list All Video Image PDF Flash Office My Templates Sort by Specify the content sort criterion File name Recently played Options Menu items in the Player page Option Name Opera...

Page 38: ...Fit to Screen If Picture Size is set to PDF or Office Full Screen Original Size This feature is only available for Video Image PDF and Office files Display Duration Set the duration for each page in a...

Page 39: ...content will be displayed if you run a channel while no programmes are scheduled on the channel None Safely Remove Safely removes USB memory Reset Restore all the values under Settings to the default...

Page 40: ...isplayed image may differ depending on the model Press the INFO button on the remote control Name Current time Software Version Displays the software version of a device MAC ID Displays the original i...

Page 41: ...to configure settings such as Picture Mode and Sound Mode Playlist View a list of content items currently playing Music Set the background music for the content currently playing Picture Mode Customi...

Page 42: ...orted Sound output restrictions More than one sound output cannot be used Playback priority Flash file network BGM local BGM video file in the main frame selected by the user Network BGM Settings can...

Page 43: ...kv asf wmv mp4 mov 3gp vro mpg mpeg ts tp trp flv vob svi m2ts mts divx AVI MKV ASF MP4 3GP VRO VOB PS TS DivX 3 11 DivX 4 DivX 5 DivX 6 1920 x 1080 6 30 30 AC3 LPCM AAC HE AAC WMA DD MPEG MP3 DTS Cor...

Page 44: ...or the resolution is 1080 x 1920 When a single video file is playing Seamless mode is not supported under the following conditions Incompatible codec MVC VP3 MJPEG Incompatible codec Incompatible cod...

Page 45: ...sion Office 97 Office 2007 Functions not supported Animation effect 3D shapes which will be displayed in 2D Header and footer some subitems are not supported Word Art Align A group alignment error may...

Page 46: ...ckground effect Some paragraph styles Word Art Align A group alignment error may occur 3D shapes which will be displayed in 2D Office 2007 SmartArt is not fully supported 97 out of 115 subitems are su...

Page 47: ...ound on the external storage device Export this device s settings to the external storage device message appears When a duplicate file is found on the external storage device 1 Connect the external st...

Page 48: ...ed to the input cable for input signal reception Range 0 224 Press u d to select a number and press E Enter the number you want using the number buttons on the remote control PC Connection Cable Selec...

Page 49: ...se the product as a TV signage using MagicInfo Express Content Creator on your PC Network type Wireless Wired Wi Fi Direct Set to connect the product to wireless mobile devices Using this function you...

Page 50: ...50 Check the current network and Internet connection Network Status HOME Network Status ENTER E Network Status The displayed image may differ depending on the model...

Page 51: ...ay are used Select either Videos Images or Text depending on the picture mode Calibration In this mode the brightness colour gamma and uniformity settings customized using the colour calibration progr...

Page 52: ...input source of your choice Aerial when the Source is set to TV Select Terrestrial or Cable Channel when the Source is set to TV Select the desired channel Content when the Source is set to Internal...

Page 53: ...ement Timer will be disabled during a period specified as a holiday Add Holiday Specify the period you want to add as a holiday Select the start and end dates of the holiday you want to add using the...

Page 54: ...screen Time Set the Start Time and End Time to display a Message Font options Specify the text font and colour for the message Position Select an orientation to display a Message Scroll Specify the s...

Page 55: ...ions Select either Videos Images or Text depending on the picture mode Video Wall Suitable for environments where videowall display are used Select either Videos Images or Text depending on the pictur...

Page 56: ...table options Shops Shopping Centres Offices Schools Terminals Stations Video Wall Videos Images Backlight Contrast Brightness Sharpness Colour Tint G R Text Backlight Contrast Brightness Sharpness Ca...

Page 57: ...ture ColourTemperature 16000K The displayed image may differ depending on the model Adjust the colour temperature Red Green Blue Range 2800K 16000K Enabled when Colour Tone is set to Off Colour Temper...

Page 58: ...able for environments where videowall display are used 10 Point Controls the white balance in 10 point interval by adjusting the red green and blue brightness 10 Point Off On Level Red Green Blue and...

Page 59: ...cture Calibrated value Don t apply The displayed image may differ depending on the model Select whether to apply the brightness colour gamma and uniformity settings customized using the colour calibra...

Page 60: ...ngs Adjustable options Shops Shopping Centres Offices Schools Video Wall Videos Images Dynamic Contrast Black Tone Flesh Tone RGB Only Mode Colour Space Text Dynamic Contrast Black Tone Terminals Stat...

Page 61: ...depth Off Dark Darker Darkest Flesh Tone Emphasize pink Flesh Tone RGB Only Mode Displays the Red Green and Blue colour for making fine adjustments to the hue and saturation Off Red Green Blue Colour...

Page 62: ...model Picture Mode Picture Mode settings Adjustable options Shops Shopping Centres Offices Schools Terminals Stations Video Wall Videos Images Colour Tone Digital Clean View MPEG Noise Filter HDMI Bla...

Page 63: ...ored for each external device connected to an input on the product Digital Clean View If the broadcast signal received by your product is weak you can activate the Digital Clean View feature to reduce...

Page 64: ...t the screen depth Auto Low Normal Available only in HDMI mode AV Timing 480p 576p 720p 1080i 1080p Film Mode This mode is suitable to view movies Sets the product to automatically sense and process f...

Page 65: ...2 Use for a stronger magnification Smart View 1 Reduces the 16 9 picture by 50 Smart View 2 Reduces the 16 9 picture by 25 Wide Fit Enlarges the aspect ratio of the picture to fit the entire screen 4...

Page 66: ...down 3 Press the E button Zoom Position Picture Size Picture Size Custom Zoom Position 4 3 Screen Size Resolution Off The displayed image may differ depending on the model Adjusts the picture zoom and...

Page 67: ...the original size Each European country requires different picture size Resolution Picture Size Picture Size Custom Zoom Position 4 3 Screen Size Resolution Off The displayed image may differ dependi...

Page 68: ...differ depending on the model Coarse Fine Removes or reduces picture noise If the noise is not removed by Fine tuning alone use the Coarse function to adjust the frequency as best as possible Coarse a...

Page 69: ...electing Picture Off switches off the screen The volume is not disabled To switch the screen on press any button other than the volume button Reset Picture MENU m Picture Reset Picture ENTER E Picture...

Page 70: ...off while watching in the PIP mode PIP mode will remain after power Off On You may notice that the picture in the PIP screen becomes slightly unnatural when you use the main screen to view a game or k...

Page 71: ...le Select either Terrestrial or Cable as the input source for the sub screen This option is enabled if the secondary display is set to TV Channel Select the channel for the sub screen This option is e...

Page 72: ...the right side of the product screen Source Content Orientation Set the orientation of content from external devices connected to the product Landscape Display the screen in landscape mode default Por...

Page 73: ...programme the time between movements of the picture in minutes Pixel Shift Minimize image retention by finely moving pixels horizontally or vertically Pixel Shift Off On Horizontal Vertical and Time a...

Page 74: ...protective pattern to display Pixel Pixels on the screen alternate black continuously Rolling bar A vertical bar moves left to right Fading screen The entire screen becomes brighter then darker The Ro...

Page 75: ...ed image may differ depending on the model Immediate display Select the screen saver you want to display immediately Off Pixel Rolling bar Fading screen Side Grey When the screen is set to 4 3 aspect...

Page 76: ...e displayed image may differ depending on the model Source Info Select whether to display the source OSD when the input source changes Off On No Signal Message Select whether to display the no signal...

Page 77: ...he language setting will only be applied to the onscreen menu display It will not be applied to other functions on your PC Reset OnScreen Display MENU m OnScreen Display Reset OnScreen Display ENTER E...

Page 78: ...image may differ depending on the model You can select a sound mode to suit your personal preferences Standard Selects the normal sound mode Music Emphasizes music over voices Movie Provides the best...

Page 79: ...tual 5 1 channel surround sound experience through a pair of speakers using HRTF Head Related Transfer Function technology Off On Dialog Clarity This function allows you to increase the intensity of a...

Page 80: ...image may differ depending on the model Select whether to hear from AV HDMI or PC DVI AV HDMI PC DVI Dolby Digital Comp MENU m Sound Dolby Digital Comp ENTER E Sound Dolby Digital Comp RF The displaye...

Page 81: ...there is no video signal both the products speakers and the external speakers will be mute TV SoundConnect You can connect Samsung Bluetooth audio devices to the SMART Signage TV They must be paired...

Page 82: ...h channel so each channel is quieter Night is useful at night when you may want to keep the volume low To use the volume control of a connected source device set Auto Volume to Off A change to the vol...

Page 83: ...und MENU m Sound Reset Sound ENTER E Sound Reset Sound The displayed image may differ depending on the model The displayed image may differ depending on the model Reset all sound settings to the facto...

Page 84: ...ning Auto Tuning ENTER E on your remote The Auto Tuning screen appears 2 On the Auto Tuning screen select the source of your product signal Terrestrial If your product is connected to an antenna choos...

Page 85: ...dcasting Auto Tuning Cable Search Option ENTER E AutoTuning Cable Search Option The displayed image may differ depending on the model Available in TV mode only when the aerial was set to Cable Sets ad...

Page 86: ...ial Terrestrial The displayed image may differ depending on the model Available in TV mode only Before your television can begin memorizing the available channels you must specify the type of signal s...

Page 87: ...all added channels Favourites 1 Favourites 5 Shows all favourite channels in up to five groups Each group has a separate screen The TV displays favourite groups only if you have added favourites usin...

Page 88: ...ramme lineup You can check the programme schedules and set up a Schedule Manager The information in the Guide is for digital channels only Analogue channels are not supported You can press the colour...

Page 89: ...le in TV mode only Watch a desired channel at a scheduled time Aerial Select either Terrestrial or Cable as digital channel mode Channel Select the desired channel Repeat Once Manual Sat Sun Mon Fri E...

Page 90: ...o run Select All Deselect All 2 After selecting channels select Delete from the screen to delete the channels Re registering deleted channels Register deleted channels again if required Deleted channe...

Page 91: ...eselect all channels Aerial Select either Terrestrial or Cable as digital channel mode Category Channels saved on your TV are classified under the All and Added Ch categories Select a desired category...

Page 92: ...splayed image may differ depending on the model Available in TV mode only You can change the channel numbers Set Edit Channel Number to Enable This function is only available on certain models in spec...

Page 93: ...rite channel list 1 Press the TOOLS button while watching TV Sub menu items are displayed Select Edit Favourites from the sub menu items 2 From the displayed prompt box select a favourite channel list...

Page 94: ...channel list This option is only available when channels under a favourite channel list are selected Aerial Select either the Terrestrial or Cable signal Edit Channel Manage saved channels Information...

Page 95: ...channels between favourites channel lists Copy channels from a favourite channel list to another favourite channel list if required 1 Select Change Fav from the screen to change the favourite channel...

Page 96: ...mode only Audio Language for digital broadcasts Change the default value for audio languages Primary Audio Set the primary audio language Secondary Audio Set the secondary audio language The available...

Page 97: ...locks programmes with ratings higher than those desired This is useful for controlling what children watch on TV This will not function for programmes originating from external sources such as DVD pla...

Page 98: ...may differ depending on the model Available in TV mode only Prevent your children from accessing harmful content by locking channels On Off This option is available when the input source is TV The de...

Page 99: ...tically Turn it Off if you do not want to use it Application Info View information about the CAM inserted into the CI slot and about the CI or CI CARD inserted into the CAM You can install the CAM any...

Page 100: ...a channel is locked using the Channel Lock function the PIN input window appears This function depends on the country and region When Aerial Source is set to Terrestrial or Cable Digital Channel Tuni...

Page 101: ...s that have been saved are marked with an asterisk on the right hand side of the channel number in the channel banner To reset the fine tuning select Reset Transfer Channel List Imports or exports the...

Page 102: ...nabled only in countries where it is supported Disable Enable Teletext Language Use this to set the teletext language Availability depends on the specific model and area Primary Teletext Set the prima...

Page 103: ...se Retry IP Settings Disconnect The displayed image may differ depending on the model Network Settings MENU m Network Network Settings ENTER E Connect to a wireless network and use the product as a TV...

Page 104: ...cable See the diagram below Note that the wall outlet is attached to a modem or router elsewhere in your house The LAN Port on the Wall LAN LAN Cable RJ45 If you have a Dynamic Network you should use...

Page 105: ...ork Connection Values To view the Network connection values on most Windows computers follow these steps 1 Right click the Network icon on the bottom right of the screen 2 In the pop up menu that appe...

Page 106: ...on Manual Setup WPS PBC Automatic Network Setup Wireless Most wireless networks have an optional security system that requires devices that access the network to transmit an encrypted security code ca...

Page 107: ...o Wireless from the Network Settings page 2 The Network function searches for available wireless networks When done it displays a list of the available networks 3 In the list of networks press the u o...

Page 108: ...use message appears WPS PBC How to set up using WPS PBC If your router has a WPS PBC button follow these steps 1 Set Network type to Wireless from the Network Settings page 2 Select WPS PBC press E a...

Page 109: ...to search devices 2 Turn on the Wi Fi Direct function on your device Select the desired Wi Fi device PBC Push Button Configuration Press the WPS PBC button on your Wi Fi device within 2 minutes Your...

Page 110: ...ast WiDi version 3 5 or higher and Miracast To check if the mirroring function is available visit the mobile device manufacturer website Screen or sound output may be choppy if there is network conges...

Page 111: ...gital broadcasts This function handles the Audio Stream for the AD Audio Description which is sent along with the Main audio from the broadcaster Audio Description Turn the audio description function...

Page 112: ...gh contrast colours in Menu Menu transparencies become opaque when the option is selected Off On Enlarge Set whether to enlarge highlighted item in Menu Off On Accessibility Audio Description Subtitle...

Page 113: ...menu language 2 Display Orientation Landscape Portrait Configure the menu page orientation 3 Auto Power Off The product will automatically turn off if you don t press a button on the remote or touch...

Page 114: ...the Stop button Auto Tuning does not appear if No channels display only is selected 7 Clock Set Set the current date and time and then select Next 8 Device Name User Input Signage Display 1 6 Select...

Page 115: ...Time and then press E Use the number buttons to enter numbers or press the up and down arrow buttons Use the left and right arrow buttons to move from one entry field to the next Press E when done Av...

Page 116: ...offset your timezone Start Date End Date and Time Offset are enabled only when DST is set to Manual Sleep Timer Automatically shuts off the product after a preset period of time Off 30 min 60 min 90...

Page 117: ...source and display a message indicating that there is no signal When the Primary Source selection is set to All the display will search all the video source inputs twice in sequence looking for an ac...

Page 118: ...displayed image may differ depending on the model Auto Power On This feature automatically turns on the product as soon as it is plugged in Pressing the power button is not needed Off On Max Power Sav...

Page 119: ...ontrol option is only enabled when Source is set to PC or HDMI If No Signal is displayed although a source device is connected check the cable connection If No Signal Message is set to Off the No Sign...

Page 120: ...etting under Picture while Eco Sensor is on will disable the Off Min Backlight When Eco Sensor is On you can manually adjust the minimum screen brightness Min Backlight is the darkest backlight mode M...

Page 121: ...Energy Saving Eco Sensor Screen Lamp Schedule No Signal Power Off Auto Power Off Off On Off 15 min Off The displayed image may differ depending on the model Temperature Control MENU m System Temperatu...

Page 122: ...keyboard Add Bluetooth Keyboard Connecting a Bluetooth keyboard 1 Place the Bluetooth keyboard into standby status 2 Select MENU m System Device Manager Keyboard Settings Add Bluetooth Keyboard The S...

Page 123: ...Options Depending on the country Keyboard Language Specify the keyboard input language Keyboard type Specify the keyboard type Switch Input Language Configure the key combination used to change the in...

Page 124: ...2 Select MENU m System Device Manager Mouse Settings Add Bluetooth Mouse 3 Select the Bluetooth mouse from the scanned list and then select Pair and connect This pairs the Bluetooth mouse to the SMART...

Page 125: ...ffer depending on the model The Change PIN screen will appear Choose any 4 digits for your PIN and enter it in Enter New PIN Reenter the same 4 digits in Confirm New PIN When the Confirm screen disapp...

Page 126: ...Lock function To unlock the menus and buttons press the LOCK button and then enter the password default password 0 0 0 0 Power On Button Enable or disable the power button on the remote control when...

Page 127: ...igure the product so that it cannot be searched from mobile devices This feature is provided for customers that do not want their device to be included in searches through Contents Creator on mobile d...

Page 128: ...t Security Use this option to turn Smart Security protection On Off Off On Scan Inspect the TV and connected storage devices to check for viruses Isolated List This is the list of items that have been...

Page 129: ...the optimal resolution Off On Available when you connect Samsung products that support BD Wise through an HDMI cable to the product The BD Wise function is enabled only when a source device with the...

Page 130: ...nect up to 3 devices of the same type Anynet Menu The Anynet menu changes depending on the type and status of the Anynet devices connected to the product Press the TOOLS button to display the Anynet m...

Page 131: ...elect Refresh to refresh the list 3 Select a device and then press the E button You can switch to the selected device The Select Device menu appears only when you set Anynet HDMI CEC to On in the Syst...

Page 132: ...eck if the Anynet function of the Anynet device is set on I want to start Anynet Check if the Anynet device is properly connected to the product and check if the Anynet HDMI CEC is set to On in the Sy...

Page 133: ...Check whether Anynet HDMI CEC is set to On in the System menu Search Anynet devices again Anynet requires an HDMI connection Make sure the device is connected to your product with an HDMI cable Some H...

Page 134: ...tp vod divx com Game Mode When connecting to a game console such as PlayStation or Xbox you can enjoy a more realistic gaming experience by selecting game mode Off On Precautions and limitations for G...

Page 135: ...set System MENU m System Reset System ENTER E System Reset System The displayed image may differ depending on the model This option returns the current settings under system to the default factory set...

Page 136: ...trength and improved HD channel reception This function is only available for digital channels Reset You can restore all SMART Signage TV settings excluding the Internet and network settings to the fa...

Page 137: ...efault settings We advise you to write down your settings so that you can easily reset them after the upgrade Update now Update the software to the latest version Auto update This feature automaticall...

Page 138: ...this information when your product does not work properly or when you want to upgrade the software You can find information regarding our call centres and how to download products and software Contac...

Page 139: ...The displayed image may differ depending on the model Refer to the Home feature chapter for details on sub menu items Go to Home to play a variety of content from a memory device or a connected netwo...

Page 140: ...used On Off Timer You must set the clock before you can use On Off Timer Set On Timer so that your product turns on automatically at a time and on a day of your choosing The power is turned on with th...

Page 141: ...eset All MENU m Support Reset All ENTER E Support Reset All The displayed image may differ depending on the model This option returns all the current settings for a display to the default factory sett...

Page 142: ...les to ensure your data is not damaged or lost Samsung Electronics is not liable for any damage or loss of data Do not remove a USB device while it is loading If a USB device is connected using a USB...

Page 143: ...ection Time Power saving mode on some external hard disk drives may automatically deactivate after connecting to the product File system and formats Media play may not function properly with unlicence...

Page 144: ...t saved on a USB device connect the USB device to a USB port on the product Removing a USB device Removing a USB device from Source 1 Press SOURCE on the remote control Alternatively go to Source usin...

Page 145: ...ice menu appears 3 Select Options from the screen and then select Multimedia Device Settings A list of devices connected to the product will appear 4 Select a device and approve the device connection...

Page 146: ...SOURCE Source 2 Select Network from Source The Network Device menu appears 3 Select a device connected via the home network DLNA A list of files and folders shared with the selected device will appea...

Page 147: ...Playlist Delete a playlist c Add to Playlist Add files to a playlist or create a new playlist c Play Selected Select and play desired content from the media content list c c c Send Send media content...

Page 148: ...is saved on the same device The mini player is displayed while background music Background Music is playing Using the mini player pause the music currently playing or change to another music Sound Mod...

Page 149: ...contains audio only or 3 the video play time is shorter than 60 seconds Chapter Titles Select and play another video in the same folder Time Bar You can use the l and r buttons to scan through the fi...

Page 150: ...To play the previous music file select twice Selecting once will play the current music from the beginning To play the next music file select Repeat Configure Repeat mode Repeat One plays the current...

Page 151: ...SubStation Alpha ssa Advanced SubStation Alpha ass Powerdivx psb Xsub Container AVI SubStation Alpha Container MKV Advanced SubStation Alpha Container MKV SubRip Container MKV MPEG 4 timed text Conta...

Page 152: ...Jump function is not supported You may experience file stuttering while playing a video through a network connection The menu may take longer to appear if the video s bit rate exceeds 10Mbps Some USB...

Page 153: ...trp mov flv vob svi m2ts mts divx AVI MKV ASF MP4 3GP VRO VOB PS TS DivX 3 11 DivX 4 DivX 5 DivX 6 1920 x 1080 6 30 30 AC3 LPCM ADMPCM IMA MS AAC HE AAC WMA DD MPEG MP3 DTS Core G 711 ALaw Law MPEG4...

Page 154: ...remains blank while the power LED blinks even when the product is correctly connected to a PC perform product testing 1 Power off both the PC and product 2 Disconnect all the cables from the product...

Page 155: ...sion Please contact the graphics card or computer manufacturer for further details about how to adjust the screen settings PC is shown in Source when a PC is not connected PC is always shown in Source...

Page 156: ...s inconsistent Go to Picture and adjust the Colour Space settings White does not really look white Go to Picture and adjust the White Balance settings There is no image on the screen and the power LED...

Page 157: ...cture Size is set to Screen Fit change the setting to 16 9 Lines red green or blue are displayed on the screen These lines are displayed when there is a defect in DATA SOURCE DRIVER IC on the SMART Si...

Page 158: ...d to it Reconnect the power cable to the device and then reboot the device There is static coming from the speakers Check the cable connection Make sure a video cable is not connected to an audio inpu...

Page 159: ...control issue The remote control does not work Make sure that the batteries are correctly in place Check if the batteries are flat Check for power failure Make sure that the power cord is connected Ch...

Page 160: ...supported appears The message The defined resolution is not supported appears if the input source resolution exceeds the maximum resolution of the display To resolve the issue change the PC resolution...

Page 161: ...ght still does not turn on after the power switch is turned off and then on again an internal jack may be disconnected Contact your nearest service centre to have the product serviced If the sensor li...

Page 162: ...y in Monitor Settings Windows 8 Go to Settings Control Panel Appearance and Personalization Display Adjust resolution Advanced Settings Monitor and adjust the frequency in Monitor Settings How can I c...

Page 163: ...ings or BIOS SETUP on the PC Windows Vista Set power saving mode in Control Panel Appearance and Personalization Personalize Screen Saver Settings or BIOS SETUP on the PC Windows 7 Set power saving mo...

Page 164: ...inches 24 9 lbs 1231 6 x 711 9 x 67 8 mm 13 6 kg 48 5 x 28 0 x 2 7 inches 30 0 lbs With Stand 1076 1 x 681 3 x 310 5 mm 12 3 kg 42 4 x 26 8 x 12 2 inches 27 1 lbs 1231 6 x 770 6 x 310 5 mm 14 6 kg 48...

Page 165: ...imizes the SMART Signage TV settings SMART Signage TV installation takes place automatically However you can customize the installation settings if desired Due to the nature of the manufacturing of th...

Page 166: ...H55E 159 W 108 W 174 9 W The displayed power consumption level can vary in different operating conditions or when settings are changed SOG Sync On Green is not supported To reduce the power consumptio...

Page 167: ...izontal Frequency 30 81 kHz Vertical Frequency 48 75 Hz Resolution Optimum resolution 1920 x 1080 60 Hz Maximum resolution 1920 x 1080 60 Hz The screen will automatically be adjusted if a signal that...

Page 168: ...4 79 976 75 025 135 000 VESA 1366 x 768 47 712 59 790 85 500 VESA 1440 x 900 55 935 59 887 106 500 VESA 1600 x 900 RB 60 000 60 000 108 000 VESA 1680 x 1050 65 290 59 954 146 250 VESA 1920 x 1080 67 5...

Page 169: ...mer requests software installation and setup for the product If a service technician removes cleans dusts or foreign materials inside of the product If customer requests an installation additionally a...

Page 170: ...for environmentally safe recycling Business users should contact their supplier and check the terms and conditions of the purchase contract This product and its electronic accessories should not be m...

Page 171: ...of time Prevention of Afterimage Burn in What is afterimage burn in Afterimage burn in should not occur when the LCD panel is operating normally Normal operation refers to a continuously changing vide...

Page 172: ...348 UA102 21 10 20 30 Type 1 Type 2 Avoid combinations of a text colour and background colour of contrasting brightness Brightness refers to the lightness or darkness of a colour which varies dependin...

Page 173: ...l Rights Reserved The terms HDMI and HDMI High Definition Multimedia Interface and the HDMI Logo are trademarks or registered trademarks of HDMI Licensing LLC in the United States and other countries...

Page 174: ...h rate Vertical frequency is measured in Hz E g 60Hz refers to a single image being displayed 60 times in one second Horizontal Frequency____ The time required to scan a single line from the left to t...

Reviews: