English - 11
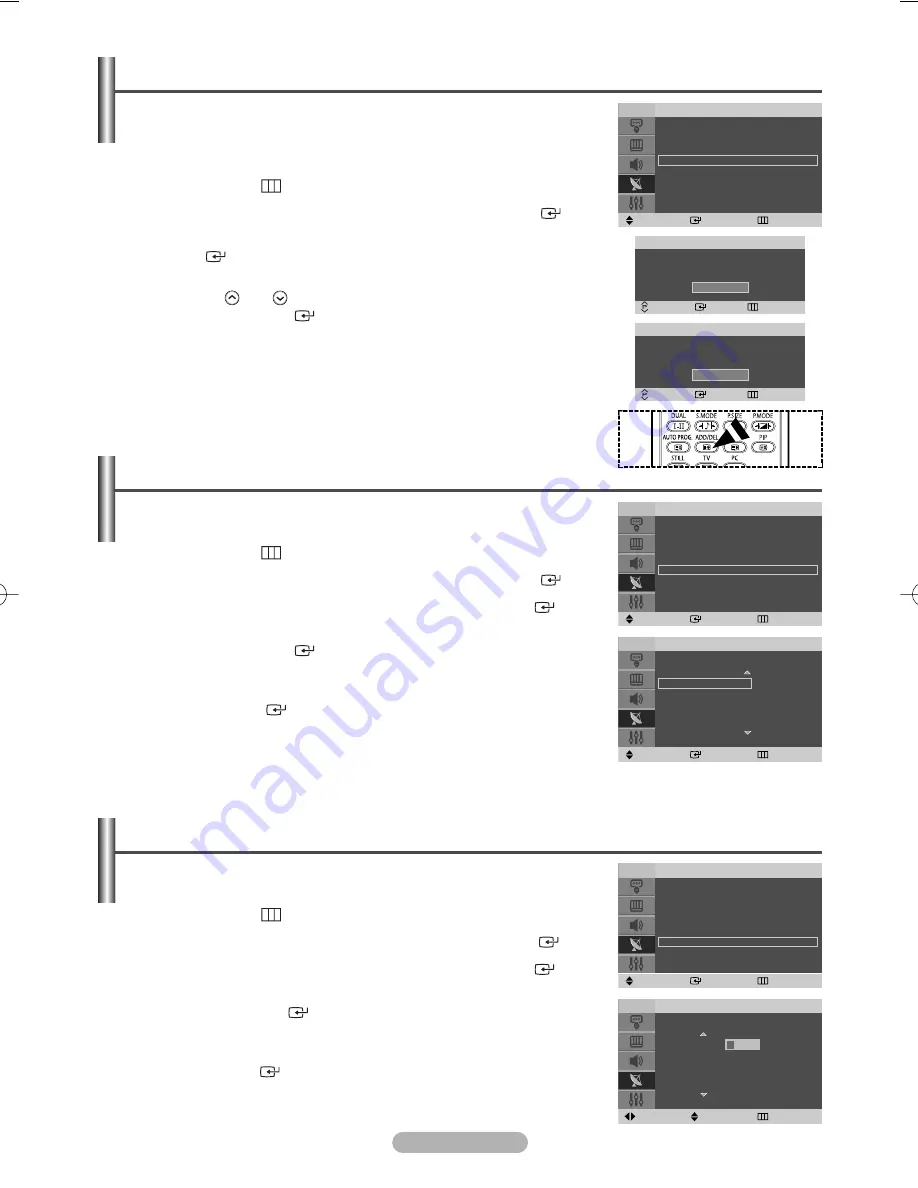
Add/Delete
Change
Enter
Return
Add
P
1 Not in Memory
Add/Delete
Change
Enter
Return
Delete
P
1 In Memory
This operation allows you to change the programme numbers of stored channels.
This operation may be necessary after using auto store.
1
Press the
MENU
(
) button to display the menu.
2
Press the
…
or
†
button to select
Channel
, then press the
ENTER
(
) button.
3
Press the
…
or
†
button to select
Sort
, then press the
ENTER
(
) button.
4
Select the channel that you wish to move by pressing the
…
or
†
button,
then press the
ENTER
(
) button.
5
Select the number of the programme to which the channel is to be moved
by pressing the
…
or
†
button.
Press the
ENTER
(
) button. The channel is moved to its new position and
all other channels are shifted accordingly.
6
Repeat steps
4
to
5
until you have moved all the channels to the required
programme numbers.
7
Press the
EXIT
button to exit.
Sorting the Stored Channels
Move
Enter
Return
Prog.
Ch.
Name
1 C 4
2 C 24
3 C 2
4 C --
5 C --
√
Sort
T V
You can exclude the channels of your choice from the channel scan operation.
When you scan through the stored channels, those that you have chosen to skip
are not displayed. All channels that you do not specifically choose to skip are
displayed during scanning.
1
Press the
MENU
(
) button to display the menu.
2
Press the
…
or
†
button to select
Channel
, then press the
ENTER
(
) button.
3
Press the
…
or
†
button to select
Add/Delete
, then press the
ENTER
(
) button.
The
Add/Delete
menu is displayed with the current channel selected.
4
Press the
P
or
P
button to delete or add the required channel,
then press the
ENTER
(
) button.
5
Repeat step
4
for each channel to be deleted or added.
6
Press the
EXIT
button to exit.
➢
You can select these options simply by pressing the
ADD/DEL
button
on the remote control.
Skipping Unwanted Channels
Move
Enter
Return
Country
: Belgium
√
Auto Store
√
Manual Store
√
Add/Delete
√
Sort
√
Name
√
Channel
T V
Channel names will be assigned automatically when channel information is
broadcast. These names can be changed, allowing you to assign new names.
1
Press the
MENU
(
) button to display the menu.
2
Press the
…
or
†
button to select
Channel
, then press the
ENTER
(
) button.
3
Press the
…
or
†
button to select
Name
, then press the
ENTER
(
) button.
4
Press the
…
or
†
button to select the channel to be assigned to a new name,
then press the
ENTER
(
) button.
5
Press the
…
or
†
button to select a letter (A~Z), a number (0~9), or a symbol.
Move on to the previous or next letter by pressing the
œ
or
√
button, then
press the
ENTER
(
) button.
6
Repeat steps
4
to
5
for each channel to be assigned to a new name.
7
Press the
EXIT
button to exit.
Assigning Names to Channels
Move
Adjust
Return
Prog.
Ch.
Name
1 C 4
2 C 24
3 C 2
4 C --
5 C --
-----
-----
-----
-----
Name
T V
Move
Enter
Return
Country
: Belgium
√
Auto Store
√
Manual Store
√
Add/Delete
√
Sort
√
Name
√
Channel
T V
Move
Enter
Return
Country
: Belgium
√
Auto Store
√
Manual Store
√
Add/Delete
√
Sort
√
Name
√
Channel
T V
A
BN68-00955A-00Eng_0819 8/19/05 2:05 PM Page 11


