background image

English  33

W

arr
anty

Warranty

Samsung microwave oven

Limited warranty to original purchaser

This SAMSUNG brand product, as supplied and distributed by Samsung Electronics 
America, Inc. (SAMSUNG) and delivered new, in the original carton to the original 
consumer purchaser, is warranted by SAMSUNG against manufacturing defects in 
materials and workmanship for a limited warranty period of:

ONE (1) YEAR PARTS AND LABOR, TEN (10) YEARS PARTS WARRANTY FOR MAGNETRON

Samsung will charge a repair fee for replacing an accessory or repairing a cosmetic 
defect if the damage to the unit and/or damage to or loss of the accessory was 
caused by the customer. Items this stipulation covers include:
- A Dented, Scratched, or Broken Door, Handle, Out-Panel, or Control Panel
- A Broken or missing Tray, Guide Roller, Coupler, Filter, or Wire Rack
User Replaceable Parts may be sent to the customer for unit repair. If necessary, a 
Service Engineer can be dispatched to perform service.
This limited warranty begins on the original date of purchase, and is valid only on 
products purchased and used in the United States. To receive warranty service, the 
purchaser must contact SAMSUNG for problem determination and service procedures. 
Warranty service can only be performed by a SAMSUNG authorized service center. 
The original dated bill of sale must be presented upon request as proof of purchase 
to SAMSUNG or SAMSUNG’s authorized service center.
SAMSUNG will repair or replace this product, at our option and at no charge as 
stipulated herein, with new or reconditioned parts or products if found to be 
defective during the limited warranty period specified above. All replaced parts and 
products become the property of SAMSUNG and must be returned to SAMSUNG. 
Replacement parts and products assume the remaining original warranty, or ninety 
(90) days, whichever is longer.
In-home service will be provided during the warranty labor period subject to 
availability within the contiguous United States. In-home service is not available in all 
areas. To receive in-home service, the product must be unobstructed and accessible to 
service personnel. If during in-home service repair can not be completed, it may be 
necessary to remove, repair and return the product. If in-home service is unavailable, 

SAMSUNG may elect, at our option, to provide for transportation of our choice to and 
from a SAMSUNG authorized service center. Otherwise, transportation to and from 
the SAMSUNG authorized service center is the responsibility of the purchaser.

This limited warranty covers manufacturing defects in materials and workmanship 
encountered in normal, noncommercial use of this product and shall not apply to the 
following, including, but not limited to: damage which occurs in shipment; delivery 
and installation; applications and uses for which this product was not intended; 
altered product or serial numbers; cosmetic damage or exterior finish; accidents, 
abuse, neglect, fire, water, lightning or other acts of nature; use of products, 
equipment, systems, utilities, services, parts, supplies, accessories, applications, 
installations, repairs, external wiring or connectors not supplied or authorized 
by SAMSUNG which damage this product or result in service problems; incorrect 
electrical line voltage, fluctuations and surges; customer adjustments and failure to 
follow operating instructions, cleaning, maintenance and environmental instructions 
that are covered and prescribed in the instruction book; problems caused by pest 
infestations, and overheating or overcooking by user; glass tray or turntable; reduced 
magnetron power output related to normal aging. SAMSUNG does not warrant 
uninterrupted or error-free operation of the product.

MS11K3000AS,MO_AA_DE68-04366B-00_EN.indd   33

2015-12-15     5:14:00

Summary of Contents for MS11K3000 series

Page 1: ...Microwave Oven User manual MS11K3000 MS11K3000AS MO_AA_DE68 04366B 00_EN indd 1 2015 12 15 5 13 54 ...

Page 2: ...ing the cooking 16 Setting the energy save mode 16 Using the auto cook features 17 Using the sensor cook features 18 Auto sensor cooking instructions 19 Utensils Cover for sensor cooking 19 Important 20 Using the healthy cooking features 20 Using the defrost features 22 Using the deodorization features 23 Using the child lock features 23 Switching the beeper off 23 Demonstration mode 23 Cooking sm...

Page 3: ...cumulate on the sealing surface C Do not operate the oven if it is damaged It is particularly important that the oven door close properly and that there is no damage to the 1 Door bent 2 Hinges and latches broken or loosened 3 Door seals and sealing surface D The oven should not be adjusted or repaired by anyone except properly qualified service personnel IMPORTANT SAFETY SYMBOLS AND PRECAUTIONS W...

Page 4: ...t authorized service facility for examination repair or adjustment 10 Do not cover or block any openings on the appliance 11 Do not tamper with or make any adjustments or repairs to the door 12 Do not store this appliance outdoors Do not use this product near water for example near a kitchen sink in a wet basement near a swimming pool or similar locations 13 Do not immerse the cord or plug in wate...

Page 5: ...for the electrical current This appliance is equipped with a cord that includes a grounding wire and a grounding plug The plug must be plugged into an outlet that is properly installed and grounded WARNING Improper use of the grounding plug can result in a risk of electric shock Plug into a grounded 3 prong outlet Do not remove the third grounding prong Do not use an adaptor or otherwise defeat th...

Page 6: ...chnician or service company Failing to have a qualified technician install the oven may result in electric shock fire an explosion problems with the product or injury Unpack the oven remove all packaging material and examine the oven for any damage such as dents on the interior or exterior of the oven broken door latches cracks in the door or a door that is not lined up correctly If there is any d...

Page 7: ...shock or fire Read and follow the specific Precautions to Avoid Possible Exposure to Excessive Mic rowave Energy found in the beginning of this Safety Information Section If the microwave generates a strange noise a burning smell or smoke unplug it immediately and contact your nearest service center Failing to do so may result in electric shock or fire In the event of a gas leak propane gas LP gas...

Page 8: ...hat children do not come too close to the appliance Failing to do so may result in children burning themselves Do not place food or heavy objects over the door when opening the door The food or object may fall and this may result in burns or injury Do not abruptly cool the door the inside of the appliance or the dish by pouring water over it during or just after cooking This may result in damage t...

Page 9: ... supply specifications of the oven must be respected and any extension cable used must be of the same standard as the power cable supplied with the oven Wipe the interior and the door seal with a damp cloth before using your microwave oven for the first time CLEANING THE TURNTABLE AND ROLLER RINGS Clean the roller rings periodically and wash the turntable as required You can wash the turntable saf...

Page 10: ... 800 726 7864 or on line at www samsungparts com Installation site 10 cm behind 20 cm above 10 cm on the side 85 cm of the floor Select a flat level surface approx 85 cm above the floor The surface must support the weight of the oven Secure room for ventilation at least 10 cm from the rear wall and both sides and 20 cm from above Do not install the oven in hot or damp surroundings such as next to ...

Page 11: ...ing clean and ensure the door opens and closes smoothly Otherwise the oven s lifecycle may be shortened Take caution not to spill water into the oven vents Do not use any abrasive or chemical substances for cleaning After each use of the oven use a mild detergent to clean the cooking chamber after waiting for the oven to cool down Replacement repair WARNING This oven has no user removable parts in...

Page 12: ...rrent time is displayed again 1 2 If you want to add an extra 30 seconds 1 Press the START 30s button one or more times for each extra 30 seconds that you wish to add 2 By turning the Dial Knob You can set the time as you want Oven features Oven 01 02 04 09 10 07 06 03 08 05 01 Door handle 02 Door 03 Ventilation holes 04 Light 05 Door latches 06 Turntable 07 Coupler 08 Roller ring 09 Safety interl...

Page 13: ...he container used and the properties of the food Quantity and density Water content Initial temperature refrigerated or not IMPORTANT As the centre of the food is cooked by heat dissipation cooking continues even when you have taken the food out of the oven Standing times specified in recipes and in this booklet must therefore be respected to ensure Even cooking of the food right to the centre The...

Page 14: ...2 The end reminder signal will beep 3 times once every minute 3 The current time is displayed again 4 The Maximum Cooking Time is 99 minutes 99 Seconds Checking that your oven is operating correctly The following simple procedure enables you to check that your oven is working correctly at all times If you are in doubt refer to the section entitled Troubleshooting on the pages 29 to 32 NOTE The ove...

Page 15: ...nob to set the minute 5 5 When the right time is displayed press the Select button to start the clock Result The time is displayed whenever you are not using the microwave oven Power levels and time variations The power level function enables you to adapt the amount of energy dissipated and thus the time required to cook or reheat your food according to its type and quantity You can choose between...

Page 16: ... to stand To stop the cooking Then Temporarily Temporarily Open the door or press the STOP ECO button once Result Cooking stops To resume cooking close the door again and press the START 30s button Completely Completely Press the STOP ECO button once Result Cooking stops If you wish to cancel the cooking settings press the STOP ECO button again Setting the energy save mode The oven has an energy s...

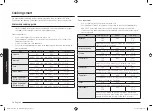
Page 17: ... Instructions 1 Popcorn 3 0 3 5 oz 1 package Use only one microwave popcorn bag at a time Be careful when removing the heated bag from the oven and opening it Soften Melt Code Food Serving size Instructions 1 Melt butter 1 stick Remove the wrapping and then cut the butter in half vertically Place the butter in a dish and cover with wax paper Stir well after finishing and let stand for 1 2 minutes ...

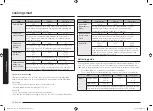
Page 18: ...oking process is controlled by the sensor system for your convenience IMPORTANT Use oven gloves while taking out Code Food Serving size Instructions 1 Potato 1 to 5ea Pierce each potato several times with a fork Place on the turntable in a spoke like fashion After cooking let the potatoes stand for 3 5 minutes Let the oven cool for at least 5 minutes before using it again 2 Pizza 2 to 4 slices Pla...

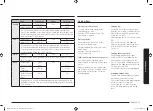
Page 19: ... while cooking When cooking food many kinds of gases are generated The Auto Sensor determines the proper time and power level by detecting these gases from the food eliminating the need to set the cooking time and power level When you cover a container with its lid or plastic wrap during Sensor Cooking the Auto Sensor will detect the gases generated after the container has been saturated with stea...

Page 20: ...r high moisture or gas emitting appliances since this will interfere with the proper performance of the Auto Sensor Always keep the inside of the oven clean Wipe all spills with a damp cloth This oven is designed for household use only Using the healthy cooking features The cooking time and temperature will be adjusted according to the selected recipe IMPORTANT Use only recipients that are microwa...

Page 21: ...king Stand for 1 2 minutes 5 Corn on the Cob 500 g Rinse and clean corn on the cobs and put into an oval glass dish Cover with microwave cling film and pierce film Stand for 1 2 minutes 6 Peeled Potatoes 250 g Wash and peel the potatoes and cut into a similar size Put them into a glass bowl with lid Add 45 60 ml 3 4 tbsp water Put bowl in the centre of turntable Cook covered Stand for 2 3 minutes ...

Page 22: ...bs Start with the food placed fat side down After each stage turn the food over and shield any warm portions with narrow strips of aluminum foil Let stand covered for 10 20 minutes Steaks Chops Fish 0 5 3 5 lbs After each stage rearrange the food If there are any warm or thawed portions of food shield them with narrow flat pieces of aluminum foil Remove any pieces of food that are nearly defrosted...

Page 23: ...odorous food or when there is a lot of smoke in the oven interior First clean the oven interior Press the Deodorization button after you have finished cleaning As soon as you press the Deodorization button the operation will start automatically when it has finished the oven beeps four times NOTE The deodorization time has been specified as 5 minutes It increases by 30 seconds whenever the START 30...

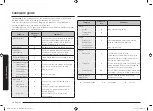
Page 24: ...r Stand for 2 3 minutes Fresh vegetables Use a suitable glass Pyrex container with a lid Cut ingredients into as small pieces as possible to reduce the cooking time Add 30 45 ml of cold water to every 250 g unless otherwise specified Stir once during cooking and once after cooking and then add seasoning to your preference Food Serving size g Power Time min Broccoli 250 500 90 4 5 7 8 Prepare even ...

Page 25: ... 500 ml cold water 250 g Add 750 ml cold water 375 g Stand for 5 minutes Food Serving size Power Time min Mixed Rice Rice Wild Rice 250 g 90 16 17 Add 500 ml cold water Stand for 5 minutes Mixed Corn Rice Grain 250 g 90 17 18 Add 400 ml cold water Stand for 5 minutes Pasta 250 g 90 10 11 Add 1000 ml hot water Stand for 5 minutes Reheating guide General This reheating guide is based on the conditio...

Page 26: ...is 30 40 C Baby milk Use a sterilised glass bottle and reheat it uncovered Remove the teat before reheating Otherwise the milk in the bottle boils over Food Serving size Power Time sec Baby Food Vegetables Meat 190 g 60 30 Empty into ceramic deep plate Cook covered Stir after cooking time Before serving stir well and check the temperature carefully Stand for 2 3 minutes Baby Porridge Grain Milk Fr...

Page 27: ...deep glass dish Heat for 20 30 seconds using 30 until honey is melted Melting gelatine Lay dry gelatine sheets 10 g for 5 minutes into cold water Put drained gelatine into a small glass pyrex bowl Heat for 1 minute using 30 Stir after melting Cooking glaze icing for cake and gateaux Mix instant glaze approximately 14 g with 40 g sugar and 250 ml cold water Cook uncovered in a glass pyrex bowl for ...

Page 28: ...ood Overheating may cause the polystyrene to melt Paper bags or newspaper May catch fire Recycled paper or metal trims May cause arcing Glassware Oven to tableware Can be used unless decorated with a metal trim Fine glassware Can be used to warm foods or liquids Delicate glass may break or crack if heated suddenly Glass jars Must remove the lid Suitable for warming only Cookware Microwave safe Com...

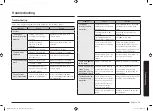
Page 29: ...xtended period of time After cooking for an extended period of time let the oven cool The cooling fan is not working Listen for the sound of the cooling fan Trying to operate the oven without food inside Put food in the oven There is not sufficient ventilation space for the oven There are intake exhaust outlets on the front and rear of the oven for ventilation Keep the gaps specified in the produc...

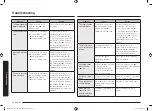
Page 30: ...a cooking container with a flat bottom Problem Cause Action The thaw function does not work The oven may not work too much food is being cooked or improper cookware is being used Put one cup of water in a microwave safe container and run the microwave for 1 2 minutes to check whether the water is heated Reduce the amount of food and start the function again Use a cooking container with a flat bott...

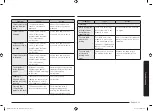
Page 31: ...ing are not malfunctions This is not an oven malfunction Cooking is finished but the cooling fan is still running To ventilate the oven the cooling fan continues to run for about 3 minutes after cooking is complete This is not an oven malfunction Pressing the 30sec button operates the oven This happens when the oven was not operating The microwave oven is designed to operate by pressing the 30sec ...

Page 32: ...4 X 10 X 14 in Volume 1 1 cu ft Weight Net Gross 31 9 lbs 35 2 lbs Information code Code Description Action C d0 Control buttons are pressed over 10 seconds Clean the keys and check if there is water on the surface around key If it occurs again turn off the microwave oven over 30 seconds and try setting again If it appears again call your local SAMSUNG Customer Care Centre C 10 The GAS sensor is o...

Page 33: ...the remaining original warranty or ninety 90 days whichever is longer In home service will be provided during the warranty labor period subject to availability within the contiguous United States In home service is not available in all areas To receive in home service the product must be unobstructed and accessible to service personnel If during in home service repair can not be completed it may b...

Page 34: ...GREATER IN AMOUNT THAN THE PURCHASE PRICE OF THE PRODUCT SOLD BY SAMSUNG AND CAUSING THE ALLEGED DAMAGE WITHOUT LIMITING THE FOREGOING PURCHASER ASSUMES ALL RISK AND LIABILITY FOR LOSS DAMAGE OR INJURY TO PURCHASER AND PURCHASER S PROPERTY AND TO OTHERS AND THEIR PROPERTY ARISING OUT OF THE USE MISUSE OR INABILITY TO USE THIS PRODUCT SOLD BY SAMSUNG NOT CAUSED DIRECTLY BY THE NEGLIGENCE OF SAMSUNG...

Page 35: ...MS11K3000AS MO_AA_DE68 04366B 00_EN indd 35 2015 12 15 5 14 00 ...

Page 36: ...T US ONLINE AT U S A Consumer Electronics 1 800 SAMSUNG 726 7864 www samsung com us support CANADA 1 800 SAMSUNG 726 7864 www samsung com ca support English www samsung com ca_fr support French DE68 04366B 00 Scan the QR code or visit www samsung com spsn to view our helpful How to Videos and Live Shows Requires reader to be installed on your smartphone MS11K3000AS MO_AA_DE68 04366B 00_EN indd 36 ...

Reviews: