background image

10

Loudspeakers  

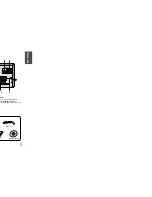
Place these speakers in front of your listening
position, facing inwards (about 45°) toward you.

Place the speakers so that their tweeters will be at
the same height as your ear.

Align the front face of the front speakers with the
front face of the center speaker or place them
slightly in front of the center speakers.

Installation in a place near heating apparatus, under direct lay of light or with high humidity may cause
performance degradation of the speaker.

Do not install on the wall or on a high place of pole or other unstable place to prevent any safety accident
caused by falling of the speaker.

Do not take the speaker apart from TV or computer monitor. 
The speaker near the TV or computer monitor may influence the quality of the screen display.

Position of the DVD Player

Place it on a stand or cabinet shelf, or under
the TV stand.

Selecting the Listening Position

The listening position should be located about 2.5 to 3
times the distance of the TV's screen size away from the
TV. Example: For 32" TVs 2~2.4m (6~8feet)

For 55" TVs 3.5~4m (11~13feet)

9

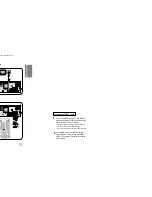
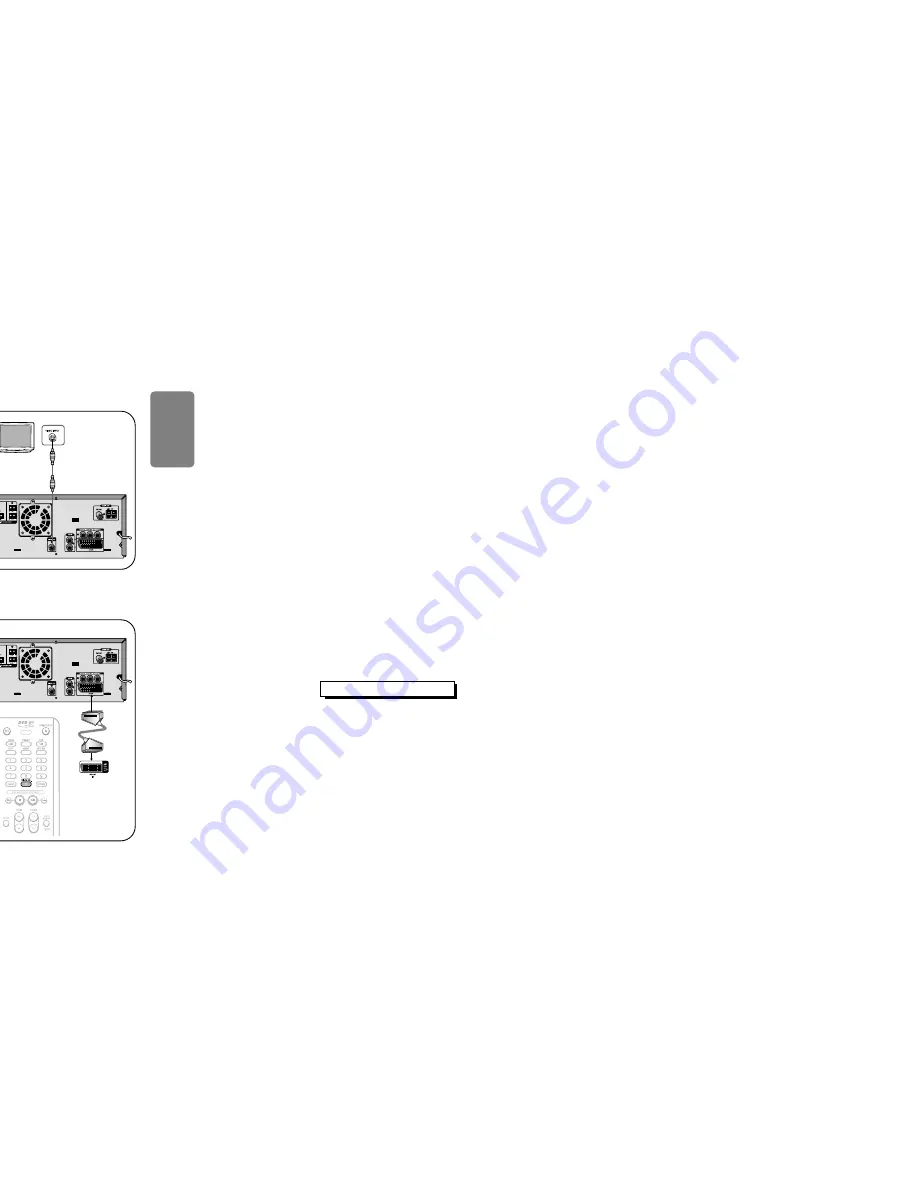
If you television is equipped with an SCART input,
connect an Scart Jack (not supplied) from the AV OUT
jack on the back panel of the system to the SCART IN
jack on your television.

R

L

Directions in Installing Speaker 

Right Speaker

Left Speaker

Method 1 

Composite Video 

(supplied)

.........

Good Quality

Method 2 

Scart 

(not supplied)

...............

Better Quality

Connect Video Out on the player to Video In
on your TV.

1

CONNECTIONS

Press the TV/VIDEO button on the remote of TV
control to set the TV to "VIDEO".

2

If Scart is equipped for your TV, select RGB by
pressing and holding VIDEO SEL. button on the
remote controller for over 5 seconds.

• 

Pressing and holding the button for over 5 seconds will
select "

RGB

" and "

COMPOSITE

" repetitively.

• 

You can get a better picture quality by using Scart setting.

1

If Scart (RGB Input) is not equipped for your TV,
select COMPOSITE by pressing and holding
VIDEO SEL. button on the remote controller for
over 5 seconds.

2

Subwoofer

Subwoofer

The position of the subwoofer is not so critical. 
Place it anywhere you like.

SW

For using the SCART cable

Before moving or installing the product, be sure to turn off the power and disconnect the power cord.

Connecting the Speakers

Please be sure to turn off the power and unplug the power cord before moving or installing this unit.
Please choose one of three video connection methods.

Connecting to a TV

VIDEO SELECT Function

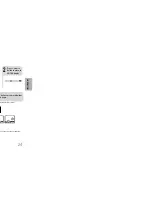
Press and hold VIDEO SEL. button on the
remote control for over 5 seconds.

• 

"

COMPOSITE

" or "

RGB

" will appear in the display. 

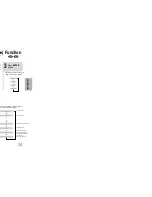
At this time, press the 

VIDEO SEL.

button shortly to

select between "

COMPOSITE

" and "

RGB

".

If Scart (RGB Input) is equipped for your TV, press
VIDEO SEL. button to select RGB mode. 
You can get a better picture quality by using Scart
setting.

If Scart (RGB Input) is not equipped for your TV, press
VIDEO SEL. button to select COMPOSITE mode.

Summary of Contents for MM-KC10

Page 1: ...NU VOLME DSP EQ TUNER MEMORY P SCAN TUNING OPEN CLOSE CANCEL DVD OK DVD USB TUNER RESERVE VIDEO SEL TUNER DVD OK AUX USB SLEEP BAND REPEAT SUBTITLE ZOOM SLOW MO ST EZ VIEW AUDIO TEMPO KEY CONTROL FEMALE MALE MELODY STEP REMAIN TIMER ON OFF NT PAL LOGO REP A B DEMO DIMMER TIMER CLOCK ...

Page 2: ... may become for continuous use Switching off the DVD player to he player completely from the power supply iod of time pose the unit to direct sunlight or other heat lead to overheating and malfunction of the unit ry used with this product contain chemicals that ul to the environment spose of batteries in the general household trash PREPARATION ...

Page 3: ...4 1 2 3 5 9 10 12 13 14 15 16 17 19 21 21 22 23 24 25 27 28 28 29 30 31 32 33 34 35 37 39 40 41 43 44 45 46 47 49 54 55 56 57 58 59 60 61 62 63 64 66 67 68 69 70 71 73 74 75 77 78 PREPARATION ...

Page 4: ...FM Antenna ook 6 PREPARATION 7 8 3 4 ut nnector o a TV with scart input connector NENT VIDEO OUTPUT jacks a TV with component video inputs to these DVD KARAOKE DISC ...

Page 5: ...8 n a straight line It can also be sor t Replace the battery cover 3 g cells e polarity to and to milar may differ in voltage PREPARATION ...

Page 6: ...ng and holding the button for over 5 seconds will select RGB and COMPOSITE repetitively You can get a better picture quality by using Scart setting 1 If Scart RGB Input is not equipped for your TV select COMPOSITE by pressing and holding VIDEO SEL button on the remote controller for over 5 seconds 2 For using the SCART cable ving or installing this unit ...

Page 7: ...e of vely down the screen line by line is drawn at one time as opposed to the ning process by which a video image is s of passes e scanning method is desirable for dealing ects sive Scan FULL FRAME ced Scanning video inputs Y Pr Pb that support nal component inputs i e non progressive may not work tion alternate to create the entire ses one field of information all lines t visible scan lines Funct...

Page 8: ... eception is poor connect an outdoor gle vinyl covered wire to the AM minal Keep the AM loop antenna nnected Snap the tabs on the loop into the slots of the base to assemble the AM loop antenna AM Loop Antenna supplied M reception is poor connect an door AM antenna not supplied AM Antennas ...

Page 9: ...nt g mode some MP3 CDs cannot be played CD varies depending on the MP3 track format recorded OSE button to open the OSE button to close the disc D atically G atically f MP3s on the TV sume playback press PLAY PAUSE n again mporarily pause playback s PLAY PAUSE during playback OPERATION ...

Page 10: ...atch a movie eo and audio formats are not ages or no sound in order to use this feature properly me file name as that of the DivX media byte characters such as Korean and AC3 DTS 8 384kbps 1 5Mbps 4 1 48khz 44 1khz S format can only support up to 6Mbps xels 4 3 this product supports up to 0 will not be supported han 48khz or 320kbps you may ...

Page 11: ...d it to a computer are not supported pport USB2 0 or USB1 1 nnect a USB1 1 device the USB HDD for proper operation d Multi slot USB card reader supported may experience problems ce might not be recognized sion Pixel Sampling Frequency 640 480 32k 44 1k 48kHz V8 32k 44 1k 48kHz support all USB devices ee page 75 76 ...

Page 12: ... wn during playback follows d during playback follows OPERATION CD DivX Reverse slow playback does not work with VCDs and DivX Note 22 DVD VCD CD MP3 ...

Page 13: ...24 2 Press Cursor button to move to ANGLE display he angle changes as follows buttons or numeric buttons ed angle 1 3 only with discs on which multiple angles OPERATION ...

Page 14: ...26 not select Repeat Play n n select Repeat Play in 2 Press Cursor button to move to REPEAT PLAYBACK display 4 Press ENTER button eat Playback Mode mation Screen OPERATION ...

Page 15: ...VD VCD e ge Function Each time the button is pressed the image makes the transition as follows From top to bottom From bottom to top Rectangular shape in the center Vertical blinds effect Each time a new image is displayed slide modes 1 11 will be applied randomly and automatically Cancels the slide mode ...

Page 16: ... 05 028 040 1 30 00 1 1 Moving to a Specific Time 3 Press Cursor buttons to move to Chapter display Moving to a Chapter e You can press on the remote control to move directly to the desired title chapter or track Depending on the disc you may not be able to move to the selected title or time Note OPERATION Scene Song ...

Page 17: ...3 Press ENTER button The title menu appears 32 exit the setup screen OPERATION u ...

Page 18: ... to move to Audio and then press ENTER button ou can set the audio delay time between 0 ms and 00 ms Set it for the best sync up with audio Press Cursor buttons to select the Delay Time of AV SYNC and then press the ENTER button digital TV deo 34 ...

Page 19: ...he setup is complete if the language was set to English OSD will be displayed in English cting the e Language d on the disc Selecting the Disc Menu Language recorded on the disc 5 OSD en ton Press Cursor button to select the desired language and then press ENTER button utton to return to the previous level on to exit the setup screen SETUP ...

Page 20: ...high hen playing DVDs recorded in different V or monitor in the full screen in the letter box ottom of the screen in the pan scan screen only with the screen ats they will look different depending on setting Size ion according to personal preference ...

Page 21: ...ous level n ve to hen R button a new new password 3 Press Cursor button to move to PASSWORD and then press ENTER button ssword ess on SETUP 40 l setting ord ...

Page 22: ... button Press Cursor button to move to LOGO and then press ENTER button U it the n URN button to return to the previous level U button to exit the setup screen 42 ode to register this player mand format To learn more ...

Page 23: ...SETUP 44 2 Turn the MIC VOL to adjust the voicd volume of the micro phone g while using the Karaoke peakers Turning down the lso effective hone ...

Page 24: ...AY PAUSE button n have the song you want to sing to be played first SETUP ressed the selection changes as follows RACK REPT DISC REPT RAND EAT button Repeat Play on is set 46 ong you want to sing to be played first mpaniment Music ...

Page 25: ...SETUP 2 4 e ton Press button to select the location of song among FAVORITE 1 2 3 tton ng Press the ENTER button to play back selected song FAVORITE SONG 48 ...

Page 26: ...nt to o d ss elect ER SETUP 3 Press button if you want to move to the previous stage Press button to move to alphabet and press button to select it 50 ...

Page 27: ...d then press button to select the genre you want move he ess lect Press the ENTER button to play back selected song ng by Genre on nt to n to e bottom You can select the genre among ROCK CHANSON FOLK BARD ROMANCES Press button if you want to move to the previous stage 52 ...

Page 28: ... the key is increased on is pressed the key is yback press the OL buttons ontrol s pressed the tempo gets faster on is pressed the tempo gets layback press the ons o Control SETUP 54 e song list book po Control ...

Page 29: ...UP 2 OK Press MENU button Each time the button is pressed the selection changes as follows LOW MIDDLE HIGH OFF 4 to Press ENTER button to select the desired item ong with supporting eased n information 56 ...

Page 30: ...SETUP 2 OK Press MENU button Each time the button is pressed the selection changes as follows LOW MIDDLE HIGH OFF 4 to e Press ENTER button to select the desired item 58 dvance e Score ...

Page 31: ...SETUP 60 unction by pressing CLOCK once LOCK he display w set orrect ayed ER Increase the hours Decrease the hours 3 Press ENTER The hour flashes ...

Page 32: ...e time indicating that the timer has been set The system will switch on and off automatically at the required times 9 R to mer Press POWER to set the system to standby mode 62 SETUP in standby once F again TIMER indication on the display ...

Page 33: ... r to Step 2 on page 63 to matically or manually tune in station Press TUNING to select 89 10 an select between 1 and Press to select preset number kHz MHz kHz MHz PROGRAM RADIO OPERATION 64 s Modulation ave ...

Page 34: ...Z and ROCK at button only available in STEREO mode with CDs MP3 CDs 2 channel DVD Audio DivX and D disc encoded with two or more channels e will be selected automatically and DSP EQ function ulate different acoustic environments the genre of music you are playing EQ Function 66 ...

Page 35: ...MISCELLANEOUS 68 ...

Page 36: ...cally prints or dirt on the disc clean it diluted in water and wipe with a ly from the inside to the outside of the disc ntaminated with dirt cs warm air comes into contact with cold parts ndensation forms inside the player the player f this occurs remove the disc and let the s with the power on ture quality or cause skipping g them and Storing Discs ...

Page 37: ... on the display of main unit hold for longer than 5 seconds INTIALIZE d all settings will return to the default values will erase all stored settings cessary old the STOP button on the main unit s will erase all stored settings essary d properly nal is weak install an external FM good reception heck Remedy in 16 9 WIDE mode 4 3 LETTER BOX N mode but 4 3 DVDs can be seen in 4 3 VD disc jacket and t...

Page 38: ...l Nepali 1525 Tegulu Dutch 1527 Tajik Norwegian 1528 Thai Occitan 1529 Tigrinya Afan Oromo 1531 Turkmen Oriya 1532 Tagalog Punjabi 1534 Setswana Polish 1535 Tonga Pashto Pushto 1538 Turkish Portuguese 1539 Tsonga Quechua 1540 Tatar Rhaeto Romance 1543 Twi Kirundi 1557 Ukrainian Romanian 1564 Urdu Russian 1572 Uzbek Kinyarwanda 1581 Vietnamese Sanskrit 1587 Volapuk Sindhi 1613 Wolof Sangro 1632 Xho...

Page 39: ...SB 2 0 7 IN 1 CARD READER UC 601R ard Reader Billionton Taiwan USB 2 0 Card Reader for SD MMC RS MMC 3 in 1 roduct Company Type lti Card Reader serotech POCKET HARD DISK DRIVE Y UX 2 DVICO USB2 0 roduct Company Type B External HDD ...

Page 40: ...MISCELLANEOUS 78 ...

Reviews: