background image

English  17

O

v

en use

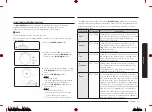
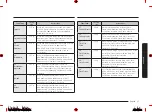
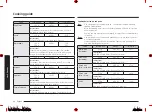
Code/Food

Serving 

size

Instructions

15
Chicken Breasts

300 g

Rinse pieces and put on a ceramic plate.
Cover with microwave cling film. Pierce film.
Put dish on turntable. Stand for 2 minutes.

16
Turkey Breasts

300 g

Rinse pieces and put on a ceramic plate.
Cover with microwave cling film. Pierce film.
Put dish on turntable. Stand for 2 minutes.

17
Fresh Fish 
Fillets

300 g

Rinse fish and put on a ceramic plate, add 1 tbsp. 
lemon juice. Cover with microwave cling film. 
Pierce film. Put dish on turntable.
Stand for 1-2 minutes.

18
Fresh Salmon 
fillets

300 g

Rinse fish and put on a ceramic plate, add 1 tbsp. 
lemon juice. Cover with microwave cling film. 
Pierce film. Put dish on turntable.
Stand for 1-2 minutes.

19
Fresh Prawns

250 g

Rinse prawns on a ceramic plate, add 1 tbsp. 
lemon juice. Cover with microwave cling film. 
Pierce film. Put dish on turntable.
Stand for 1-2 minutes.

20
Fresh Trout

200 g

Put 1 fresh whole fish into an ovenproof dish. 
Add a pinch salt, 1 tbsp. lemon juice and herbs. 
Cover with microwave cling film. Pierce film.
Put dish on turntable. Stand for 2 minutes.

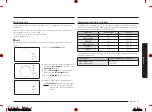
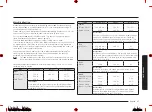
Code/Food

Serving 

size

Instructions

8
Spinach

150 g

Rinse and clean spinach. Put into a glass bowl 
with lid. Do not add water. Put bowl in the centre 
of turntable. Cook covered. Stir after cooking. 
Stand for 1-2 minutes.

9
Corn on the Cob

250 g

Rinse and clean corn on the cob and put into an 
oval glass dish. Cover with microwave cling film 
and pierce film. Stand for 1-2 minutes.

10
Peeled 
Potatoes

250 g

Wash and peel the potatoes and cut into a similar 
size. Put them into a glass bowl with lid. 
Add 45-60 ml (3-4 tbsp.) water. Put bowl in the 
centre of turntable. Cook covered. Stand for 
2-3 minutes.

11
Brown Rice

125 g

Use a large glass ovenware dish with lid.
Add double quantity of cold water (250 ml).
Cook covered. Stir before standing time and add 
salt and herbs. Stand for 5-10 minutes.

12
Wholemeal 
Macaroni

125 g

Use a large glass ovenware dish with lid.
Add 500 ml hot boiling water, a pinch of salt and 
stir well. Cook uncovered. Stir before standing 
time and drain thoroughly afterwards. Stand for 
1 minute.

13
Quinoa

125 g

Use a large glass ovenware dish with lid.
Add double quantity of cold water (250 ml).
Cook covered. Stir before standing time and add 
salt and herbs. Stand for 1-3 minutes.

14
Bulgur

125 g

Use a large glass ovenware dish with lid.
Add double quantity of cold water (250 ml).
Cook covered. Stir before standing time and add 
salt and herbs. Stand for 2-5 minutes.

MG23K3505AS_SW_DE68-04547B-00_EN+DE+FR+IT.indb   17

6/26/2018   2:59:06 PM

Summary of Contents for MG23K3505 Series

Page 1: ...Microwave Oven User manual MG23K3505 MG23K3505AS_SW_DE68 04547B 00_EN DE FR IT indb 1 6 26 2018 2 59 03 PM ...

Page 2: ...king Reheating 12 Setting the time 13 Power levels and time variations 13 Adjusting the cooking time 14 Stopping the cooking 14 Setting the energy save mode 14 Using the Quick Defrost features 15 Using the Auto Cook features 16 Using the Keep Warm features 18 Grilling 19 Combining microwaves and grill 19 Using the Grill 30s features 20 Using the Deodorization features 20 Using the Child Lock featu...

Page 3: ...orking environments farm houses by clients in hotels motels and other residential environments bed and breakfast type environments Only use utensils that are suitable for use in microwave ovens When heating food in plastic or paper containers keep an eye on the oven due to the possibility of ignition The microwave oven is intended for heating food and beverages Drying of food or clothing and heati...

Page 4: ...nstruction concerning use of the appliance by a person responsible for their safety Children should be supervised to ensure that they do not play with the appliance This appliance can be used by children aged from 8 years and above and persons with reduced physical sensory or mental capabilities or lack of experience and knowledge if they have been given supervision or instruction concerning use o...

Page 5: ...lements Children less than 8 years of age shall be kept away unless continuously supervised CAUTION The cooking process has to be supervised A short term cooking process has to be supervised continuously The door or the outer surface may get hot when the appliance is operating The temperature of accessible surfaces may be high when the appliance is operating The surfaces are liable to get hot duri...

Page 6: ...m the power plug terminals and contacts Do not pull excessively bend or place heavy objects on the power cord If there is a gas leak propane LP etc ventilate immediately Do not touch the power cord Do not touch the power cord with wet hands While the oven is operating do not turn it off by unplugging the power cord Do not insert fingers or foreign substances If foreign substances enter the oven un...

Page 7: ...en door and front face or allow food or cleaner residue to accumulate on sealing surfaces Keep the door and door sealing surfaces clean by wiping with a damp cloth and then with a soft dry cloth after each use Do not operate the oven if it is damaged Only operate after it has been repaired by a qualified technician Important the oven door must close properly The door must not be bent the door hing...

Page 8: ...ial resources Household users should contact either the retailer where they purchased this product or their local government office for details of where and how they can take these items for environmentally safe recycling Business users should contact their supplier and check the terms and conditions of the purchase contract This product and its electronic accessories should not be mixed with othe...

Page 9: ... Keep the door and door sealing clean and ensure the door opens and closes smoothly Otherwise the oven s lifecycle may be shortened Take caution not to spill water into the oven vents Do not use any abrasive or chemical substances for cleaning After each use of the oven use a mild detergent to clean the cooking chamber after waiting for the oven to cool down Installation site 10 cm behind 20 cm ab...

Page 10: ...sing of the oven first unplug the power cord from the power source and then contact a local Samsung service centre Care against an extended period of disuse If you don t use the oven for an extended period of time unplug the power cord and move the oven to a dry dust free location Dust and moisture that builds up inside the oven may affect the performance of the oven Oven features Oven 01 02 05 04...

Page 11: ... by the magnetron reflected at cavity and are distributed uniformly as the food rotates on the turntable The food is thus cooked evenly 2 The microwaves are absorbed by the food up to a depth of about 1 inch 2 5 cm Cooking then continues as the heat is dissipated within the food 3 Cooking times vary according to the container used and the properties of the food Quantity and density Water content I...

Page 12: ...oiling Cooking Reheating The following procedure explains how to cook or reheat food CAUTION ALWAYS check your cooking settings before leaving the oven unattended The maximum Microwave time is 99 minutes Open the door Place the food in the centre of the turntable Close the door Never switch the microwave oven on when it is empty 1 1 Press the Microwave button Result The 800 W Maximum cooking power...

Page 13: ...nob to set the minute 5 5 When the right time is displayed press the Select Clock button to start the clock Result The time is displayed whenever you are not using the microwave oven Power levels and time variations The power level function enables you to adapt the amount of energy dissipated and thus the time required to cook or reheat your food according to its type and quantity You can choose b...

Page 14: ...k the food Turn the food over or stir it Leave it to stand To stop the cooking Then Temporarily Open the door or press the STOP ECO button once Result Cooking stops To resume cooking close the door again and press the START 30s button Completely Press the STOP ECO button once Result Cooking stops If you wish to cancel the cooking settings press the STOP ECO button again Setting the energy save mod...

Page 15: ...te and if possible turn over as soon as the oven beeps Oven keeps operating and is stopped when you open the door This programme is suitable for all kinds of bread sliced or whole as well as for bread rolls and baguettes Arrange bread rolls in a circle This programme is suitable for all kinds of yeast cake biscuit cheese cake and puff pastry It is not suitable for short crust pastry fruit and crea...

Page 16: ...programme is suitable for meals consisting of 3 components e g meat with sauce vegetables and a side dishes like potatoes rice or pasta Stand for 2 3 minutes 2 Chilled Ready Meal 400 450 g 3 Chilled Vegetarian Meal 300 350 g Put meal on a ceramic plate and cover with microwave cling film This programme is suitable for meals consisting of 2 components e g spaghetti with sauce or rice with vegetable...

Page 17: ... Put into a glass bowl with lid Do not add water Put bowl in the centre of turntable Cook covered Stir after cooking Stand for 1 2 minutes 9 Corn on the Cob 250 g Rinse and clean corn on the cob and put into an oval glass dish Cover with microwave cling film and pierce film Stand for 1 2 minutes 10 Peeled Potatoes 250 g Wash and peel the potatoes and cut into a similar size Put them into a glass b...

Page 18: ... The 60 minutes is displayed To stop warming the food open the door or press STOP ECO button Recommend Keep warm menu Code Mode Menu 1 Hot Lasagne Soup Gratin Casserole Pizza Steaks Well done Bacon Fish Dishes Dry Cakes 2 Mild Pie Bread Egg Dishes Steaks Rare or Midium rare NOTE Do not use this function to reheat cold foods This programmes are for keeping food warm that has just been cooked Do not...

Page 19: ...3 Press the START 30s button Result Combination cooking starts 1 The oven beeps 4 times 2 The end reminder signal will beep 3 times once every minute 3 The current time is displayed again Grilling The grill enables you to heat and brown food quickly without using microwaves Always use oven gloves when touching the recipients in the oven as they will be very hot You can get better cooking and grill...

Page 20: ... features after cooking odorous food or when there is a lot of smoke in the oven interior First clean the oven interior 1 Press the Deodorization button after you have finished cleaning As soon as you press the Deodorization button the operation will start automatically when it has finished the oven beeps four times NOTE The deodorization time has been specified as 5 minutes It increases by 30 sec...

Page 21: ...ve safe Comments Aluminum foil Can be used in small quantities to protect areas against overcooking Arcing can occur if the foil is too close to the oven wall or if too much foil is used Crust plate Do not preheat for more than 8 minutes China and earthenware Porcelain pottery glazed earthenware and bone china are usually suitable unless decorated with a metal trim Disposable polyester cardboard d...

Page 22: ...ooking Cookware for microwave cooking Cookware must allow microwave energy to pass through it for maximum efficiency Microwaves are reflected by metal such as stainless steel aluminium and copper but they can penetrate through ceramic glass porcelain and plastic as well as paper and wood So food must never be cooked in metal containers Food suitable for microwave cooking Many kinds of food are sui...

Page 23: ...halves Arrange stems to the centre Stand for 3 minutes Courgettes 250 g 800 W 3 4 Instructions Cut courgettes into slices Add 30 ml 2 tbsp water or a knob of butter Cook until just tender Stand for 3 minutes Cooking Guide for frozen vegetables Use a suitable glass pyrex bowl with lid Cook covered for the minimum time see table Continue cooking to get the result you prefer Stir twice during cooking...

Page 24: ...Instructions Add 400 ml cold water Stand for 5 minutes Pasta 250 g 800 W 11 12 Instructions Add 1000 ml hot water Stand for 5 minutes Food Serving Size Power Time min Egg Plants 250 g 800 W 3 4 Instructions Cut egg plants into small slices and sprinkle with 1 tbsp lemon juice Stand for 3 minutes Leeks 250 g 800 W 4 5 Instructions Cut leeks into thick slices Stand for 3 minutes Mushrooms 125 g 250 ...

Page 25: ...heating food for the first time it is helpful to make a note of the time taken for future reference Always make sure that the reheated food is piping hot throughout Allow food to stand for a short time after reheating to let the temperature even out The recommended standing time after reheating is 2 4 minutes unless another time is recommended in the chart Take particular care when heating liquids...

Page 26: ...i in a deep ceramic plate Cover with plastic lid Stir occasionally during reheating and again before standing and serving Stand for 3 minutes Food Serving Size Power Time min Plated Meal Chilled 350 g 600 W 5 6 Instructions Plate a meal of 2 3 chilled components on a ceramic dish Cover with microwave cling film Stand for 3 minutes Reheating baby food and milk Use the power levels and times in this...

Page 27: ...bout 18 to 20 C use the following table as a guide Food Serving Size Power Time min Meat Minced Beef 250 g 500 g 180 W 6 7 10 12 Pork Steaks 250 g 180 W 7 8 Instructions Place the meat on a flat ceramic plate Shield thinner edges with aluminium foil Turn over after half of defrosting time Stand for 5 25 minutes Food Serving Size Power Time min Poultry Chicken Pieces 500 g 2 pcs 180 W 14 15 Whole C...

Page 28: ...he turntable is rotating Due to the rotation of the turntable the food browns evenly Cookware for cooking with microwaves grill Please use cookware that microwaves can pass through Cookware should be flameproof Do not use metal cookware with combination mode Do not use any type of plastic cookware as it can melt Food suitable for microwaves grill cooking Food suitable for combination mode cooking ...

Page 29: ...n over after first time Oven Chips 250 g Grill only 10 15 Grill only 8 12 Instructions Put oven chips evenly on baking paper on the rack Grill Guide for fresh food Preheat the grill with the grill function for 3 4 minutes Use the power levels and times in this table as guide lines for grilling Fresh Food Serving Size 1 step min 2 step min Toast Slices 6 7 pcs each 25 g Grill only 6 8 Grill only 4 ...

Page 30: ...ey into a small deep glass dish Heat for 20 30 seconds using 300 W until honey is melted Melting gelatine Lay dry gelatine sheets 10 g for 5 minutes into cold water Put drained gelatine into a small glass pyrex bowl Heat for 1 minute using 300 W Stir after melting Cooking glaze icing for cake and gateaux Mix instant glaze approximately 14 g with 40 g sugar and 250 ml cold water Cook uncovered in a...

Page 31: ...oking for an extended period of time let the oven cool The cooling fan is not working Listen for the sound of the cooling fan Trying to operate the oven without food inside Put food in the oven There is not sufficient ventilation space for the oven There are intake exhaust outlets on the front and rear of the oven for ventilation Keep the gaps specified in the product installation guide Several po...

Page 32: ...ood press the START 30s button again to restart operation The oven is not level The oven is installed on an uneven surface Make sure the oven is installed on flat stable surface There are sparks during cooking Metal containers are used during the oven thawing functions Do not use metal containers Problem Cause Action When power is connected the oven immediately starts to work The door is not prope...

Page 33: ... The grill or other accessories are not correctly inserted Correctly insert the accessories The wrong type or size of cookware is used Use suitable cookware with flat bottoms Problem Cause Action Turntable While turning the turntable comes out of place or stops turning There is no roller ring or the roller ring is not properly in place Install the roller ring and then try again The turn table drag...

Page 34: ...ys and check if there is water on the surface around key If it occurs again turn off the microwave oven over 30 seconds and try setting again If it appears again call your local SAMSUNG Customer Care Centre NOTE If the suggested solution does not solve the problem contact your local SAMSUNG Customer Care Centre Technical specifications SAMSUNG strives to improve its products at all times Both the ...

Page 35: ...Memo MG23K3505AS_SW_DE68 04547B 00_EN DE FR IT indb 35 6 26 2018 2 59 08 PM ...

Page 36: ...7 www samsung com de support ITALIA 800 SAMSUNG 800 7267864 www samsung com it support CYPRUS 8009 4000 only from landline toll free www samsung com gr support GREECE 80111 SAMSUNG 80111 726 7864 only from land line 30 210 6897691 from mobile and land line LUXEMBURG 261 03 710 www samsung com be_fr support NETHERLANDS 088 90 90 100 www samsung com nl support NORWAY 815 56480 www samsung com no sup...

Page 37: ...Mikrowellengerät Benutzerhandbuch MG23K3505 MG23K3505AS_SW_DE68 04547B 00_EN DE FR IT indb 1 6 26 2018 2 59 10 PM ...

Page 38: ...rzeit 13 Leistungsstufen und unterschiedliche Garzeiten 13 Regulieren der Garzeit 14 Beenden Unterbrechen des Garvorgangs 14 Einstellen des Energiesparmodus 14 Verwenden der Auftauprogramme 15 Verwenden der Garprogramme 16 Verwenden der Funktionen zum Warmhalten 18 Grillen 19 Kombinierter Mikrowellen und Grillmodus 19 Verwenden der Grill 30s Funktionen 20 Verwenden der Geruchsbeseitigung 20 Verwen...

Page 39: ...tsumgebungen in Gasthäusern in Hotels Raststätten Herbergen und anderen Wohnumgebungen in Frühstückspensionen und ähnlichen Umgebungen Verwenden Sie nur Kochzubehör das für den Einsatz im Innern von Mikrowellengeräten geeignet ist Lassen Sie das Gerät nicht unbeaufsichtigt wenn Sie Speisen in Kunststoff oder Papierbehältern erhitzen da die Gefahr besteht dass sich die Behälter entzünden Das Mikrow...

Page 40: ...Verwendung durch Personen einschließlich Kindern mit verringerten körperlichen sensorischen oder mentalen Fähigkeiten oder einem Mangel an Erfahrung und Wissen bestimmt sofern sie nicht von einer für ihre Sicherheit verantwortlichen Person im Umgang mit dem Gerät unterwiesen wurden und von dieser beaufsichtigt werden Kinder müssen beaufsichtigt werden um zu verhindern dass sie mit dem Gerät spiele...

Page 41: ...tromschlags besteht Um eine Überhitzung zu vermeiden darf die Tür des Geräts nicht mit einer Zierblende versehen werden WARNUNG Das Gerät und seine zugänglichen Teile können während des Betriebs heiß werden Es ist Vorsicht geboten damit Sie die Heizelemente des Geräts nicht berühren Wenn sie nicht unter ständiger Aufsicht stehen müssen Kinder unter 8 Jahren von dem Gerät ferngehalten werden VORSIC...

Page 42: ...mit Gold oder Silberrand Schaschlikspieße usw Entfernen Sie eventuelle Drahtverschlüsse Andernfalls können Lichtbögen auftreten Verwenden Sie das Gerät nicht zum Trocknen von Zeitungen oder Kleidung Stellen Sie bei kleinen Mengen geringere Garzeiten ein um ein Überhitzen und Verbrennen der Speisen zu verhindern spielen Kinder dürfen bei Reinigung und Pflege nur dann helfen wenn sie älter als 8 Jah...

Page 43: ...einer qualifizierten Fachkraft repariert wurde Wichtig Die Gerätetür muss stets ordnungsgemäß schließen Stellen Sie sicher dass die Gerätetür nicht verbogen ist uns die Türscharniere Türverriegelungen und Dichtungsflächen nicht beschädigt oder locker sind Jegliche Änderungen oder Reparaturen dürfen ausschließlich von einer qualifizierter Fachkraft durchgeführt werden Eingeschränkte Garantie Samsun...

Page 44: ...iche Nutzer wenden sich an ihren Lieferanten und gehen nach den Bedingungen des Verkaufsvertrags vor Dieses Produkt und elektronische Zubehörteile dürfen nicht zusammen mit anderem Gewerbemüll entsorgt werden Weitere Informationen zum Engagement von Samsung für die Umwelt und zu produkspezifischen Auflagen wie z B REACH finden Sie unter samsung com uk aboutsamsung samsungelectronics corporatecitiz...

Page 45: ...ätetür zu gewährleisten Andernfalls verringert sich möglicherweise die Lebensdauer des Geräts Achten Sie darauf dass kein Wasser in die Belüftungsschlitze des Geräts eindringt Verwenden Sie zum Reinigen des Geräts keine Scheuermittel oder Chemikalien Warten Sie nach jeder Verwendung des Geräts bis das Gerät abgekühlt ist und reinigen Sie den Garraum anschließend mit einem milden Reinigungsmittel A...

Page 46: ...men mit dem Gehäuse des Geräts zuerst den Netzstecker aus der Steckdose und wenden Sie sich dann an ein Kundendienstzentrum in Ihrer Nähe Vorgehensweise bei längerem Nichtgebrauch Wenn Sie das Gerät längere Zeit nicht verwenden ziehen Sie den Netzstecker aus der Steckdose und bewahren Sie das Gerät an einem trockenen staubfreien Ort auf Staub und Feuchtigkeit die sich im Innern des Geräts ansammel...

Page 47: ...llen werden im Innern des Garraums reflektiert und gleichmäßig verteilt während sich die Speisen auf dem Drehteller drehen So werden die Lebensmittel gleichmäßig erhitzt 2 Die Mikrowellen dringen bis etwa 2 5 cm tief in die Lebensmittel ein Der Garvorgang setzt sich dann durch das Ausbreiten der Hitze in den Lebensmitteln fort 3 Die Garzeiten variieren je nach verwendetem Behältnis und folgenden L...

Page 48: ... Aufwärmen von Lebensmitteln VORSICHT Überprüfen Sie STETS die vorgenommenen Einstellungen bevor Sie das Gerät unbeaufsichtigt lassen Die maximale Mikrowelle beträgt 99 Minuten Öffnen Sie die Gerätetür Legen Sie die Lebensmittel in die Mitte des Drehtellers Schließen Sie die Gerätetür Schalten Sie das Mikrowellengerät niemals ein wenn es leer ist 1 1 Drücken Sie die Taste Microwave Mikrowelle Erge...

Page 49: ...hen am Drehrad die Minuten ein 5 5 Wenn die richtige Uhrzeit angezeigt wird drücken Sie zum Einschalten der Uhr die Taste Auswahl Uhr Ergebnis Die Uhrzeit wird immer angezeigt wenn das Mikrowellengerät nicht benutzt wird Leistungsstufen und unterschiedliche Garzeiten Mit Hilfe der Leistungsstufen können Sie die abgegebene Energiemenge einstellen anhand derer die benötigten Gar oder Aufwärmzeiten e...

Page 50: ...uhen zu lassen Unterbrechen des Garvorgangs Dann Vorübergehend Öffnen Sie entweder die Gerätetür oder drücken Sie einmal die Taste STOP ECO STOPP ÖKO Ergebnis Der Garvorgang wird unterbrochen Schließen Sie die Gerätetür und drücken Sie erneut die Taste START 30s um den Garvorgang fortzusetzen Vollständig Drücken Sie einmal die Taste STOP ECO STOPP ÖKO Ergebnis Der Garvorgang wird unterbrochen Wenn...

Page 51: ...teller legen und wenn möglich bei Erklingen des Signaltons wenden Der Betrieb des Geräts wird beim Öffnen der Gerätetür unterbrochen Dieses Programm eignet sich für alle Brotsorten ganz oder geschnitten sowie für Brötchen und Baguettes Die Brötchen kreisförmig anordnen Dieses Programm eignet sich für alle Sorten von Hefekuchen Plätzchen Käsekuchen und Blätterteigstücke Es ist nicht geeignet für Mü...

Page 52: ...en z B Fleisch mit Sauce Gemüse und eine Beilage wie Kartoffeln Reis oder Nudeln Vor dem Verzehr 2 bis 3 Minuten lang ruhen lassen 2 Gekühlt Fertiggericht 400 450 g 3 Gekühlt Vegetarische Gerichte 300 350 g Das Gericht auf einen Keramikteller stellen und mit mikrowellengeeigneter Frischhaltefolie abdecken Dieses Programm eignet sich für Gerichte die aus 2 Komponenten bestehen z B Spaghetti mit Sau...

Page 53: ...ng 8 Spinat 150 g Spinat putzen und waschen In eine Glasschlüssel mit Deckel geben Kein Wasser hinzugeben Die Schüssel in die Mitte des Drehtellers stellen Abgedeckt garen Nach dem Garen umrühren Vor dem Verzehr 1 bis 2 Minuten lang ruhen lassen 9 Maiskolben 250 g Maiskolben putzen waschen und in eine ovale Glasform geben Mit mikrowellengeeigneter Frischhaltefolie abdecken und die Folie einstechen...

Page 54: ...ten werden angezeigt Um das Aufwärmen der Lebensmittel zu beenden öffnen Sie die Tür oder drücken Sie auf die Taste STOP ECO STOPP ÖKO Empfohlene Temperatureinstellung im Menü Warmhalten Code Modus Menü 1 Heiß Lasagne Suppe Gratin Auflauf Pizza Steak durchgebraten Speck Fischgerichte Trockenkuchen 2 Warm Kuchen Brot Eierspeisen Steak blutig oder medium HINWEIS Verwenden Sie diese Funktion nicht um...

Page 55: ...en 3 Drücken Sie die Taste START 30s Ergebnis Die Lebensmittel werden im Kombinationsmodus zubereitet 1 Es erklingt 4 Mal ein Signalton 2 Abschließend erklingt 3 Mal ein Signalton einmal pro Minute 3 Die aktuelle Uhrzeit wird wieder angezeigt Grillen Mit der Grillfunktion können Sie Lebensmittel ohne die Verwendung von Mikrowellen schnell erhitzen und bräunen Verwenden Sie zum Berühren der Behälte...

Page 56: ...enden Gerichten oder nach starker Rauchentwicklung im Innern des Geräts Reinigen Sie zunächst den Garraum 1 Drücken Sie nach dem Reinigen die Taste Deodorization Geruchsbeseitigung Nachdem Sie die Taste Deodorization Geruchsbeseitigung gedrückt haben wird der Vorgang automatisch gestartet Anschließend erklingt viermal ein Signalton HINWEIS Als Dauer für die Geruchsbeseitigung sind 5 Minuten vorein...

Page 57: ...net Kommentare Aluminiumfolie Kann in kleineren Mengen verwendet werden um bestimmte Bereiche vor Überhitzung zu schützen Wenn sich die Aluminiumfolie zu dicht an den Innenwänden befindet oder zu viel Folie verwendet wird kann es zu Lichtbogenbildung kommen Backunterlage Nicht länger als 8 Minuten vorheizen Porzellan und Steingut Keramik Töpferware glasiertes Steingut und feines Porzellan sind in ...

Page 58: ...mittel führt Garen Mikrowellengeeignetes Geschirr Das Geschirr muss durchlässig für die Mikrowellen sein um eine effiziente Erhitzung der Lebensmittel zu gewährleisten Mikrowellen werden von Metall z B Edelstahl Aluminium oder Kupfer reflektiert Sie können jedoch Keramik Glas Porzellan und Kunststoff sowie Papier und Holz durchdringen Daher dürfen Speisen nie in Behältnissen aus Metall erhitzt wer...

Page 59: ... Minuten lang ruhen lassen Zucchini 250 g 800 W 3 4 Anleitung Die Zucchini in Scheiben schneiden 30 ml 2 EL Wasser oder etwas Butter hinzugeben Die Scheiben bissfest garen Vor dem Verzehr 3 Minuten lang ruhen lassen Zubereitungshinweise für tiefgefrorenes Gemüse In eine geeignete ofenfeste Glasschlüssel mit Deckel geben Abgedeckt bei der zum Garen des Gemüses angegebenen Mindestzeit siehe Tabelle ...

Page 60: ... Wasser hinzugeben Vor dem Verzehr 5 Minuten lang ruhen lassen Nudeln 250 g 800 W 11 12 Anleitung 1 l heißes Wasser hinzugeben Vor dem Verzehr 5 Minuten lang ruhen lassen Gericht Portionsgröße Leistung Zeit in Min Auberginen 250 g 800 W 3 4 Anleitung Die Auberginen in dünne Scheiben schneiden und mit 1 EL Zitronensaft beträufeln Vor dem Verzehr 3 Minuten lang ruhen lassen Lauch 250 g 800 W 4 5 Anl...

Page 61: ...st es hilfreich sich die benötigte Zeit zu notieren zur späteren Verwendung Vergewissern Sie sich immer dass die Speisen vollkommen aufgewärmt sind Lassen Sie die Speisen nach dem Aufwärmen kurze Zeit ruhen damit ein Temperaturausgleich stattfinden kann Die empfohlene Ruhezeit nach dem Aufwärmen beträgt 2 bis 4 Minuten sofern in der Tabelle keine andere Zeitspanne angegeben ist Seien Sie besonders...

Page 62: ...en tiefen Keramikteller geben Mit einem Kunststoffdeckel abdecken Während des Aufwärmens mehrmals umrühren und dann vor der Ruhezeit und dem Servieren erneut umrühren Vor dem Verzehr 3 Minuten lang ruhen lassen Gericht Portionsgröße Leistung Zeit in Min Tellergericht gekühlt 350 g 600 W 5 6 Anleitung Das aus 2 bis 3 gekühlten Komponenten bestehende Gericht auf einen Keramikteller geben Mit mikrowe...

Page 63: ...in der folgenden Tabelle als Richtlinie wenn Sie tiefgefrorene Lebensmittel auftauen die eine Temperatur von 18 C bis 20 C aufweisen Gericht Portionsgröße Leistung Zeit in Min Fleisch Hackfleisch 250 g 500 g 180 W 6 7 10 12 Schweinesteaks 250 g 180 W 7 8 Anleitung Das Fleisch auf einen flachen Keramikteller legen Die schmaleren Seiten mit Aluminiumfolie schützen Nach der Hälfte der Auftauzeit wend...

Page 64: ...llmodus Verwenden Sie Geschirr das für Mikrowellen durchlässig ist Das Geschirr sollte hitzebeständig sein Verwenden Sie im Kombinationsmodus kein Geschirr aus Metall Verwenden Sie kein Kunststoffgeschirr es schmilzt möglicherweise Für das Garen im kombinierten Mikrowellen und Grillmodus geeignete Lebensmittel Für das Garen im Kombinationsmodus eignen sich sämtliche Lebensmittel die aufgewärmt und...

Page 65: ...drehen Backofen Pommes 250 g Nur Grill 10 15 Nur Grill 8 12 Anleitung Die Backofen Pommes gleichmäßig auf der Backunterlage verteilen und diese auf den Rost stellen Anleitungen zum Grillen von frischen Lebensmitteln Heizen Sie den Grill 3 4 Minuten lang mit der Grillfunktion vor Verwenden Sie die in dieser Tabelle angegebenen Leistungsstufen und Garzeiten als Richtlinie für das Grillen der Lebensm...

Page 66: ...ösen 20 g kristallisierten Honig in ein kleines tiefes Glasgefäß geben Den Honig 20 bis 30 Sekunden bei 300 W so lange erhitzen bis er wieder flüssig ist Gelatine auflösen Trockene Gelatineblätter 10 g 5 Minuten lang in kaltes Wasser legen Die ausgedrückte Gelatine in ein kleines ofenfestes Glasgefäß geben 1 Minute lang bei 300 W erhitzen Anschließend umrühren Torten Zuckerguss zubereiten für Kuch...

Page 67: ...haltet Das Gerät wurde über einen zu langen Zeitraum betrieben Lassen Sie das Gerät nach längeren Garvorgängen abkühlen Der Kühlungsventilator läuft nicht Horchen Sie ob der Kühlungsventilator in Betrieb ist Das Gerät wurde ohne Speisen betrieben Lebensmittel in das nicht vorgeheizte Gerät legen Die Belüftung des Geräts ist nicht ausreichend gewährleistet An der Vorder und Rückseite des Geräts bef...

Page 68: ...rücken Sie nach dem Wenden der Speisen erneut die Taste START 30s um den Betrieb fortzusetzen Das Gerät steht nicht waagerecht Das Gerät wurde auf einer unebenen Fläche aufgestellt Stellen Sie das Gerät auf einer ebenen und stabilen Fläche auf Im Betrieb entstehen Funken Es wurden Metallbehälter im Gerät verwendet Verwenden Sie keine Metallbehälter Problem Ursache Abhilfemaßnahme Sobald der Netzst...

Page 69: ...rill oder andere Zubehörteile wurden nicht richtig eingesetzt Setzen Sie die Zubehörteile richtig ein Das verwendete Geschirr oder seine Größe ist ungeeignet Verwenden Sie Geschirr mit flachem Boden Problem Ursache Abhilfemaßnahme Drehteller Der Drehteller gerät während der Drehbewegung aus der Führung oder die Drehbewegung wird angehalten Der Drehring ist überhaupt nicht oder nicht ordnungsgemäß ...

Page 70: ...üfen Sie ob sich auf der Oberfläche rund um die Tasten Wasser angesammelt hat Wenn das Problem erneut auftritt schalten Sie das Gerät 30 Sekunden lang aus und programmieren Sie die Einstellungen neu Wenn das Problem erneut auftritt wenden Sie sich an das nächstgelegene SAMSUNG Kundendienstzentrum HINWEIS Wenn das Problem mit der vorgeschlagenen Lösung nicht behoben werden kann wenden Sie sich an d...

Page 71: ...Notizen MG23K3505AS_SW_DE68 04547B 00_EN DE FR IT indb 35 6 26 2018 2 59 15 PM ...

Page 72: ... 00 www samsung com fr support GERMANY 06196 77 555 77 www samsung com de support ITALIA 800 SAMSUNG 800 7267864 www samsung com it support CYPRUS 8009 4000 only from landline toll free www samsung com gr support GREECE 80111 SAMSUNG 80111 726 7864 only from land line 30 210 6897691 from mobile and land line LUXEMBURG 261 03 710 www samsung com be_fr support NETHERLANDS 088 90 90 100 www samsung c...

Page 73: ...Four à micro ondes Manuel d utilisation MG23K3505 MG23K3505AS_SW_DE68 04547B 00_EN DE FR IT indb 1 6 26 2018 2 59 17 PM ...

Page 74: ...12 Cuisson Réchauffage 12 Réglage de l horloge 13 Niveaux de puissance et variations de temps 13 Réglage du temps de cuisson 14 Arrêt de la cuisson 14 Réglage du mode d économie d énergie 14 Utilisation des fonctions Décongélation rapide 15 Utilisation des fonctions Cuisson automatique 16 Utilisation des fonctions Maintien au chaud 18 Faire griller 19 Combinaison micro ondes et gril 19 Utilisation...

Page 75: ... au personnel de magasins bureaux ou autres environnements professionnels dans les fermes par les clients d hôtels motels et autres lieux résidentiels dans les lieux de type chambre d hôtes Utilisez uniquement des ustensiles adaptés à la cuisson au four micro ondes Lorsque vous faites réchauffer des aliments dans des récipients en plastique ou en papier veillez à ce que ces derniers ne s enflammen...

Page 76: ...s dont les capacités physiques sensorielles ou mentales sont réduites ou ayant une expérience et des connaissances insuffisantes sur le sujet sauf si celles ci sont sous la surveillance de la personne responsable de leur sécurité ou si cette dernière leur a expliqué comment utiliser l appareil Les enfants doivent rester sous la surveillance d un adulte afin de s assurer qu ils ne jouent pas avec l...

Page 77: ...u four ils pourraient en rayer la surface et par conséquent casser le verre Un nettoyeur vapeur ne doit pas être utilisé AVERTISSEMENT Afin d éviter tout risque d électrocution veillez à ce que l appareil soit hors tension avant de procéder au remplacement de l ampoule L appareil ne doit pas être installé derrière une porte décorative afin d éviter tout risque de surchauffe AVERTISSEMENT L apparei...

Page 78: ...rs suivants 1 immergez la zone brûlée dans de l eau froide pendant au moins 10 minutes 2 recouvrez la d un tissu propre et sec 3 N appliquez aucune crème huile ou lotion Pour éviter d endommager le plateau ou la grille ne le la plongez pas dans l eau immédiatement après la cuisson N utilisez pas le four pour une cuisson à bain d huile car la température de l huile ne peut pas être contrôlée Cela p...

Page 79: ... de sécurité Ne placez aucun objet entre la façade du four et la porte et ne laissez aucune tache ni aucun reste de produit d entretien s accumuler sur les surfaces assurant l étanchéité Maintenez la porte et les joints d étanchéité propres en permanence après chaque utilisation du four essuyez les d abord avec un chiffon humide puis avec un chiffon doux et sec N utilisez pas le four si celui ci e...

Page 80: ...ose dans le cadre d un développement durable Les particuliers sont invités à contacter le magasin leur ayant vendu le produit ou à se renseigner auprès des autorités locales pour connaître les procédures et les points de collecte de ces produits en vue de leur recyclage Les entreprises et particuliers sont invités à contacter leurs fournisseurs et à consulter les conditions de leur contrat de vent...

Page 81: ...ION Veillez à ce que la porte et les joints de la porte soient toujours propres et assurez vous que la porte s ouvre et se ferme correctement Si ce n est pas le cas le cycle de vie du four peut en être réduit Faites attention à ne pas renverser d eau à l intérieur des orifices de ventilation du four N utilisez aucune substance abrasive ou chimique pour le nettoyage Après chaque utilisation du four...

Page 82: ...our débranchez d abord le câble d alimentation de la source puis contactez un centre de service Samsung local Précautions contre une période prolongée de non utilisation Si vous n utilisez pas le four pendant une période prolongée débranchez le câble d alimentation et déplacez le four dans un endroit sec et sans poussière La poussière et l humidité qui se forment à l intérieur du four peuvent affe...

Page 83: ...age Cuire Principe de cuisson 1 Les micro ondes générées par le magnétron sont réfléchies sur les parois du four et réparties de façon homogène à l intérieur du four pendant la cuisson grâce à la rotation du plateau sur lequel sont placés les produits Ce procédé assure donc une cuisson homogène des aliments 2 Les micro ondes sont absorbées par les aliments sur une profondeur d environ 2 5 cm La cu...

Page 84: ...que vous souhaitez faire cuire ou réchauffer des aliments ATTENTION Vérifiez TOUJOURS vos réglages de cuisson avant de laisser le four sans surveillance Le temps de cuisson maximal de la fonction Microwave Micro ondes est de 99 minutes Ouvrez la porte Placez les aliments au centre du plateau Fermez la porte Ne mettez jamais le four micro ondes en route lorsqu il est vide 1 1 Appuyez sur le bouton ...

Page 85: ...fichée est correcte appuyez sur le bouton Sélection Horloge pour lancer l horloge Résultat L heure s affiche lorsque vous n utilisez pas le four à micro ondes Niveaux de puissance et variations de temps La fonction du niveau de puissance vous permet d adapter la quantité d énergie dispersée et par conséquent le temps nécessaire à la cuisson ou au réchauffage des aliments en fonction de leur catégo...

Page 86: ...r la cuisson Retourner ou mélanger les aliments Les laisser reposer Pour arrêter la cuisson Vous devez Temporairement Ouvrez la porte ou appuyez une fois sur le bouton STOP ECO ARRÊT ÉCO Résultat La cuisson s arrête Pour reprendre la cuisson refermez la porte et appuyez sur le bouton START 30s DÉPART 30 s Définitivement Appuyez une fois sur le bouton STOP ECO ARRÊT ÉCO Résultat La cuisson s arrête...

Page 87: ...matiquement lorsque vous ouvrez la porte Ce programme convient à la décongélation de toutes sortes de pains en tranches ou entier ainsi qu à celle des petits pains et des baguettes Disposez les petits pains en cercle Ce programme convient à la décongélation de toutes sortes de gâteaux à base de levure ainsi qu à celle des biscuits de la tarte au fromage et de la pâte feuilletée Il n est pas adapté...

Page 88: ...ats composés de trois aliments différents ex viande en sauce légumes et accompagnements tels que pommes de terre riz ou pâtes Laissez reposer 2 à 3 minutes 2 Réfrigéré Plat préparé 400 à 450 g 3 Réfrigéré Repas végétarien 300 à 350 g Placez les aliments dans une assiette en céramique et recouvrez la d un film plastique résistant aux micro ondes Ce programme permet de faire décongeler des plats com...

Page 89: ...lle de la portion Consignes 8 Épinards 150 g Rincez et nettoyez les épinards Mettez les dans une cocotte en verre et couvrez N ajoutez pas d eau Placez le bol au centre du plateau tournant Faites cuire à couvert Remuez après cuisson Laissez reposer 1 à 2 minutes 9 Maïs en épis 250 g Rincez et nettoyez le maïs sur les épis et placez les dans un plat en verre ovale Recouvrez avec un film plastique r...

Page 90: ...églage 3 Appuyez sur le bouton START 30s DÉPART 30 s Résultat La durée de 60 minutes s affiche Pour arrêter de réchauffer les aliments ouvrez la porte ou appuyez sur le bouton STOP ECO ARRÊT ÉCO Menu Maintien au chaud recommandé Code Menu Menu 1 Chaud Lasagnes Soupe Gratin Plat mijoté Pizza Steaks Bien cuits Bacon Poissons Gâteaux secs 2 Modéré Tarte Pain Plats à base d œufs Steaks Saignants ou À ...

Page 91: ...0 minutes 3 Appuyez sur le bouton START 30s DÉPART 30 s Résultat La cuisson combinée démarre 1 Le signal sonore retentit 4 fois 2 Le signal de rappel de fin de cuisson retentit 3 fois une fois toutes les minutes 3 L heure actuelle s affiche à nouveau Faire griller Le gril permet de faire chauffer et dorer des aliments rapidement sans utiliser la cuisson par micro ondes Les récipients étant très ch...

Page 92: ...z cette fonction pour éliminer la fumée ou les odeurs de cuisson à l intérieur du four Commencez par nettoyer l intérieur du four 1 Appuyez sur le bouton Deodorization Désodorisation une fois le nettoyage terminé Une fois que vous avez appuyé sur le bouton Deodorization Désodorisation le fonctionnement démarre automatiquement Une fois terminé un signal sonore retentit quatre fois dans le four REMA...

Page 93: ...êcher toute surcuisson de certaines zones peu charnues Des arcs électriques peuvent se former si l aluminium est placé trop près des parois du four ou si vous en avez utilisé en trop grande quantité Plat croustilleur Le temps de préchauffage ne doit pas excéder 8 minutes Porcelaine et terre cuite S ils ne comportent pas d ornements métalliques les récipients en céramique en terre cuite en faïence ...

Page 94: ...e excitation des molécules Cette agitation crée des mouvements de friction qui génèrent la chaleur nécessaire à la cuisson des aliments Cuisson Récipients utilisés pour la cuisson aux micro ondes Pour une efficacité maximale les récipients doivent laisser l énergie des micro ondes les traverser Les micro ondes sont réfléchies par les métaux tels que l acier inoxydable l aluminium et le cuivre mais...

Page 95: ...Laissez reposer 3 minutes Courgettes 250 g 800 W 3 à 4 Consignes Coupez les courgettes en rondelles Ajoutez 30 ml 2 cuillères à soupe d eau ou une noix de beurre Faites les cuire jusqu à ce qu elles soient tendres Laissez reposer 3 minutes Guide de cuisson pour les légumes surgelés Utilisez une cocotte en Pyrex avec couvercle adaptée à la cuisson au four Faites cuire les aliments à couvert pendant...

Page 96: ... à 19 Consignes Ajoutez 400 ml d eau froide Laissez reposer 5 minutes Pâtes 250 g 800 W 11 à 12 Consignes Ajoutez 1 litre d eau chaude Laissez reposer 5 minutes Aliment Quantité Puissance Temps min Aubergines 250 g 800 W 3 à 4 Consignes Coupez les aubergines en fines rondelles et arrosez les d un filet de jus de citron Laissez reposer 3 minutes Poireaux 250 g 800 W 4 à 5 Consignes Coupez les poire...

Page 97: ...ieurement Vérifiez toujours que les aliments réchauffés sont uniformément chauds Laissez les aliments reposer pendant un court laps de temps après le réchauffage pour que la température s homogénéise Le temps de repos recommandé après le réchauffage est généralement compris entre 2 et 4 minutes à moins qu un autre temps ne soit indiqué dans le tableau Soyez particulièrement vigilant lorsque vous f...

Page 98: ...ioli tortellini dans une assiette creuse en céramique Recouvrez le récipient d un couvercle en plastique Remuez de temps en temps pendant le réchauffage puis de nouveau avant de laisser reposer et de servir Laissez reposer 3 minutes Aliment Quantité Puissance Temps min Plat préparé Réfrigéré 350 g 600 W 5 à 6 Consignes Placez le plat réfrigéré composé de 2 à 3 aliments sur une assiette en céramiqu...

Page 99: ...tions figurant dans le tableau ci contre Aliment Quantité Puissance Temps min Viande Bœuf haché 250 g 500 g 180 W 6 à 7 10 à 12 Escalopes de porc 250 g 180 W 7 à 8 Consignes Placez la viande dans une assiette plate en céramique Protégez les parties les plus fines avec de l aluminium Retournez à la moitié du temps de décongélation Laissez reposer 5 à 25 minutes Aliment Quantité Puissance Temps min ...

Page 100: ...urne La rotation du plateau permet de faire dorer les aliments uniformément Ustensiles pour la cuisson Micro ondes gril Utilisez des ustensiles qui laissent passer les micro ondes Les ustensiles doivent résister aux flammes N utilisez pas d ustensiles métalliques en mode combiné N utilisez pas d ustensiles en plastique car ils pourraient fondre Aliments convenant à la cuisson par micro ondes gril ...

Page 101: ...ignes Placez les beignets de poulet sur la grille Retournez à mi cuisson Frites au four 250 g Gril seul 10 à 15 Gril seul 8 à 12 Consignes Répartissez régulièrement les frites sur du papier sulfurisé posé sur la grille Guide de cuisson au gril pour aliments frais Faites préchauffer le gril fonction Gril pendant 3 à 4 minutes Reportez vous aux puissances et aux temps de cuisson figurant dans ce tab...

Page 102: ...cristallisé dans un petit plat creux en verre Faites chauffer pendant 20 à 30 secondes à 300 W jusqu à ce que le miel ait entièrement fondu Faire fondre de la gélatine Faites tremper des feuilles de gélatine 10 g pendant 5 minutes dans de l eau froide Placez la gélatine égouttée dans un petit bol en Pyrex Faites chauffer pendant 1 minute à 300 W Remuez une fois fondue Confectionner un glaçage pour...

Page 103: ...eur de refroidissement ne fonctionne pas Écoutez le bruit émis par le ventilateur de refroidissement Essayez de faire fonctionner le four sans aliments à l intérieur Placez les aliments dans le four L espace de ventilation est insuffisant pour le four Des systèmes d entrée d évacuation sont présents à l avant et à l arrière du four pour la ventilation Maintenez les espaces spécifiés dans le guide ...

Page 104: ...T 30 s pour redémarrer le fonctionnement Le four n est pas de niveau Le four est installé sur une surface irrégulière Assurez vous que le four est installé sur une surface plane et stable Des étincelles apparaissent durant la cuisson Des récipients métalliques sont utilisés durant l utilisation du four de la décongélation N utilisez pas de récipients métalliques Problème Cause Action Lorsqu il est...

Page 105: ...accessoires ne sont pas insérés correctement Insérez correctement les accessoires Des récipients de taille ou de type inadapté e sont utilisés Utilisez des récipients adaptés avec des fonds plats Problème Cause Action Plateau tournant Lorsqu il tourne le plateau tournant se déplace ou il cesse de tourner Il n y a pas l anneau de guidage ou de dernier n est pas positionné correctement Installez l a...

Page 106: ...t actionnés pendant plus de 10 secondes Nettoyez les touches et assurez vous de l absence d eau sur la surface entourant la touche Si cela se produit à nouveau éteignez le four à micro ondes après 30 secondes et réessayez Si ce phénomène se poursuit contactez votre service d assistance clientèle SAMSUNG local REMARQUE Si la solution suggérée ne suffit pas à résoudre le problème contactez votre ser...

Page 107: ...Notes MG23K3505AS_SW_DE68 04547B 00_EN DE FR IT indb 35 6 26 2018 2 59 22 PM ...

Page 108: ...amsung com fr support GERMANY 06196 77 555 77 www samsung com de support ITALIA 800 SAMSUNG 800 7267864 www samsung com it support CYPRUS 8009 4000 only from landline toll free www samsung com gr support GREECE 80111 SAMSUNG 80111 726 7864 only from land line 30 210 6897691 from mobile and land line LUXEMBURG 261 03 710 www samsung com be_fr support NETHERLANDS 088 90 90 100 www samsung com nl sup...

Page 109: ...Forno a microonde Manuale dell utente MG23K3505 MG23K3505AS_SW_DE68 04547B 00_EN DE FR IT indb 1 6 26 2018 2 59 24 PM ...

Page 110: ...e dell ora 13 Livelli di potenza e modifiche dei tempi 13 Regolazione del tempo di cottura 14 Interruzione della cottura 14 Impostazione della modalità di risparmio energetico 14 Uso della funzione di Scongelamento automatico 15 Uso delle funzioni di Cottura automatica 16 Uso delle funzioni Mantieni caldo 18 Grigliatura 19 Uso combinato di microonde e grill 19 Uso della funzione Grill 30s 20 Uso d...

Page 111: ...azioni quali aree adibite a cucina per il personale di negozi uffici e altri ambienti lavorativi aziende agricole uso da parte del cliente in hotel motel e altri ambienti residenziali bed and breakfast Utilizzare solo utensili e recipienti adatti al microonde Se si cuociono cibi in contenitori di plastica o carta sorvegliare il forno per evitare possibili principi di incendio Utilizzare il forno a...

Page 112: ...tte capacità fisiche sensoriali o mentali inesperte o prive di una adeguata conoscenza a meno che una persona responsabile per la loro sicurezza fornisca loro una corretta supervisione e istruzione all uso Sorvegliare i bambini affinché non giochino con l apparecchio Questo apparecchio può essere utilizzato da bambini di età superiore agli 8 anni e da persone con ridotte capacità fisiche sensorial...

Page 113: ...andare in frantumi il vetro Non usare un pulitore a vapore AVVERTENZA Assicurarsi che l apparecchio sia spento prima di sostituire la lampadina in modo da evitare possibili scariche elettriche L apparecchio non deve essere installato dietro uno sportello decorativo ad evitare il suo surriscaldamento AVVERTENZA Il prodotto e le sue parti accessibili possono diventare bollenti durante l uso Prestare...

Page 114: ...uzioni di Primo soccorso 1 Immergere la parte ustionata in acqua fredda per almeno 10 minuti 2 Coprire con un panno pulito e asciutto 3 Non applicare creme olio o lozioni Al fine di evitare di danneggiare il vassoio o la griglia non mettere il vassoio o la griglia sotto l acqua subito dopo la cottura Non utilizzare il forno per friggere in quanto la temperatura dell olio non è controllabile Ciò pu...

Page 115: ...o ed evitare l accumulo di residui di cibo o detersivo sulle superfici di tenuta Mantenere lo sportello e la cornice del vano puliti spolverandoli con un panno umido ed asciugandoli con un panno asciutto dopo ogni uso Non azionare il forno qualora sia danneggiato Azionare solo una volta riparato da parte di un tecnico qualificato Importante lo sportello del forno deve chiudersi regolarmente Lo spo...

Page 116: ...l momento dell acquisto di una nuova apparecchiatura di tipo equivalente Presso i rivenditori di prodotti elettronici con superficie di vendita di almeno 400 m2 è inoltre possibile consegnare gratuitamente senza obbligo di acquisto i prodotti elettronici da smaltire con dimensioni inferiori a 25 cm Gli utenti professionali imprese e professionisti sono invitati a contattare il proprio fornitore e ...

Page 117: ...sportello e le guarnizioni pulite e verificare che lo sportello si apra e chiuda regolarmente La mancata osservanza di questa precauzione potrebbe portare a una riduzione della vita utile dell apparecchio Prestare attenzione a non versare acqua nei fori di ventilazione del forno Per la pulizia non utilizzare sostanze chimiche o abrasive Dopo ogni utilizzo del forno attendere che si raffreddi quind...

Page 118: ...ollegare la spina di alimentazione dalla presa di corrente quindi rivolgersi al Centro assistenza Samsung di zona Manutenzione dopo un lungo periodo di inutilizzo Se si prevede di non utilizzare il forno per un lungo periodo di tempo scollegare l alimentazione elettrica e spostare il forno in un luogo asciutto e privo di polvere L eventuale presenza di polvere e o di umidità all interno del forno ...

Page 119: ...ron vengono riflesse all interno della cavità del forno e distribuite uniformemente man mano che gli alimenti ruotano sul piatto girevole Ciò permette di cuocere gli alimenti in modo uniforme 2 Le microonde vengono assorbite dagli alimenti fino a una profondità di circa 2 5 cm La cottura continua man mano che il calore si disperde all interno degli alimenti 3 Il tempo di cottura varia a seconda de...

Page 120: ...ento La seguente procedura spiega come cuocere o riscaldare i cibi ATTENZIONE Controllare SEMPRE le impostazioni di cottura prima di lasciare il forno incustodito Il tempo di Microwave Microonde massimo è 99 minuti Aprire lo sportello Collocare il cibo al centro del piatto girevole Chiudere lo sportello Non accendere mai il forno a microonde quando è vuoto 1 1 Premere il tasto Microwave Microonde ...

Page 121: ...mpostare i minuti ruotare la Manopola 5 5 Quando appare l ora esatta premere il tasto Seleziona Orologio per avviare l orologio Risultato L ora verrà visualizzata quando il forno a microonde non è in uso Livelli di potenza e modifiche dei tempi I livelli di potenza consentono di modificare la quantità di energia generata e quindi il tempo necessario per il riscaldamento o la cottura a seconda del ...

Page 122: ...er arrestare la cottura Quindi Temporaneamente Aprire lo sportello o premere una volta il tasto STOP ECO Risultato La cottura si interrompe Per riprendere la cottura chiudere lo sportello e premere il tasto START 30s AVVIO 30s Completamente Premere una volta il tasto STOP ECO Risultato La cottura si interrompe Per annullare le impostazioni di cottura premere nuovamente il tasto STOP ECO Impostazio...

Page 123: ...piatto di ceramica e girarlo appena il forno emette un segnale acustico il forno rimane in funzione e si interrompe all apertura dello sportello Questo programma è adatto per ogni tipo di pane affettato o intero oltre che per panini e baguette Disporre i panini in cerchio Questo programma è adatto per ogni tipo di dolce lievitato biscotti cheese cake e pasta sfoglia Non è adatto per crostate torte...

Page 124: ...iatti pronti 300 350 g Collocare su un piatto di ceramica e coprire con pellicola per forno a microonde Questo programma è adatto a cibi composti da tre alimenti ad esempio carne con salsa e contorno come verdure patate riso o pasta Lasciare riposare per 2 3 minuti 2 Congelato Piatti pronti 400 450 g 3 Congelato Piatti vegetariani congelati 300 350 g Collocare su un piatto di ceramica e coprire co...

Page 125: ...to girevole Lasciare riposare per 2 minuti Codice Alimento Dimensione della portata Istruzioni 7 Fagiolini 250 g Sciacquare e pulire i fagiolini Disporre uniformemente in un recipiente di vetro con coperchio Aggiungere 30 ml di acqua 2 cucchiai per 250 g Collocare il recipiente al centro del piatto girevole Cuocere incoperchiato Mescolare dopo la cottura Lasciare riposare per 1 2 minuti 8 Spinaci ...

Page 126: ...isultato Viene visualizzato il tempo di 60 minuti Per interrompere il riscaldamento del cibo aprire lo sportello o premere il tasto STOP ECO Consigliato il menu Mantieni caldo Codice Modalità Menu 1 Caldo Lasagne Zuppa Gratin Casseruola Pizza Bistecca Ben cotta Pancetta Piatti di pesce Torte asciutte 2 Tiepido Torte Pane Piatti a base di uova Bistecca Al sangue o Cottura media NOTA Non usare quest...

Page 127: ...il tasto START 30s AVVIO 30s Risultato Inizia la cottura in modalità combinata 1 Il forno emette 4 segnali acustici 2 Il segnale di fine cottura viene emesso 3 volte una al minuto 3 Viene visualizzata nuovamente l ora corrente Grigliatura Il grill consente di scaldare e dorare gli alimenti rapidamente senza utilizzare il microonde Per toccare i recipienti nel forno usare sempre i guanti da forno p...

Page 128: ...ione di Deodorante Utilizzare questa funzione dopo avere cotto cibi dall odore intenso oppure quando l interno del forno contiene molto fumo Per primo pulire l interno del forno 1 Una volta pulito il forno premere il tasto Deodorization Deodorante Premendo il tasto Deodorization Deodorante la funzione di deodorazione viene avviata automaticamente Al termine il forno emette quattro segnali acustici...

Page 129: ...impedire che determinate aree vengano cotte eccessivamente Se il foglio è troppo vicino alla parete del forno oppure se ne utilizza una quantità eccessiva potrebbero generarsi archi elettrici Piatto doratore Non preriscaldare per più di 8 minuti Porcellana cinese e terracotta Porcellana terracotta terracotta porcellanata e porcellana cinese sono materiali adatti a meno che non siano decorati con f...

Page 130: ...one causata dal movimento rapido delle molecole produce calore ed è questo calore che cuoce i cibi Cottura Stoviglie per cottura a microonde Per essere efficaci le microonde devono essere in grado di attraversare i materiali utilizzati per la cottura degli alimenti Le microonde vengono riflesse dai metalli quali acciaio inossidabile alluminio e rame ma possono attraversare ceramica vetro porcellan...

Page 131: ...i gambi al centro Lasciare riposare per 3 minuti Zucchine 250 g 800 W 3 4 Istruzioni Tagliare a rondelle le zucchine Aggiungere 30 ml 2 cucchiai di acqua oppure una noce di burro Cuocere fino a quando non saranno ammorbidite Lasciare riposare per 3 minuti Guida alla cottura delle verdure congelate Utilizzare un recipiente in Pyrex con coperchio Cuocere incoperchiato per il tempo minimo indicato ve...

Page 132: ...W 18 19 Istruzioni Aggiungere 400 ml di acqua fredda Lasciare riposare per 5 minuti Pasta 250 g 800 W 11 12 Istruzioni Aggiungere 1000 ml di acqua calda Lasciare riposare per 5 minuti Alimento Dimensione della portata Potenza Tempo min Melanzane 250 g 800 W 3 4 Istruzioni Tagliare le melanzane a fette sottili e cospargerle con 1 cucchiaio di succo di limone Lasciare riposare per 3 minuti Porri 250...

Page 133: ... annotare il tempo impiegato per futuri riferimenti Assicurarsi sempre che il cibo riscaldato sia bollente in tutte le zone interne Lasciare riposare brevemente il cibo dopo ogni riscaldamento in modo che la temperatura sia uniformemente distribuita Il tempo di riposo consigliato dopo il riscaldamento è di 2 4 minuti a meno che non venga indicato un tempo diverso nella tabella Prestare molta atten...

Page 134: ... Mescolare di tanto in tanto durante il riscaldamento e nuovamente prima del periodo di riposo e servire Lasciare riposare per 3 minuti Alimento Dimensione della portata Potenza Tempo min Piatti preconfezionati Congelati 350 g 600 W 5 6 Istruzioni Collocare il contenuto di una confezione composta da 2 3 ingredienti congelati su un piatto di ceramica Coprire con una pellicola per microonde Lasciare...

Page 135: ...n una temperatura compresa tra 18 e 20 C utilizzare la seguente tabella come riferimento Alimento Dimensione della portata Potenza Tempo min Carne Carne macinata 250 g 500 g 180 W 6 7 10 12 Braciole di maiale 250 g 180 W 7 8 Istruzioni Collocare la carne su un piatto piano di ceramica Proteggere i bordi più sottili con un foglio di alluminio Girare a metà scongelamento Lasciare riposare per 5 25 m...

Page 136: ...atto girevole gli alimenti si rosolano in modo uniforme Stoviglie per la cottura con microonde grill Usare stoviglie in grado di essere penetrate dalle microonde del forno Le stoviglie devono essere ignifughe Non utilizzare stoviglie in metallo in caso di uso delle modalità combinate Non usare alcun tipo di stoviglia in plastica poiché potrebbe sciogliersi Alimenti adatti alla cottura a microonde ...

Page 137: ...ia Girare trascorso il tempo del primo lato Patatine al forno 250 g Solo grill 10 15 Solo grill 8 12 Istruzioni Disporre le patatine direttamente su carta da forno e collocarle sulla griglia Guida alla grigliatura del cibo fresco Preriscaldare il grill per 3 4 minuti con la funzione grill Come riferimento per una corretta grigliatura utilizzare i livelli di potenza e i tempi indicati in questa tab...

Page 138: ...di miele cristallizzato su un piattino profondo in vetro Riscaldare per 20 30 secondi a 300 W fino a quando il miele si è sciolto Per fondere la gelatina Immergere i fogli di gelatina 10 g per 5 minuti in acqua fredda Collocare la gelatina in un contenitore in Pyrex Riscaldare per 1 minuto a 300 W Mescolare una volta sciolta Cuocere la glassa per torte e dolci Mescolare la glassa istantanea circa ...

Page 139: ...reddi La ventola di raffreddamento non funziona Ascoltare il rumore proveniente dalla ventilazione Tentare di attivare il forno a vuoto Collocare il cibo nel forno Lo spazio di ventilazione tra il forno e le superfici limitrofe è insufficiente Sul pannello anteriore e posteriore del forno sono presenti aperture di ventilazione sull ingresso e sullo scarico Mantenere lo spazio specificato nella gui...

Page 140: ...IO 30s per riavviare il forno Il forno non è livellato Il forno è installato su una superficie irregolare Verificare che il forno sia installato su una superficie piana e stabile Durante la cottura si verificano scintille Sono stati utilizzati contenitori metallici per cuocere scongelare in forno Non utilizzare contenitori metallici Problema Causa Azione Quando l alimentazione è collegata il forno...

Page 141: ... forno e riprovare Il grill o gli accessori non sono correttamente inseriti Inserire correttamente gli accessori È stato usato un contenitore non idoneo per tipo o grandezza Usare stoviglie idonee con fondo piatto Problema Causa Azione Piatto girevole Durante la rotazione il piatto esce dalla sua sede e si ferma L anello girevole è mancante o non è posizionato correttamente Posizionare l anello gi...

Page 142: ...ire i tasti e verificare se vi è acqua sulla superficie circostante Se ciò dovesse verificarsi nuovamente spegnere il forno a microonde entro 30 secondi quindi provare a reimpostarlo Qualora si verifichi nuovamente contattare un Centro di assistenza autorizzato SAMSUNG NOTA Se la soluzione suggerita non dovesse risolvere il problema rivolgersi al Centro assistenza clienti SAMSUNG di zona Specifich...

Page 143: ...Promemoria MG23K3505AS_SW_DE68 04547B 00_EN DE FR IT indb 35 6 26 2018 2 59 28 PM ...

Page 144: ...om fr support GERMANY 06196 77 555 77 www samsung com de support ITALIA 800 SAMSUNG 800 7267864 www samsung com it support CYPRUS 8009 4000 only from landline toll free www samsung com gr support GREECE 80111 SAMSUNG 80111 726 7864 only from land line 30 210 6897691 from mobile and land line LUXEMBURG 261 03 710 www samsung com be_fr support NETHERLANDS 088 90 90 100 www samsung com nl support NOR...

Reviews: